Launch
Creating interactive and organized documentation experience for students in the Maker Space
My Role in Group
● Make research plan, lead the synthesis session
● Lead the usability testing and iteration
● Low-fi and hi-fi Interface design
TEAM
Hannah Xue, Estelle Jiang, Guodong Zhao
TIMELINE
September - December 2019


Our Client
Our client is Winchester Thurston Upper School (WT), an independent, preparatory high school in Pittsburgh. We were primarily working with Mr. M, the instructor of a project-based learning (PBL) course and his course is a maker space course teaching 3D modeling with self-defined group projects.
Our Goal
The initial design requirement of this project is to figure out potential problems they have in class and then design better learning experiences for students.
Documentation
We documented each design step in detail: Medium Link


The Problem
Currently, students can propose to do any kind of projects and each group has a different project timeline. Although the freedom gave students an opportunity to develop their own interest, it also brought many challenges:

The Solution
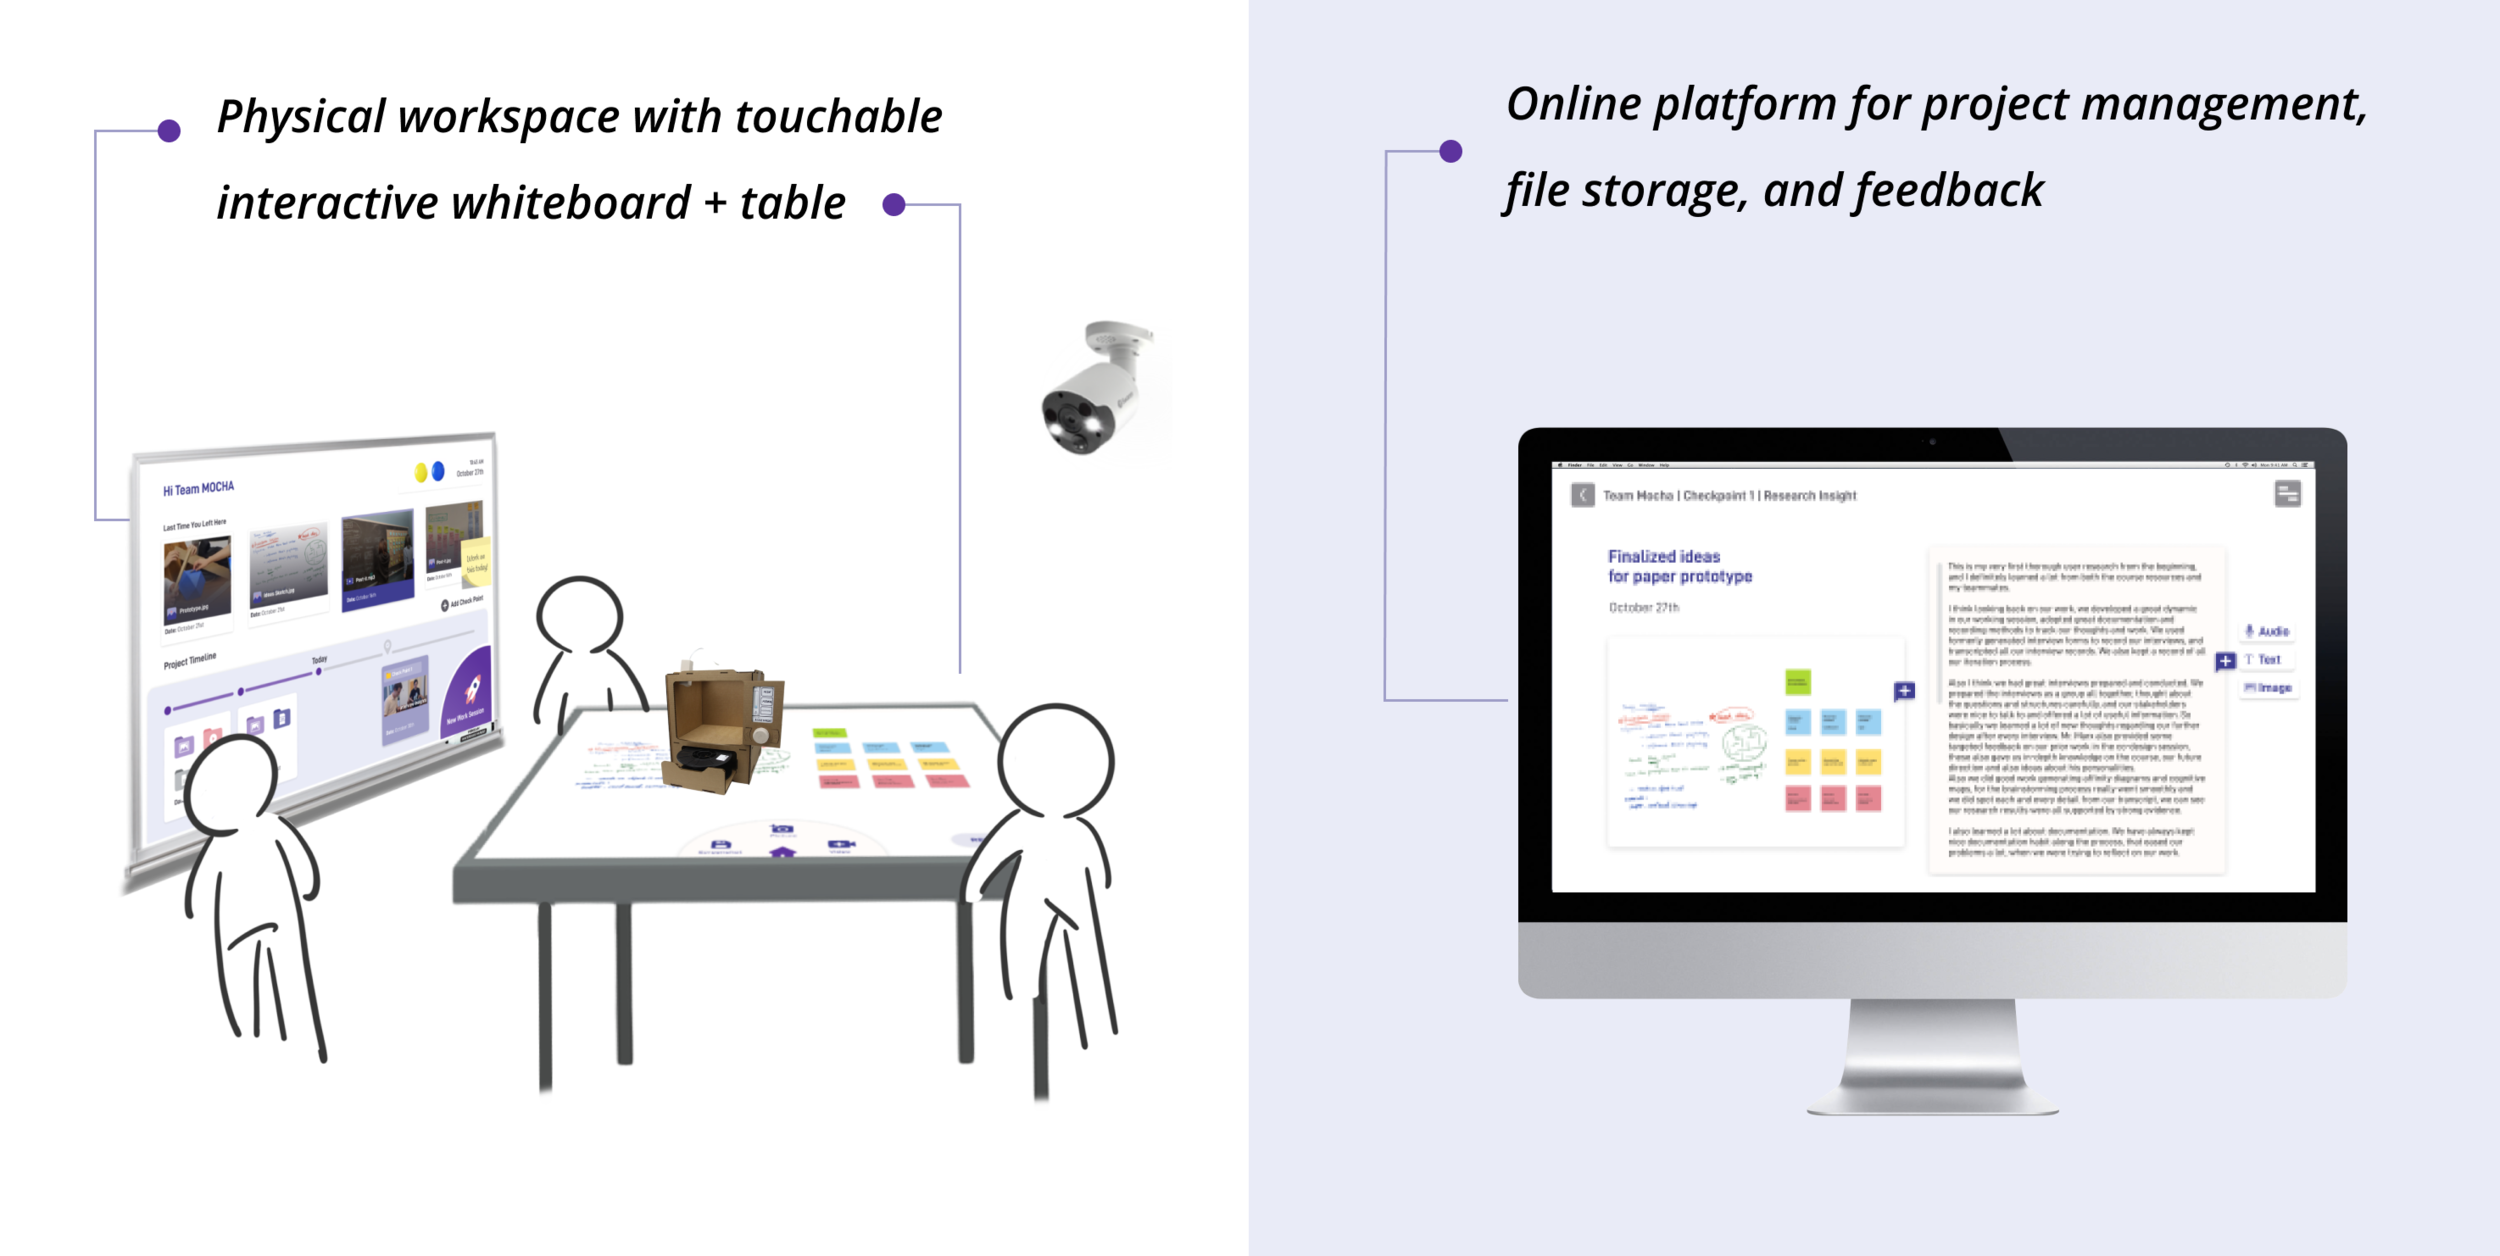
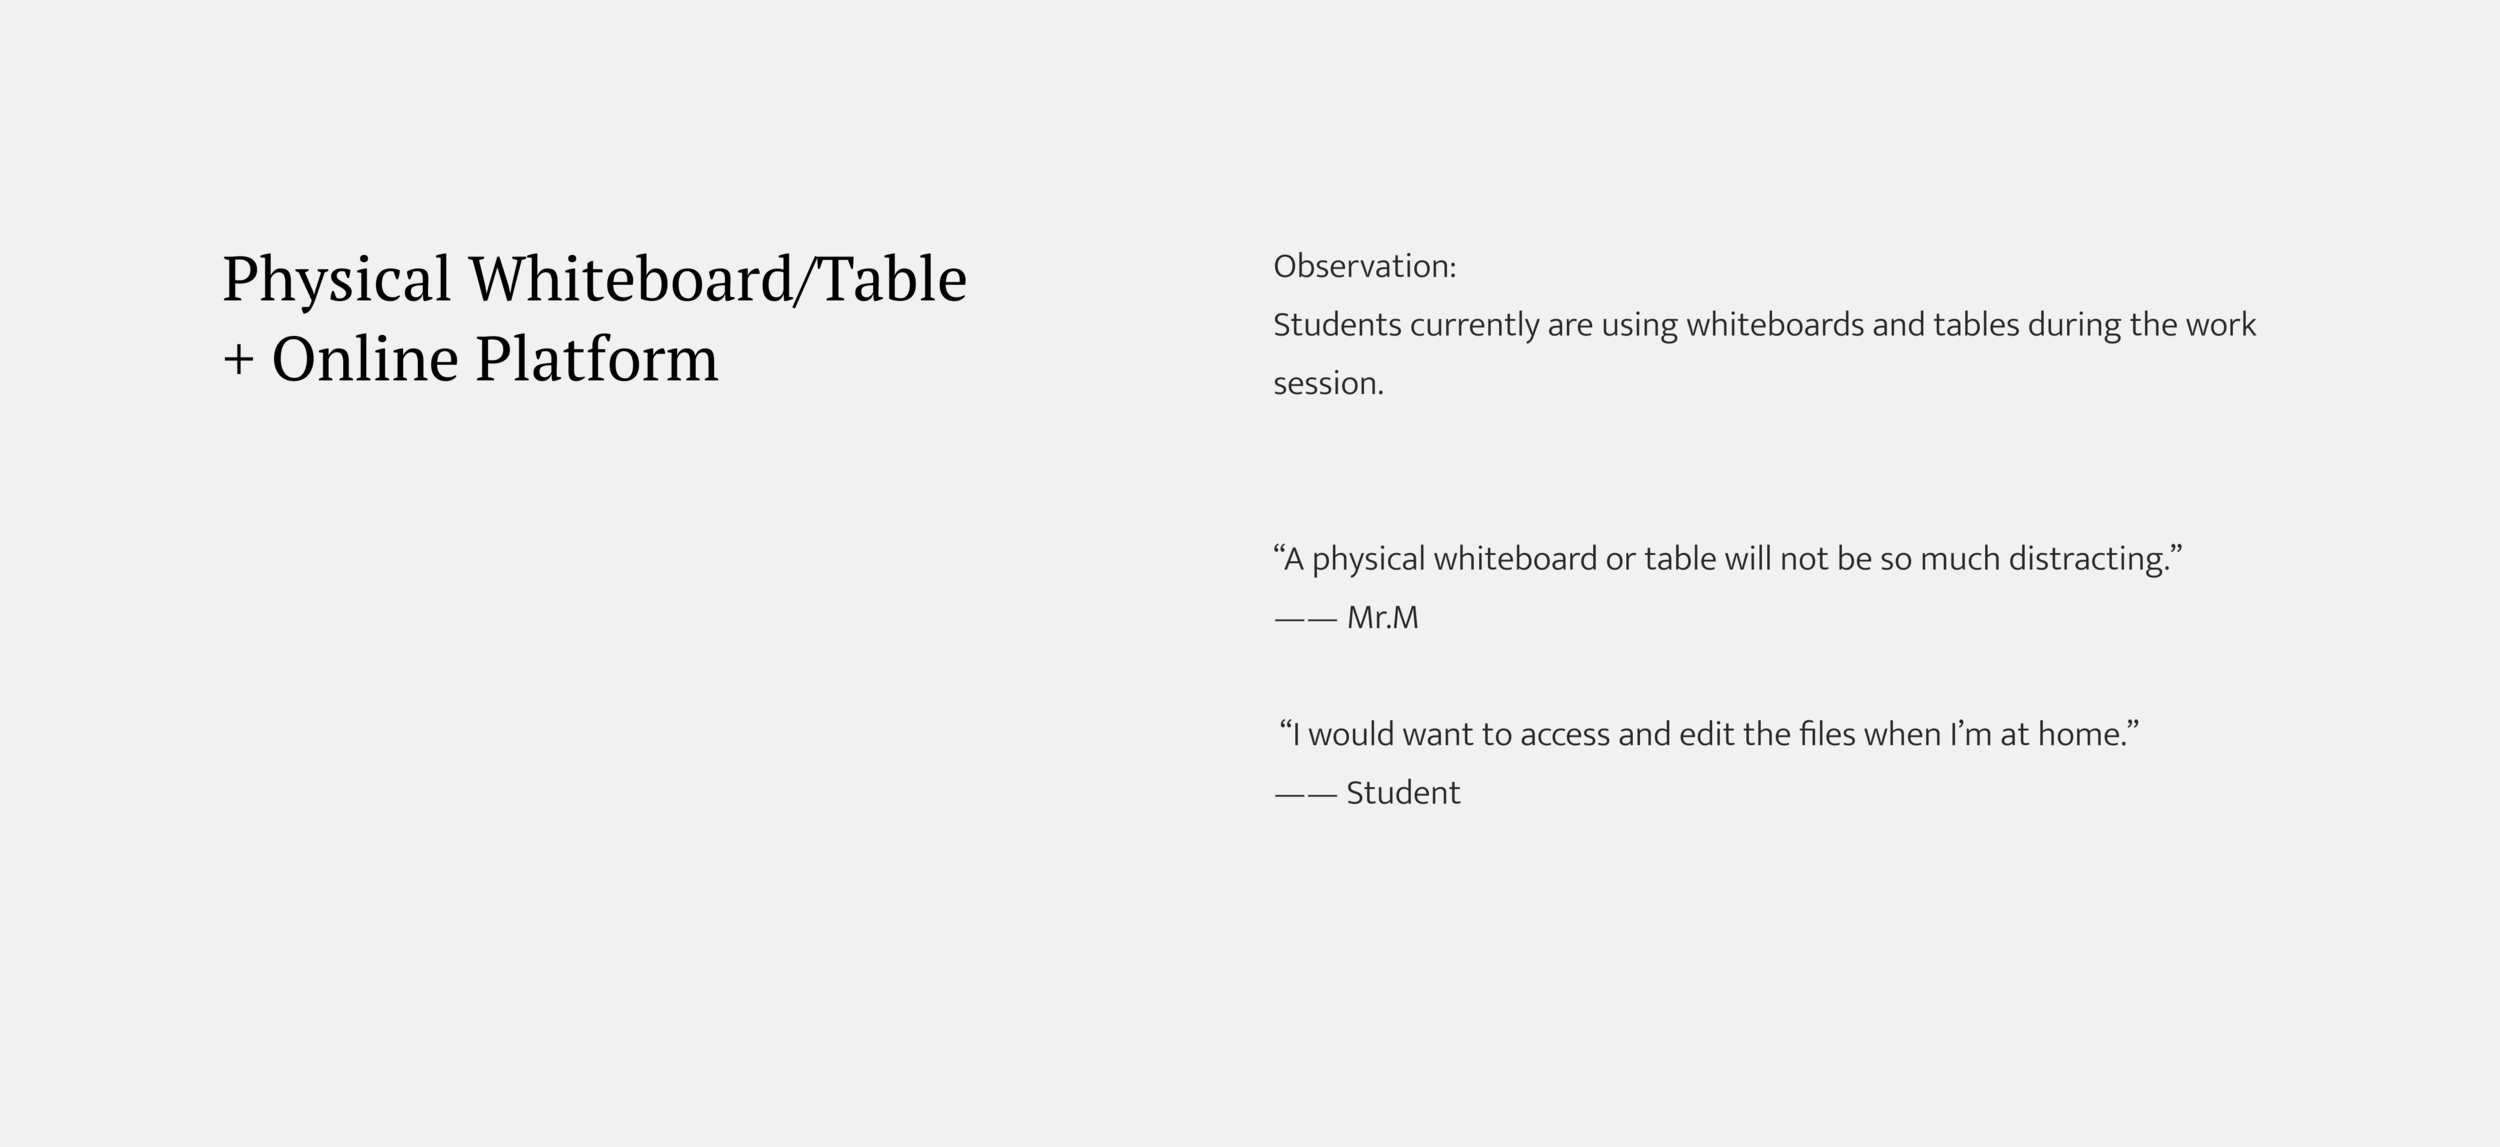
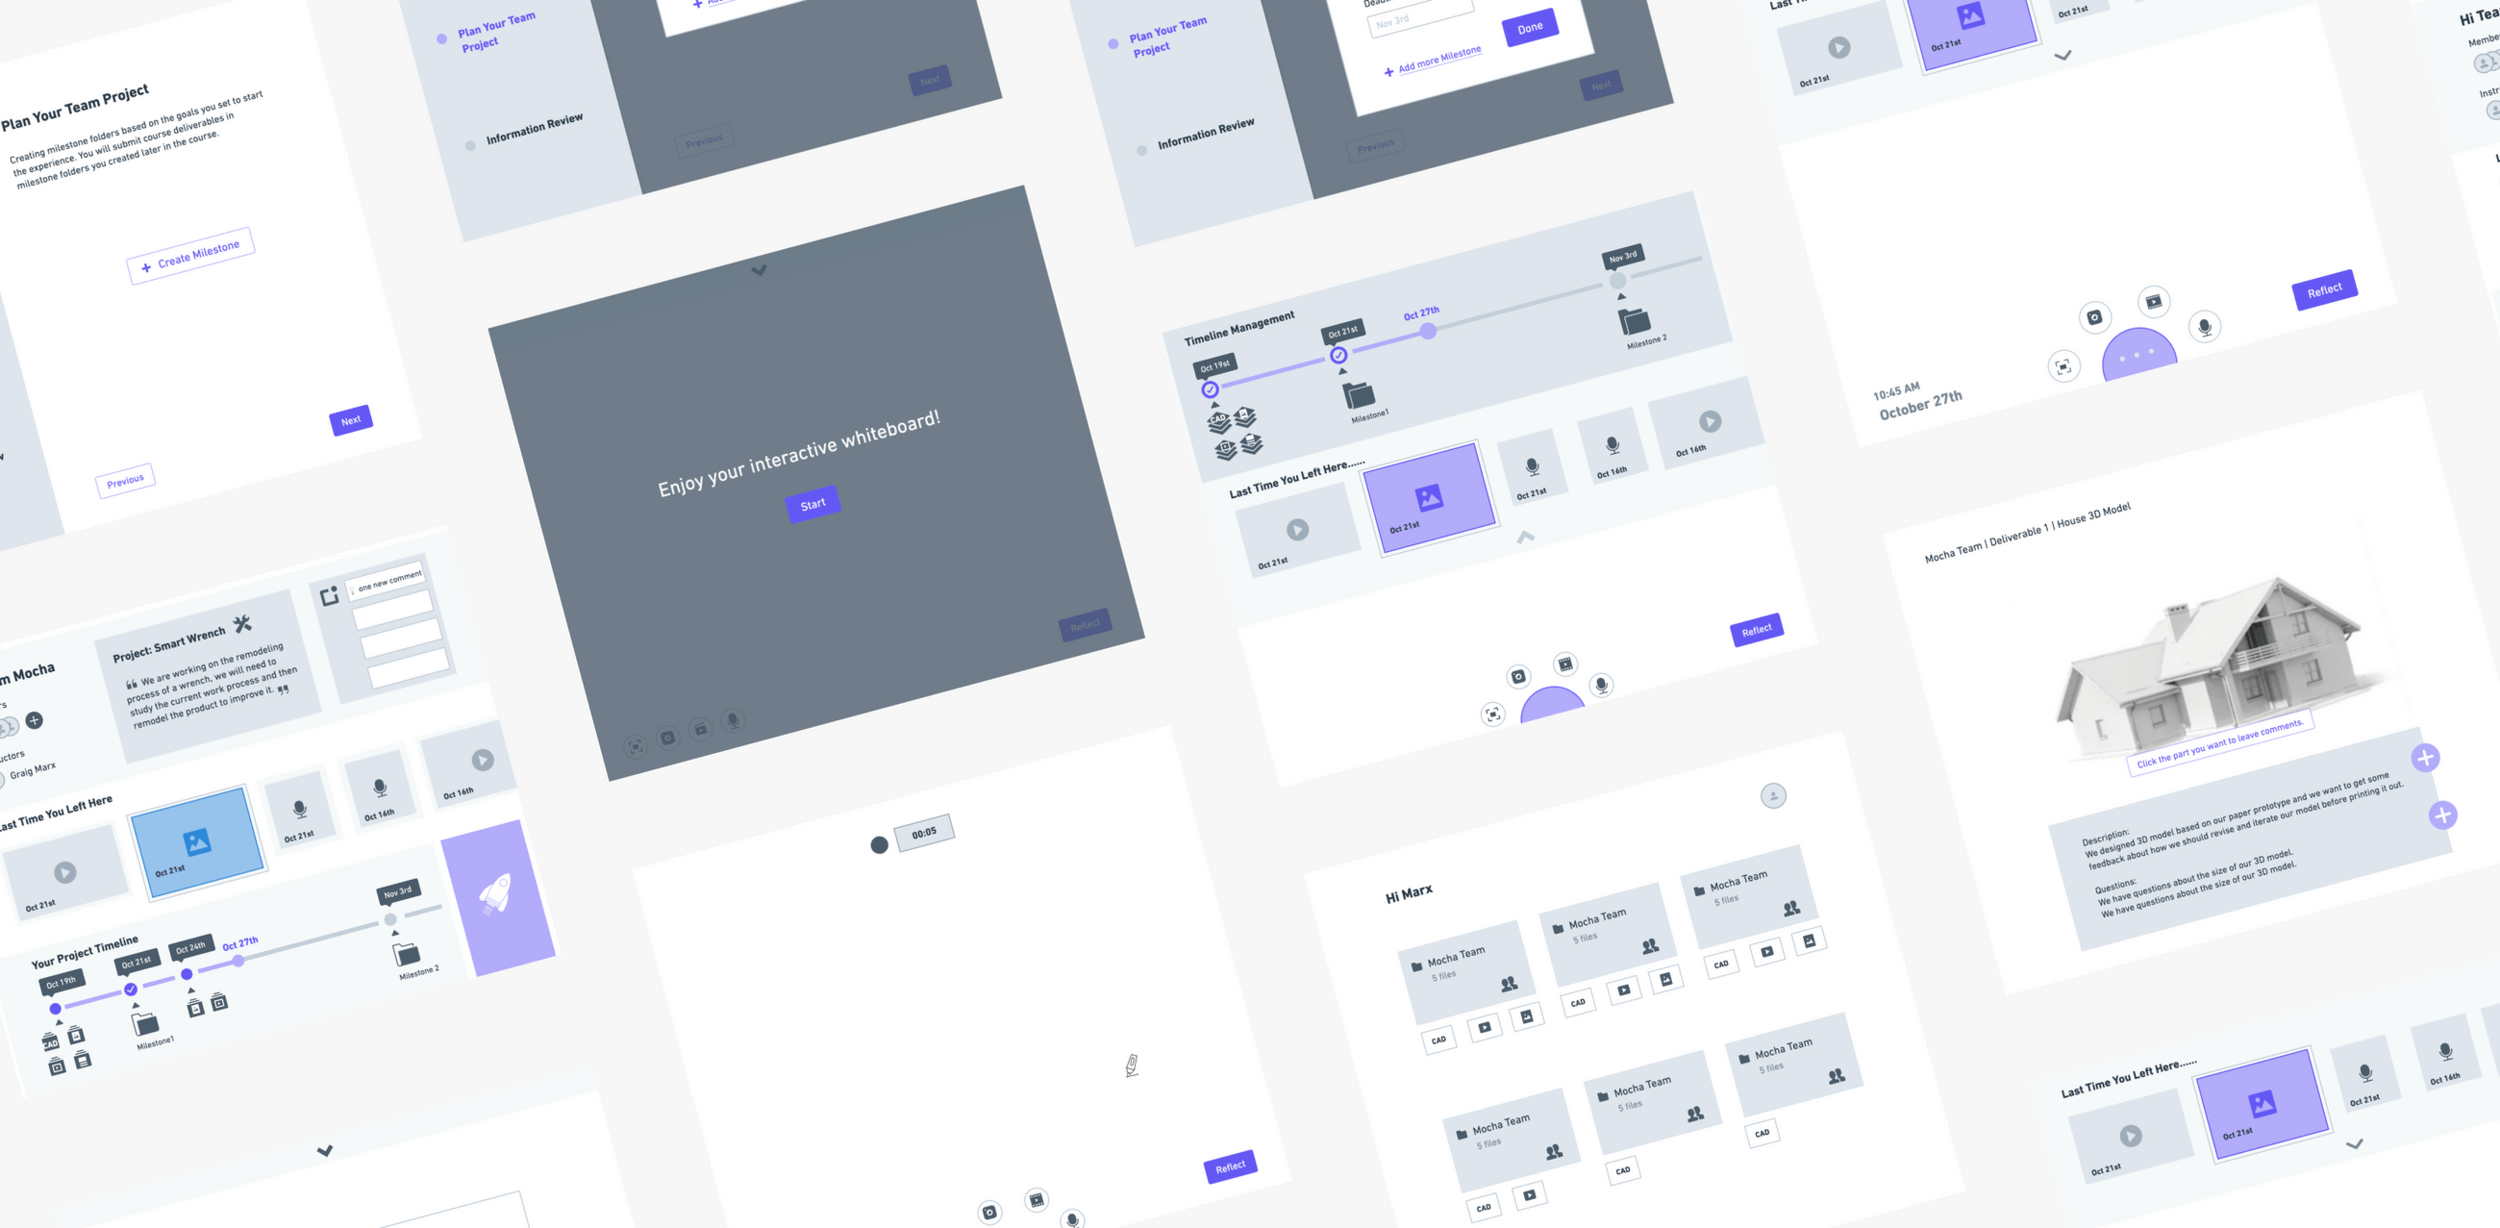
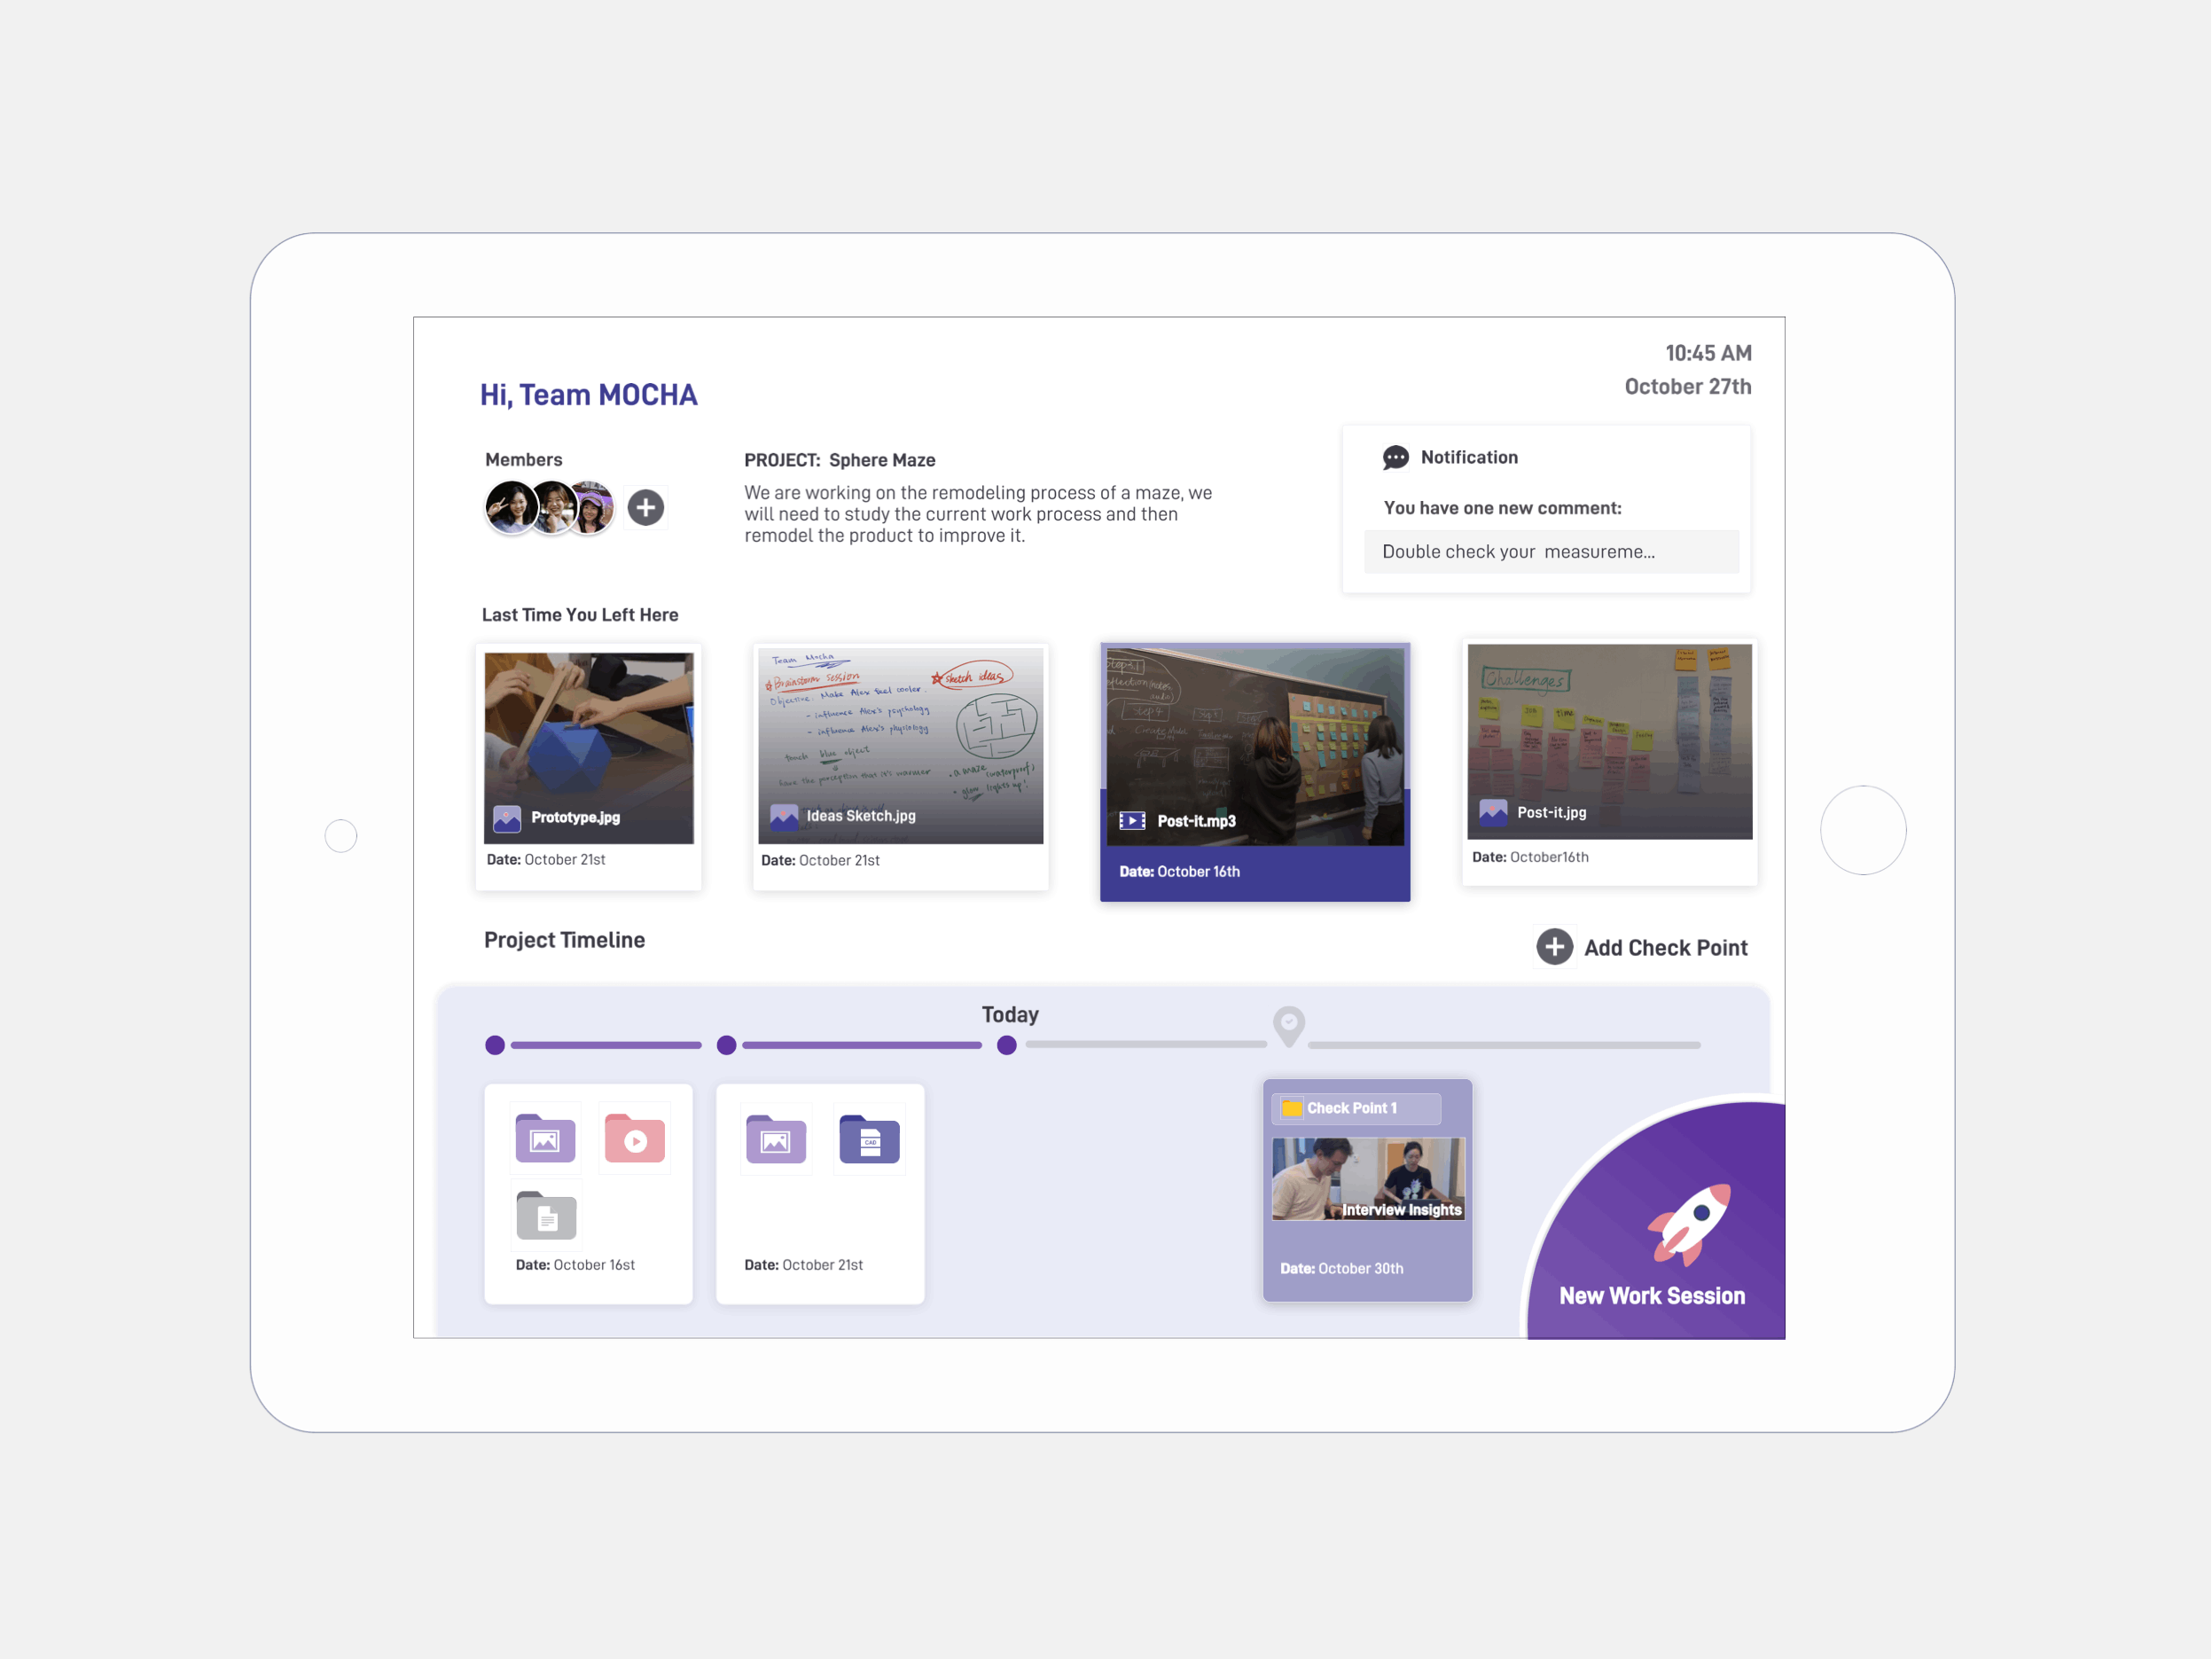
Launch is an integrated workspace with interactive whiteboards/tables in WT school’s documentation room and an online project management platform where students can access through laptop and iPad.
Concept Video
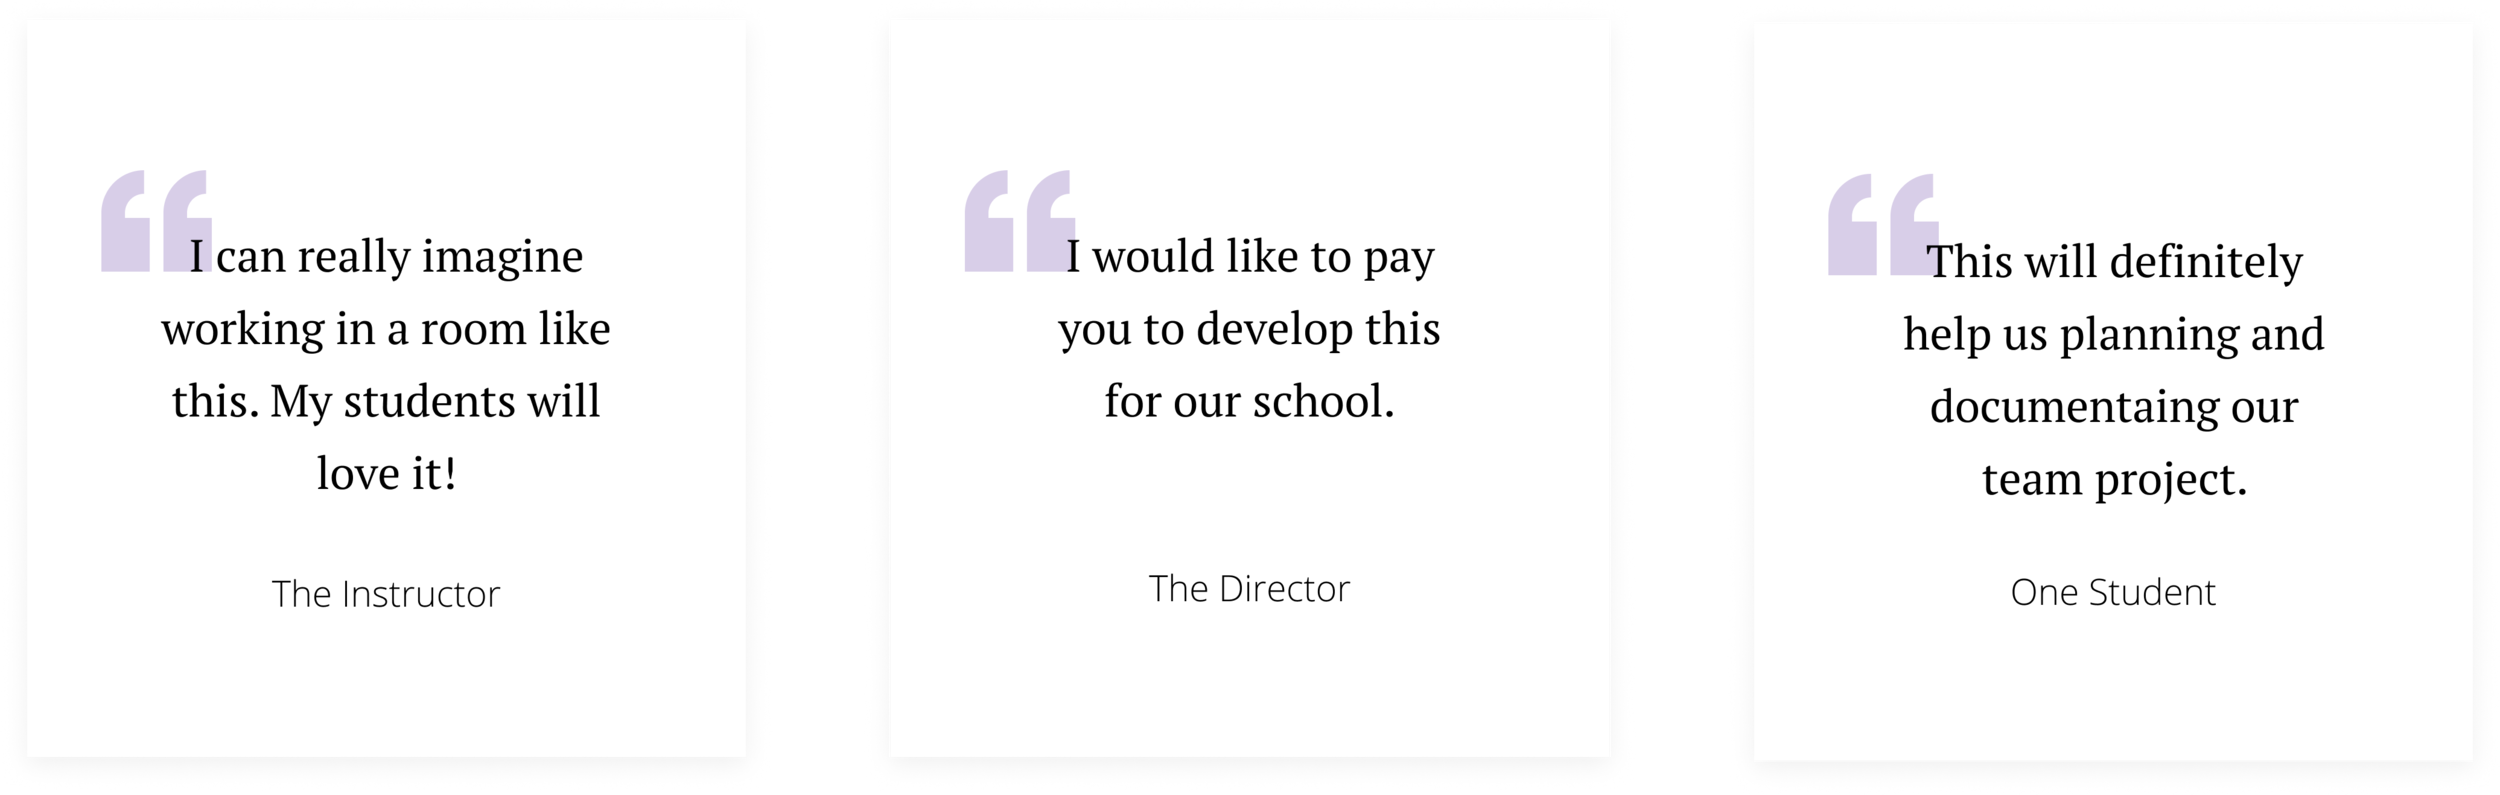
The Impact
We presented our design to the school director, several instructors and the students. We gained many positive feedback.


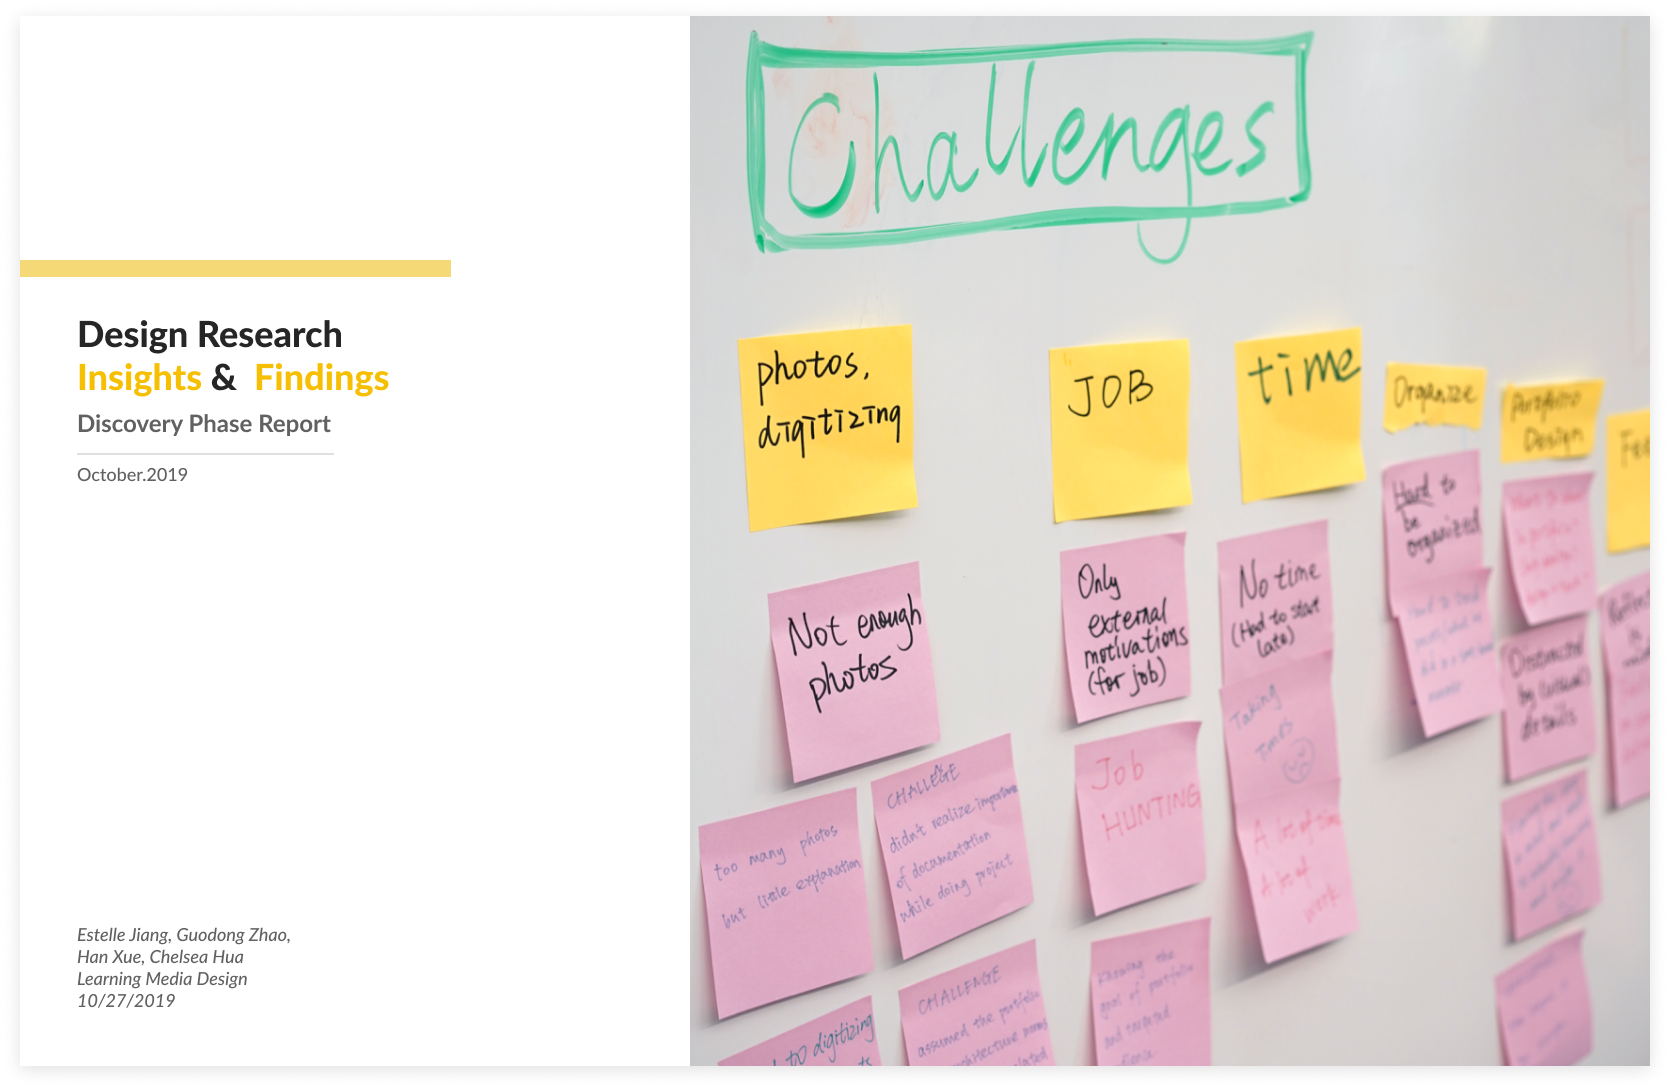
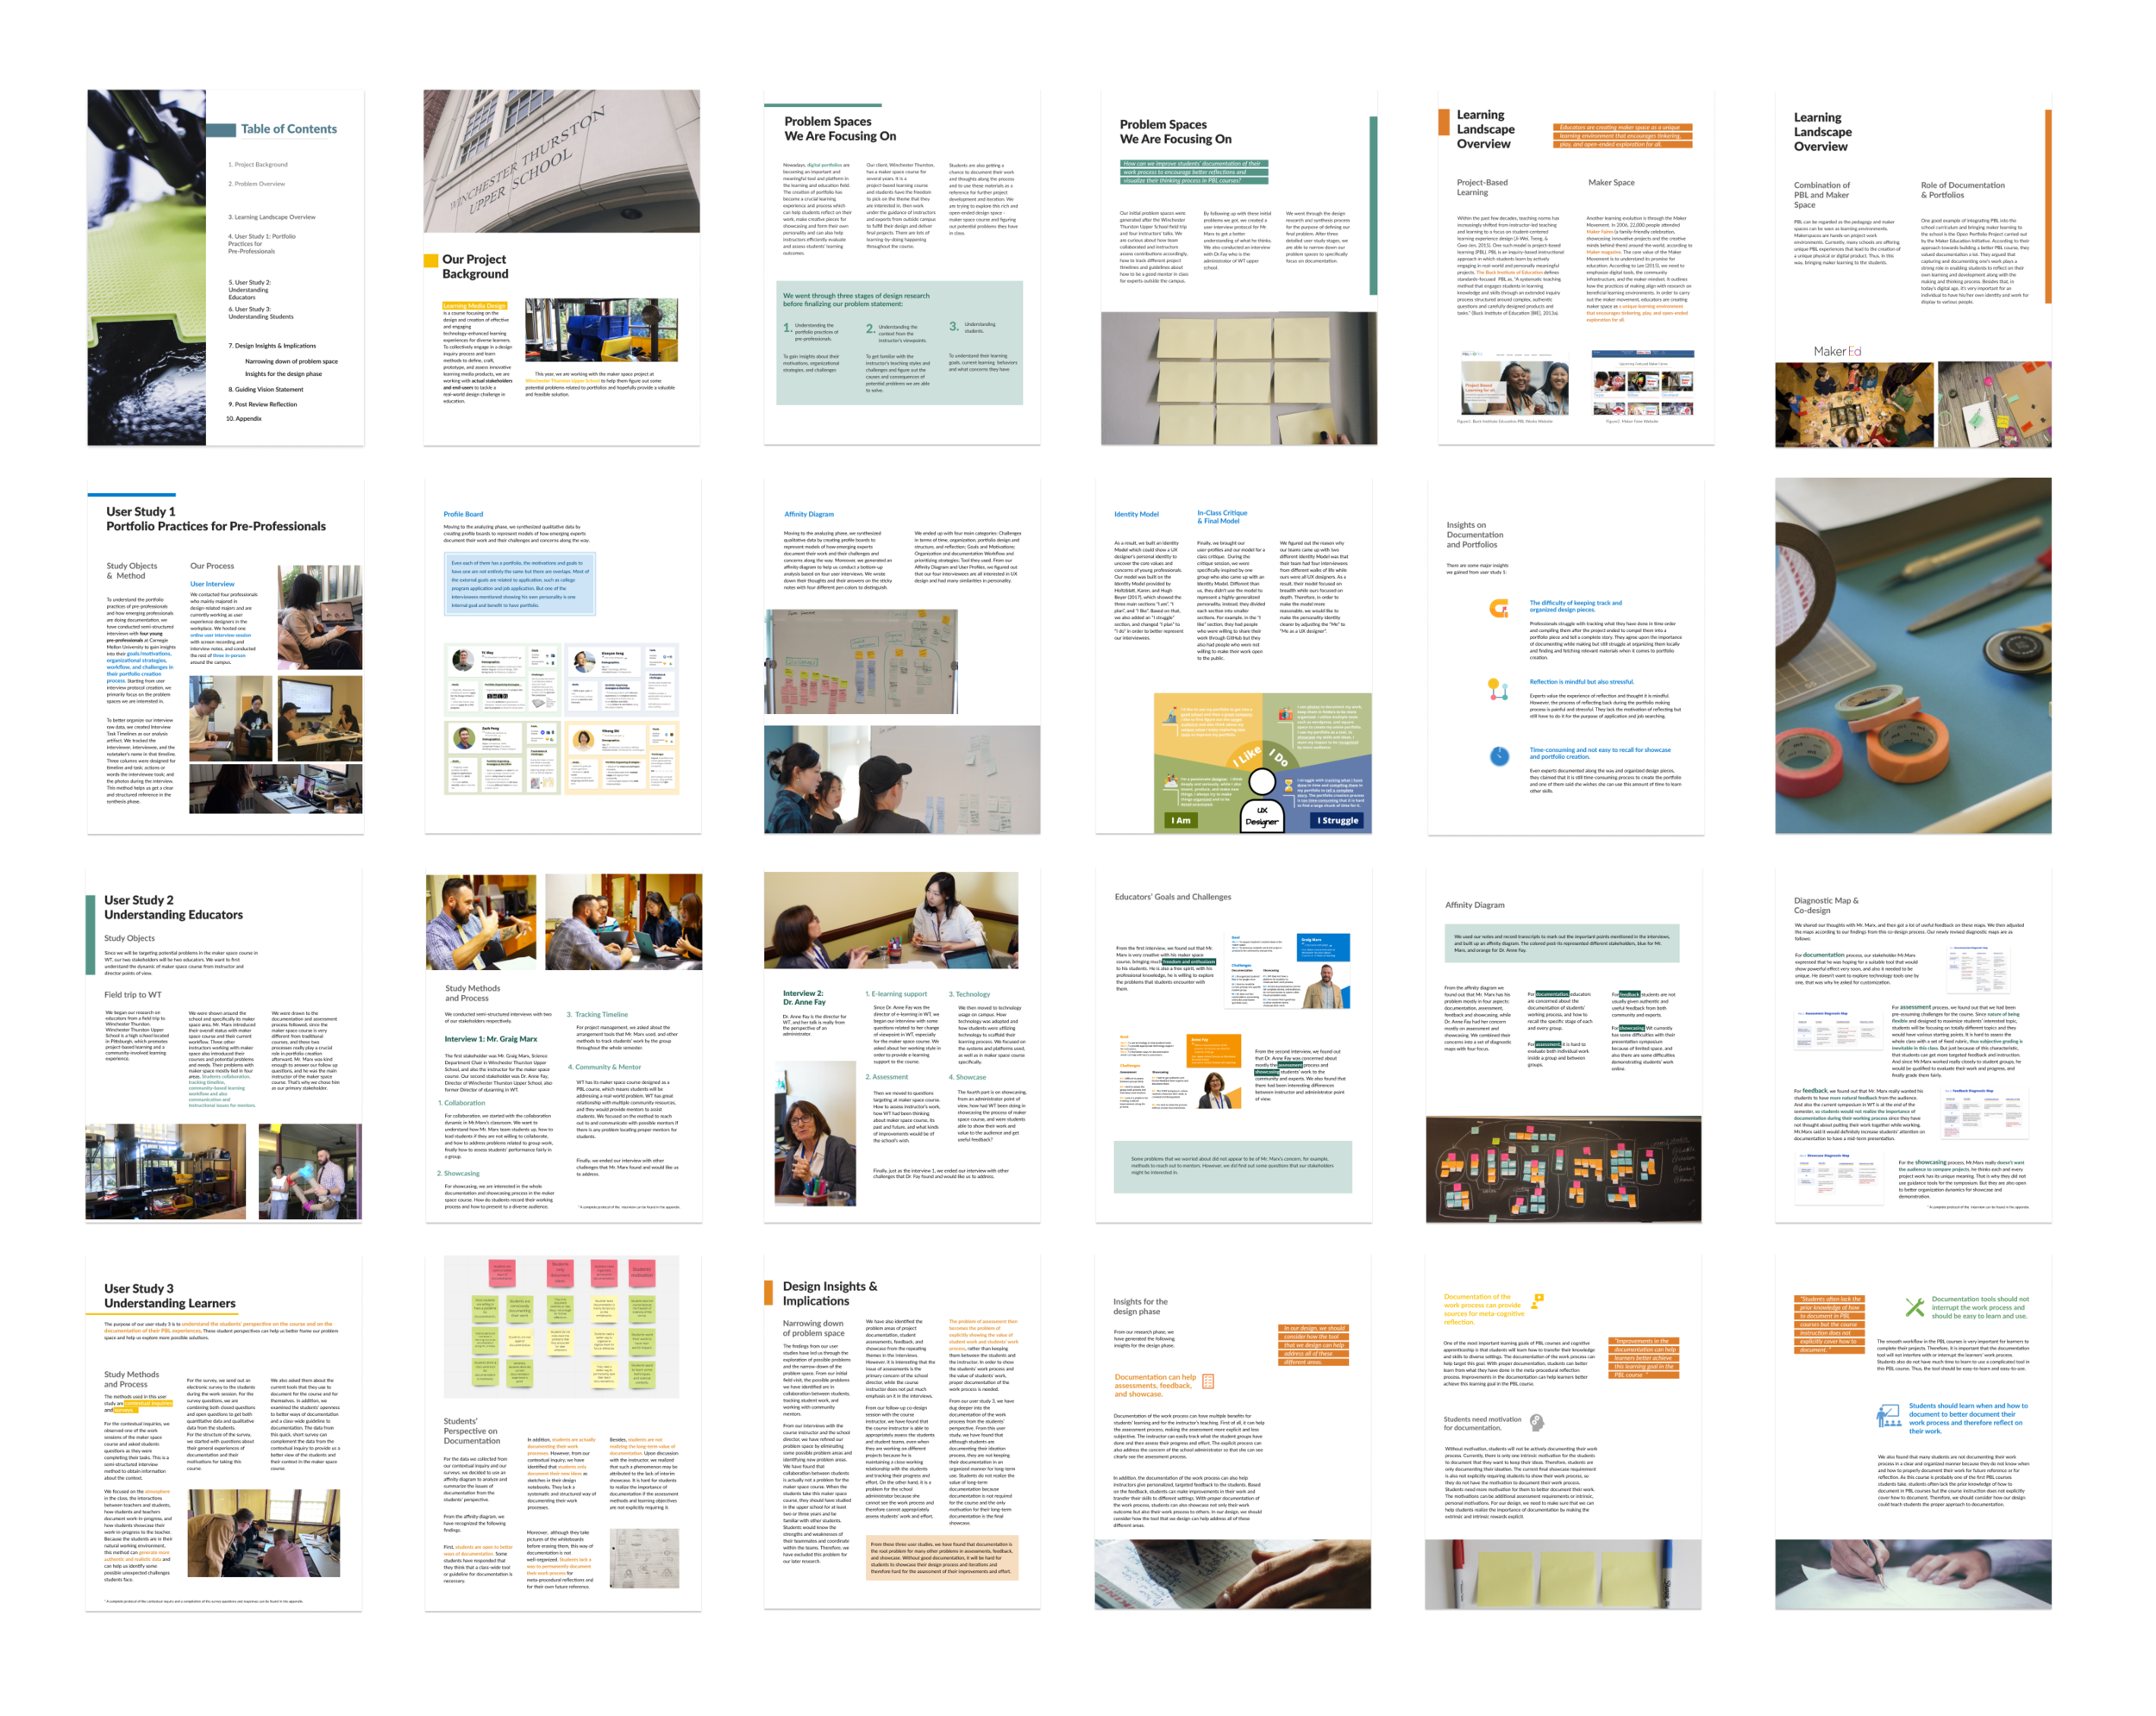
For the research phase, we designed a magazine-style research report and I’m responsible for the documentation design. Click here to download.

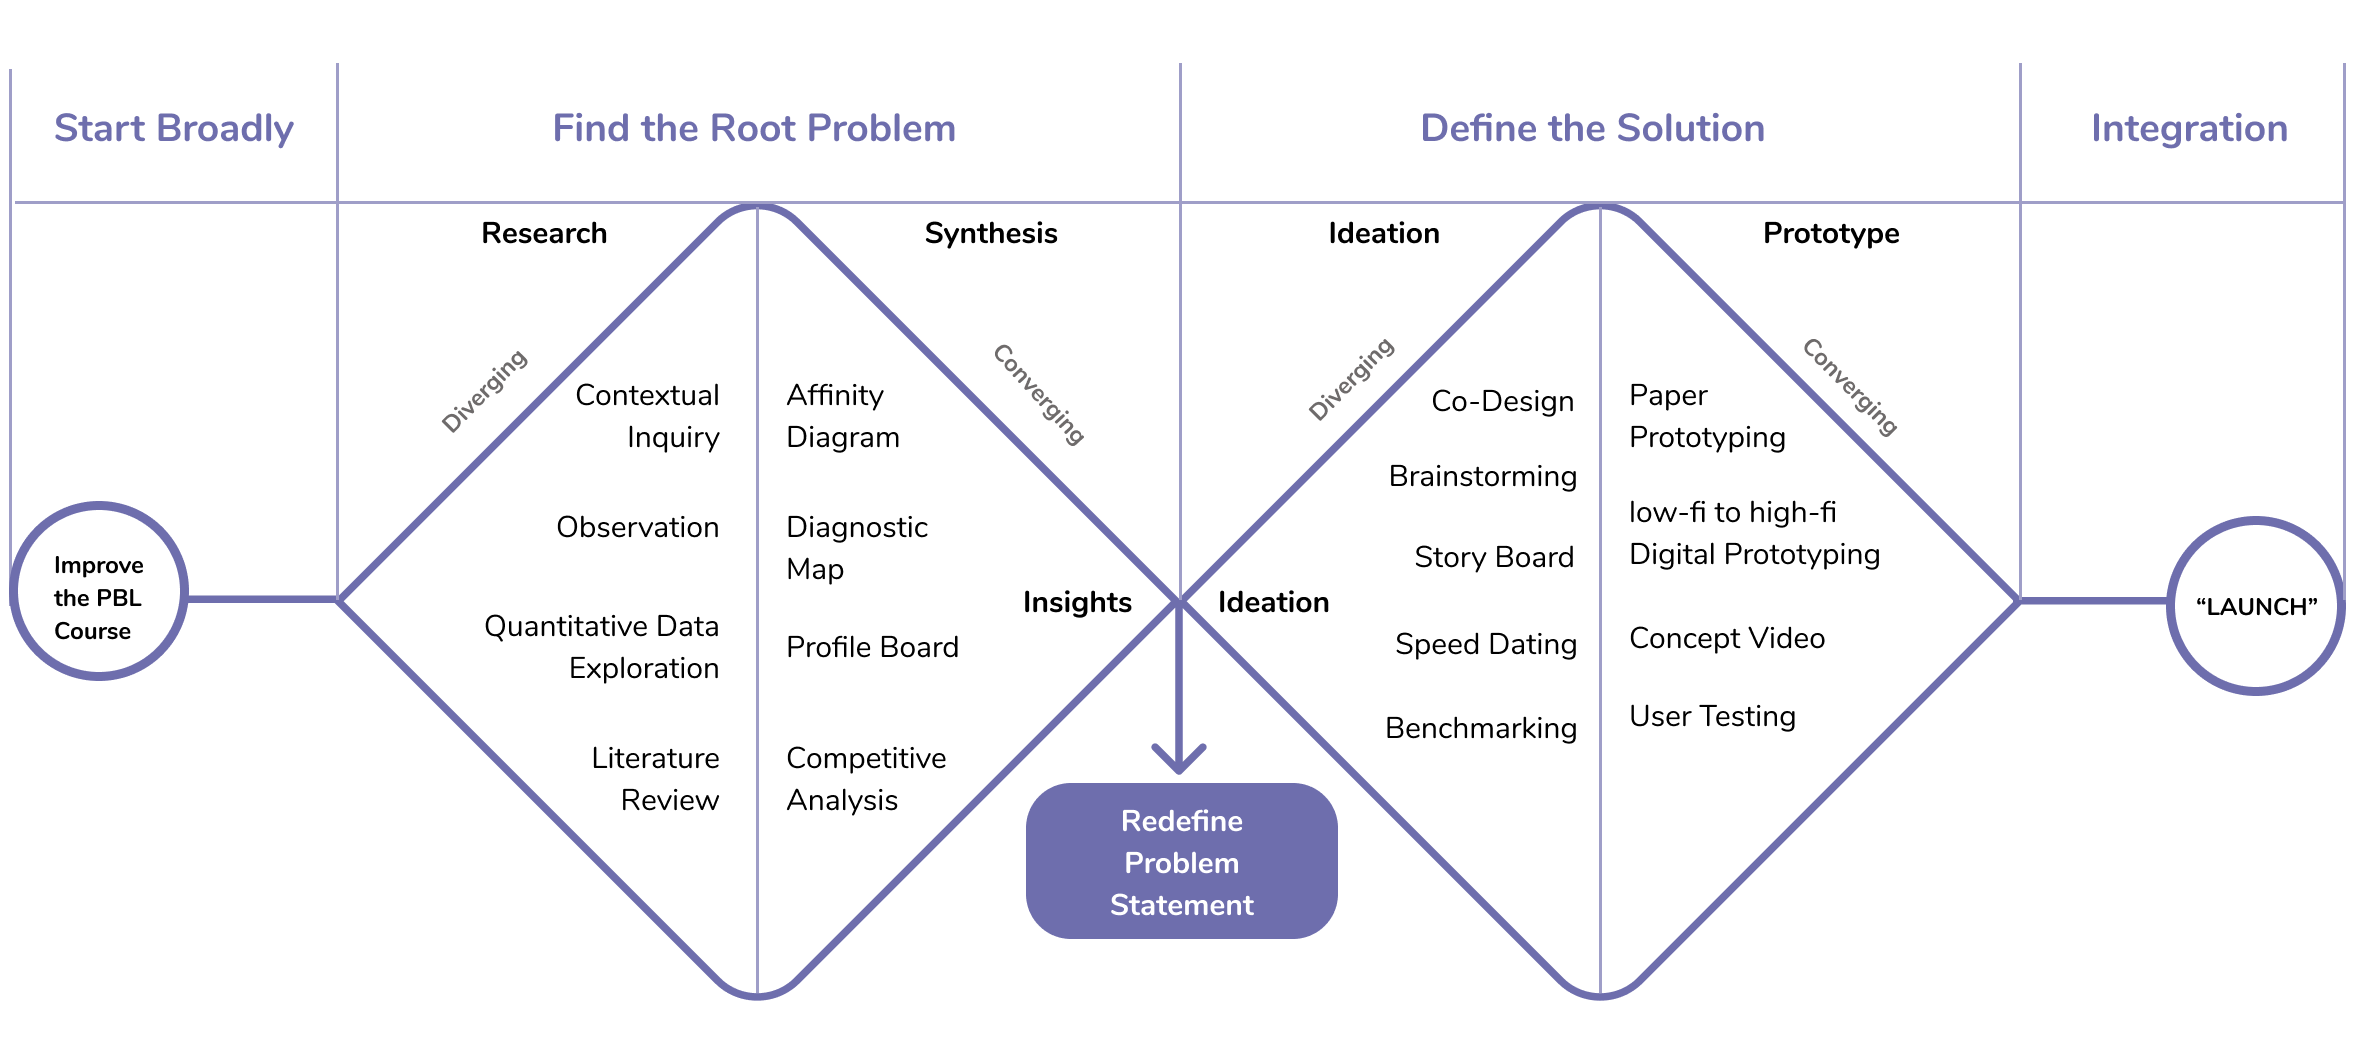
Step 01: Use concept map to guide user research
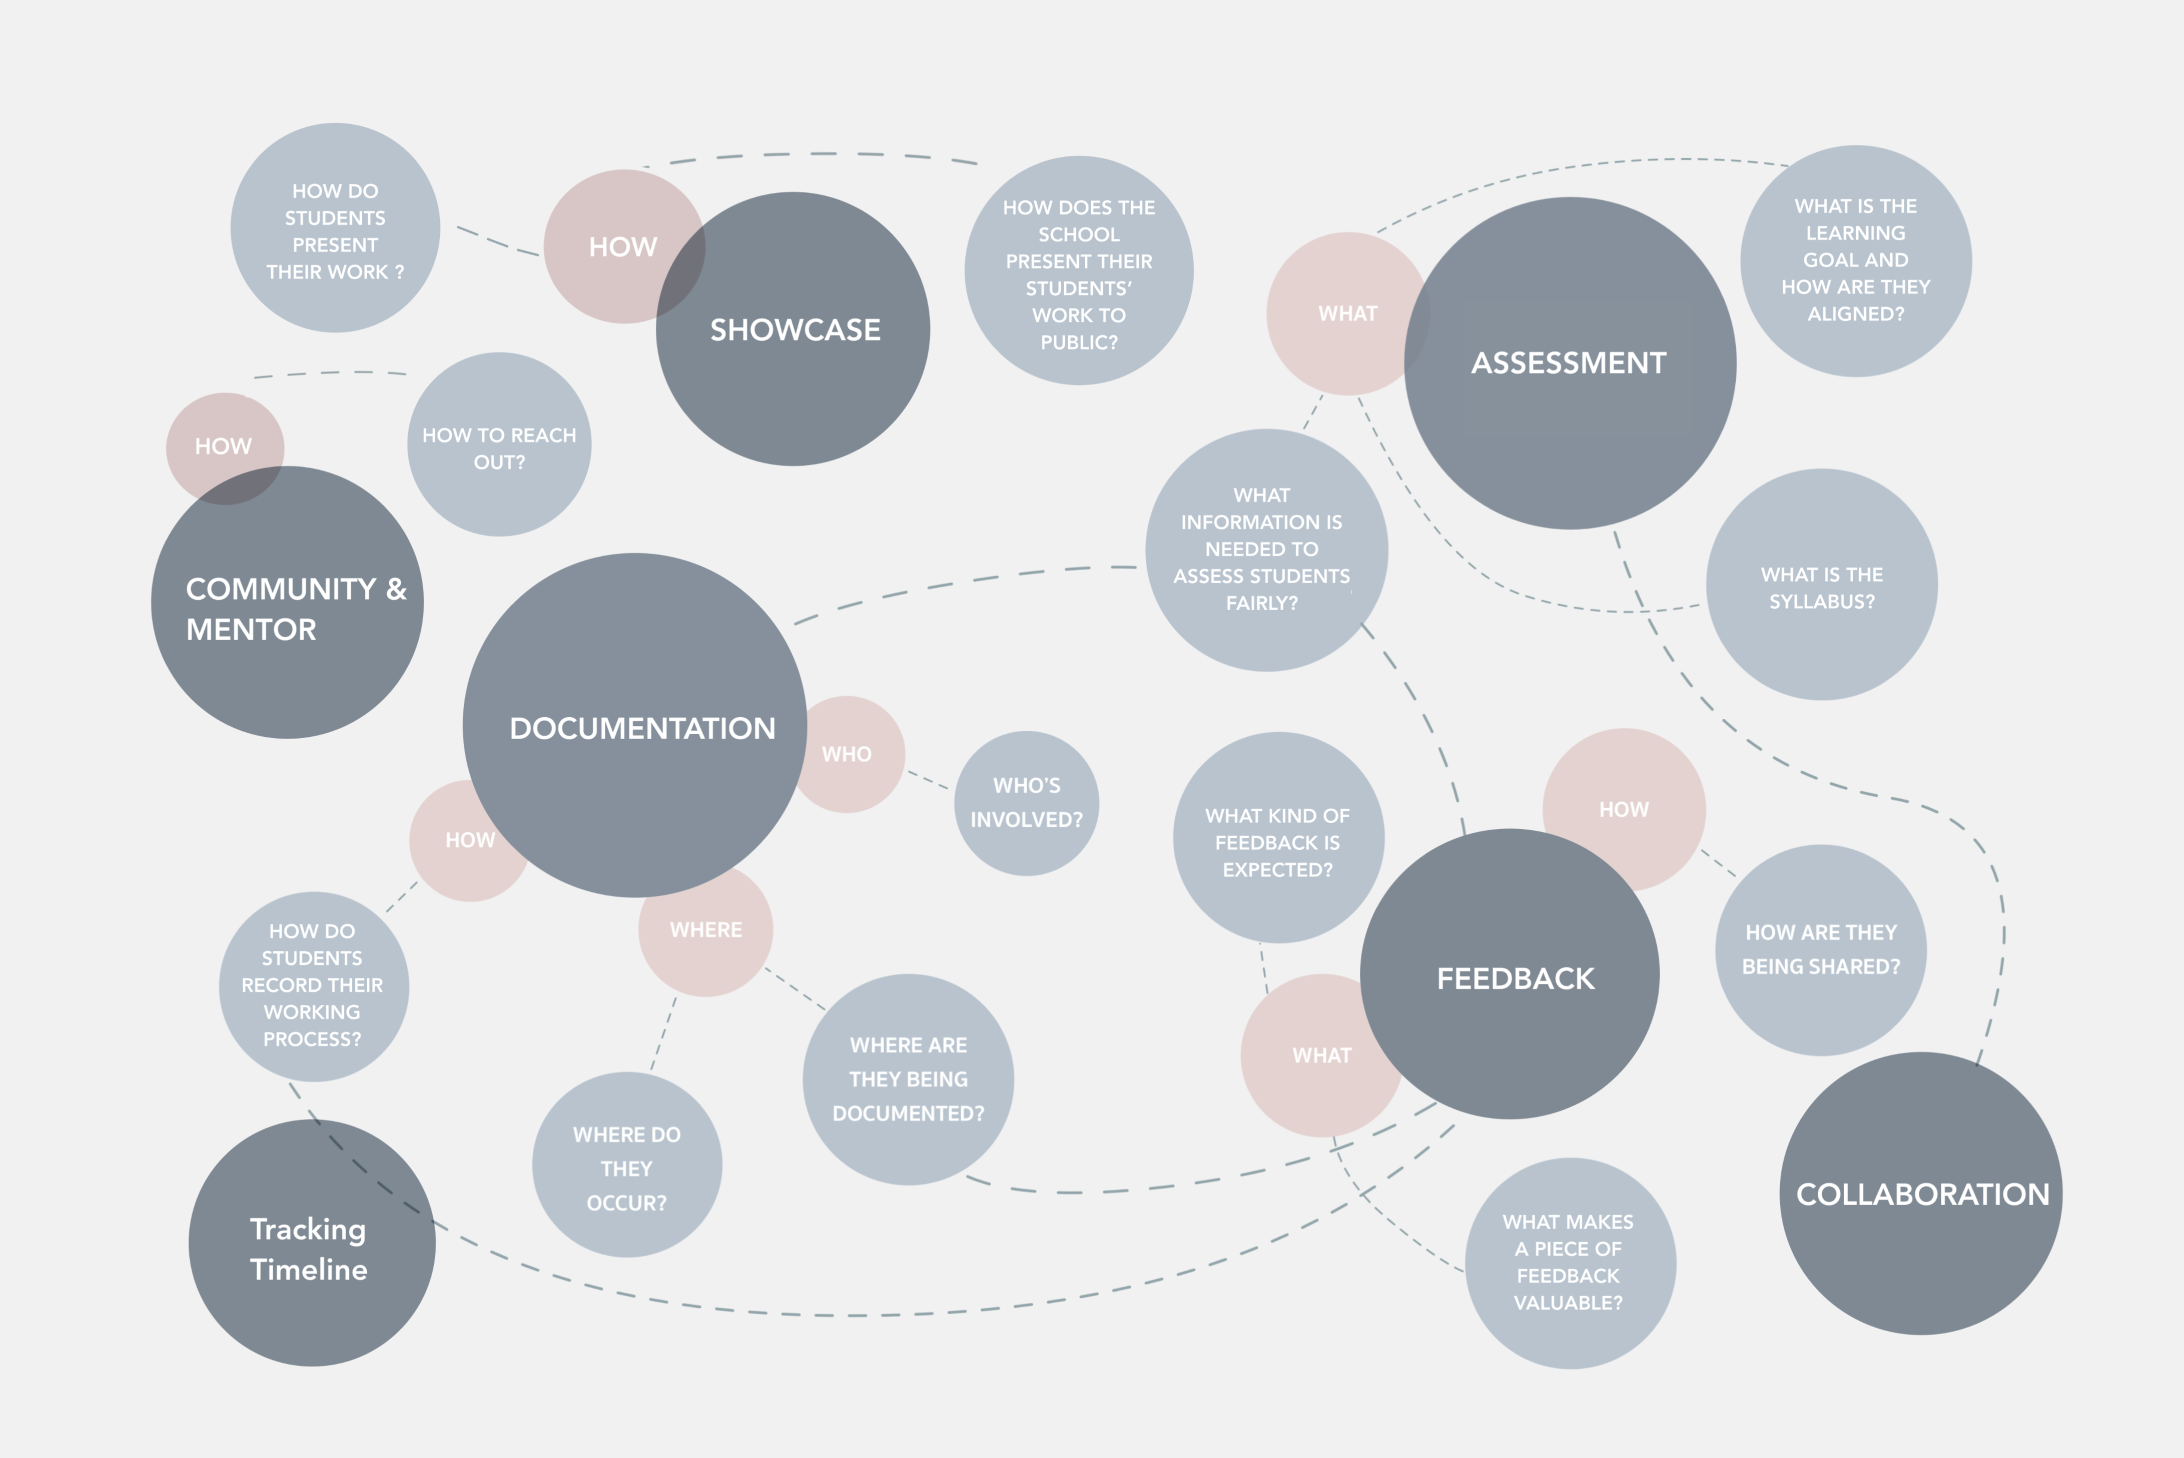
After we conducted literature reviews and took a field trip to WT Upper School, I drew a concept map including common concerns in project-based-learning and specific challenges I observed. This helped the team narrow down and organize the interview and research scope. I broke it into seven parts and sought to understand the why, how and what behind each area.
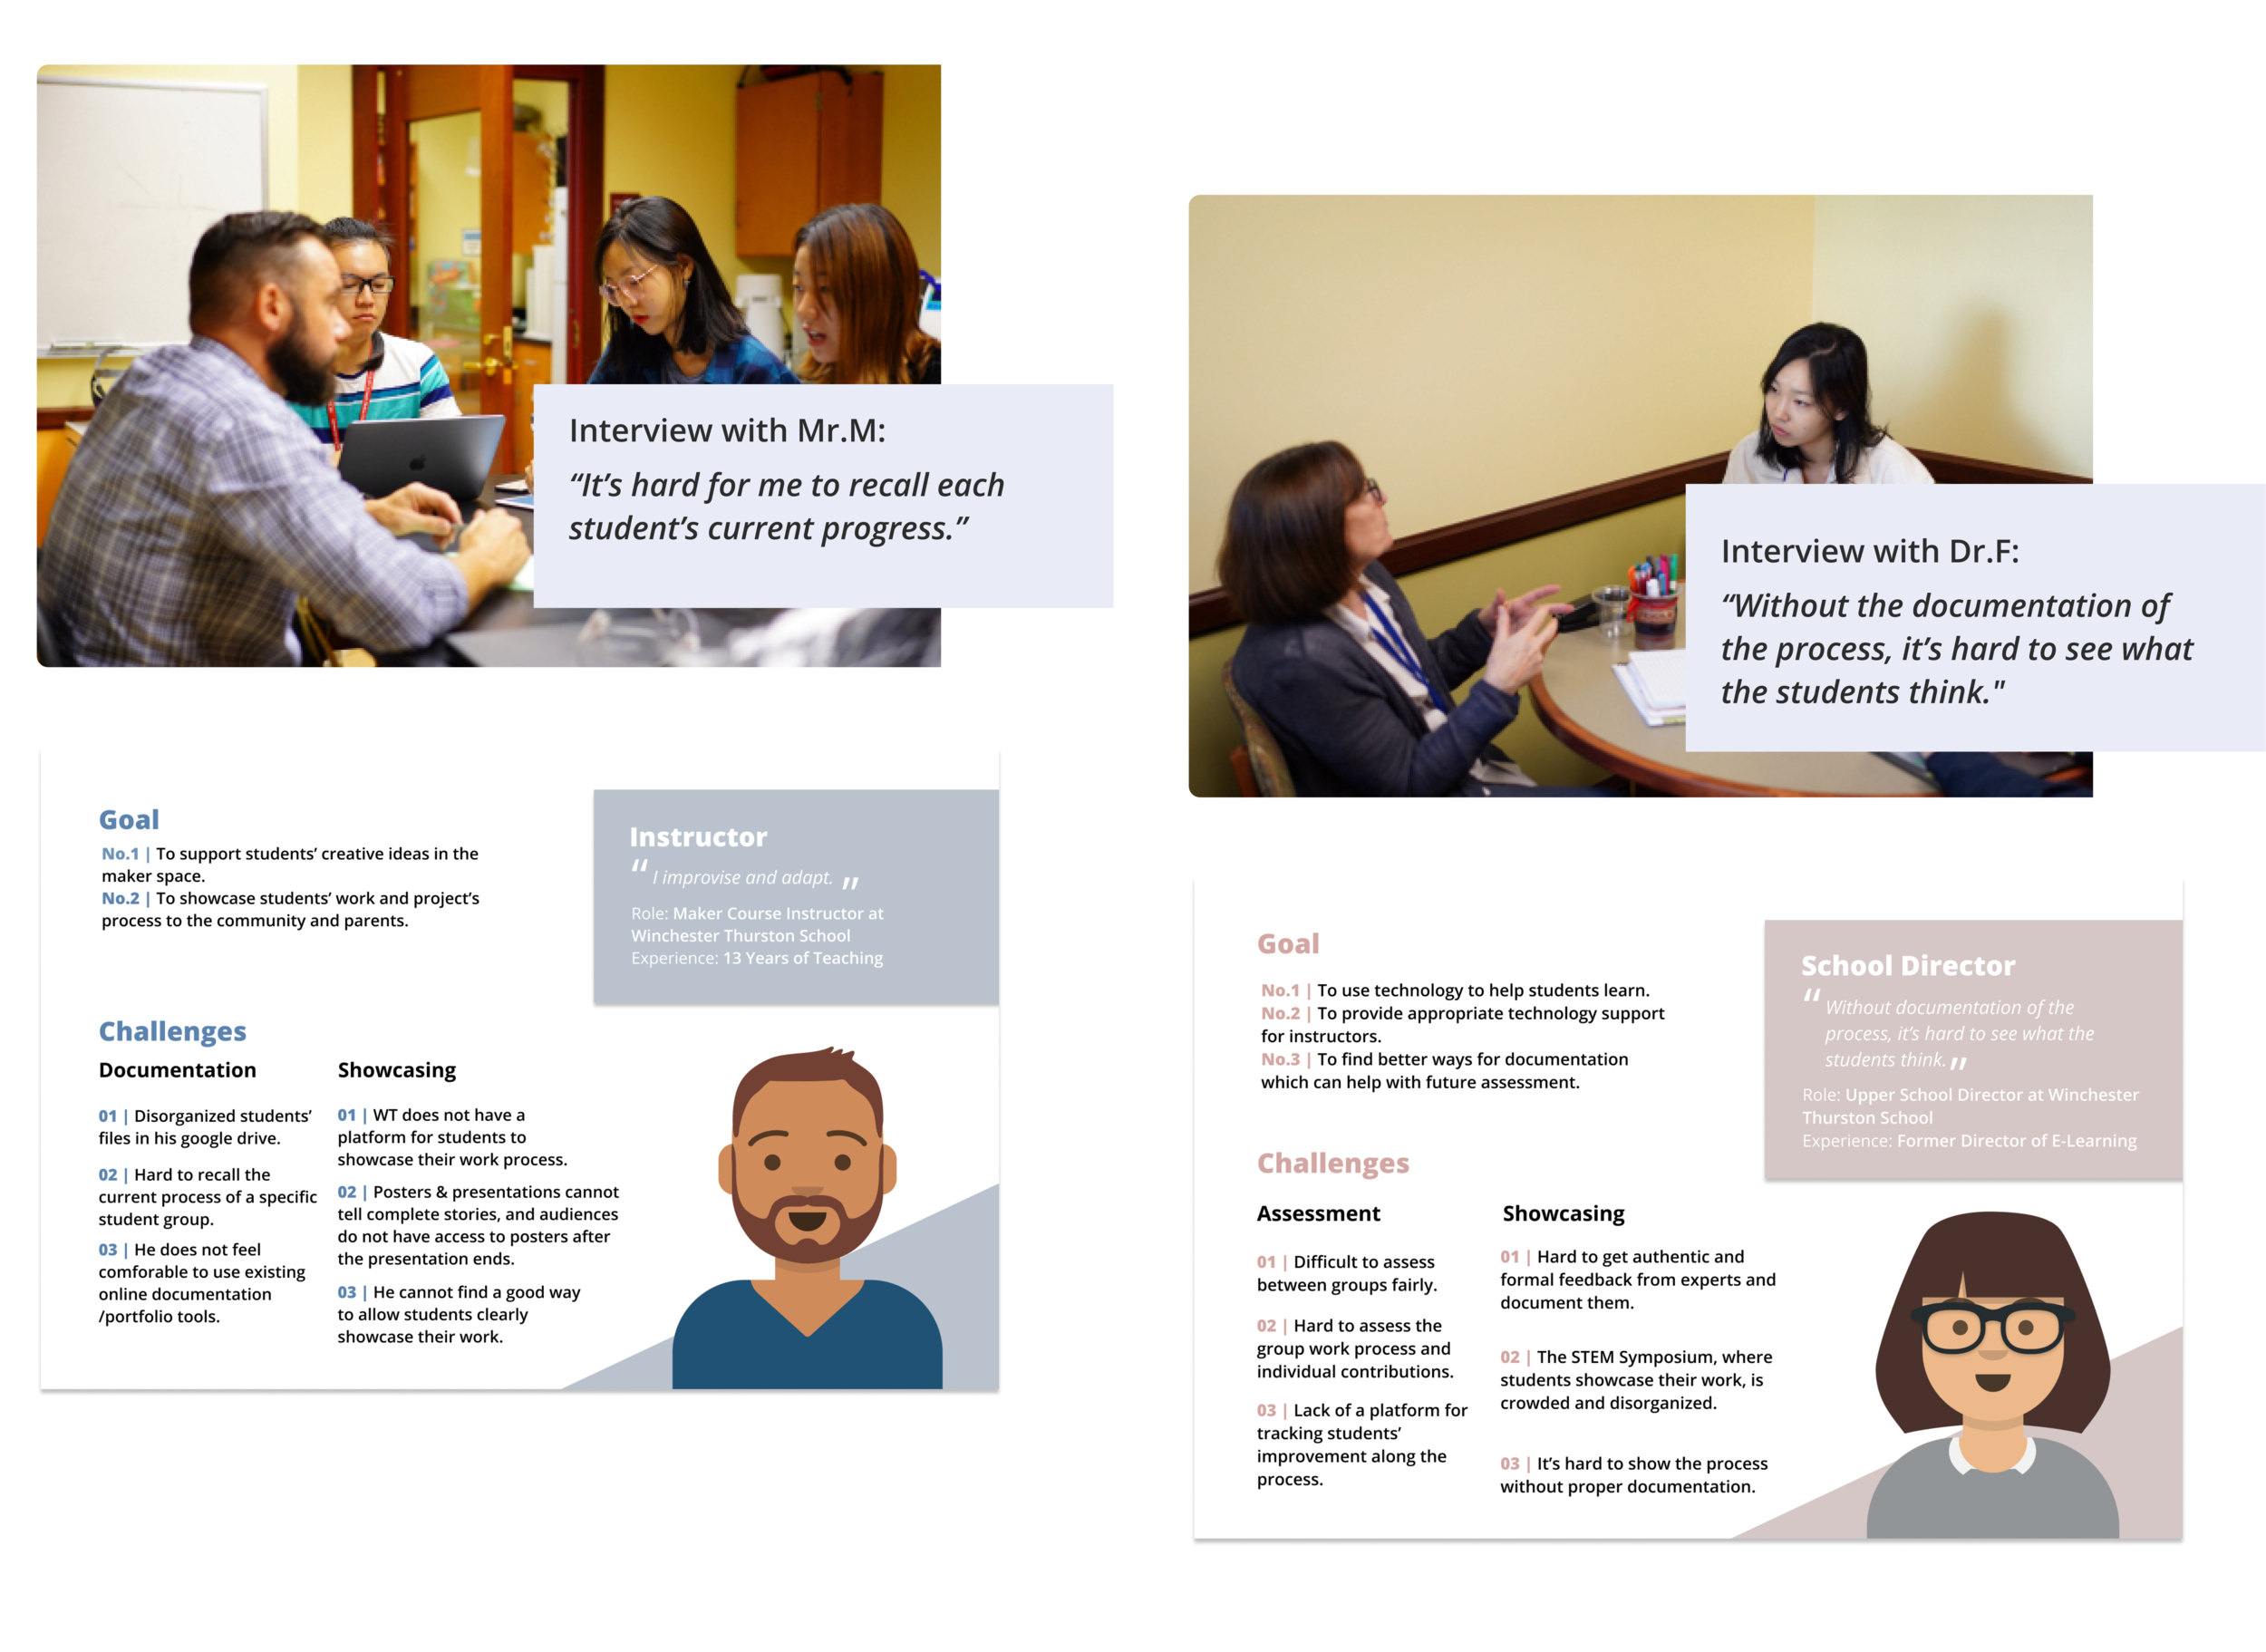
Step 02: Understand current challenges in implementing PBL classes
For our first user study, we chose to conduct interviews with two educators closely related to the course: Mr. M, the instructor of the PBL course, and Dr. F, the director of the school. We aimed to understand the dynamic of the marker space course from their point of view and their current teaching challenges.
● Stakeholder Interviews & Personas
● Analysis
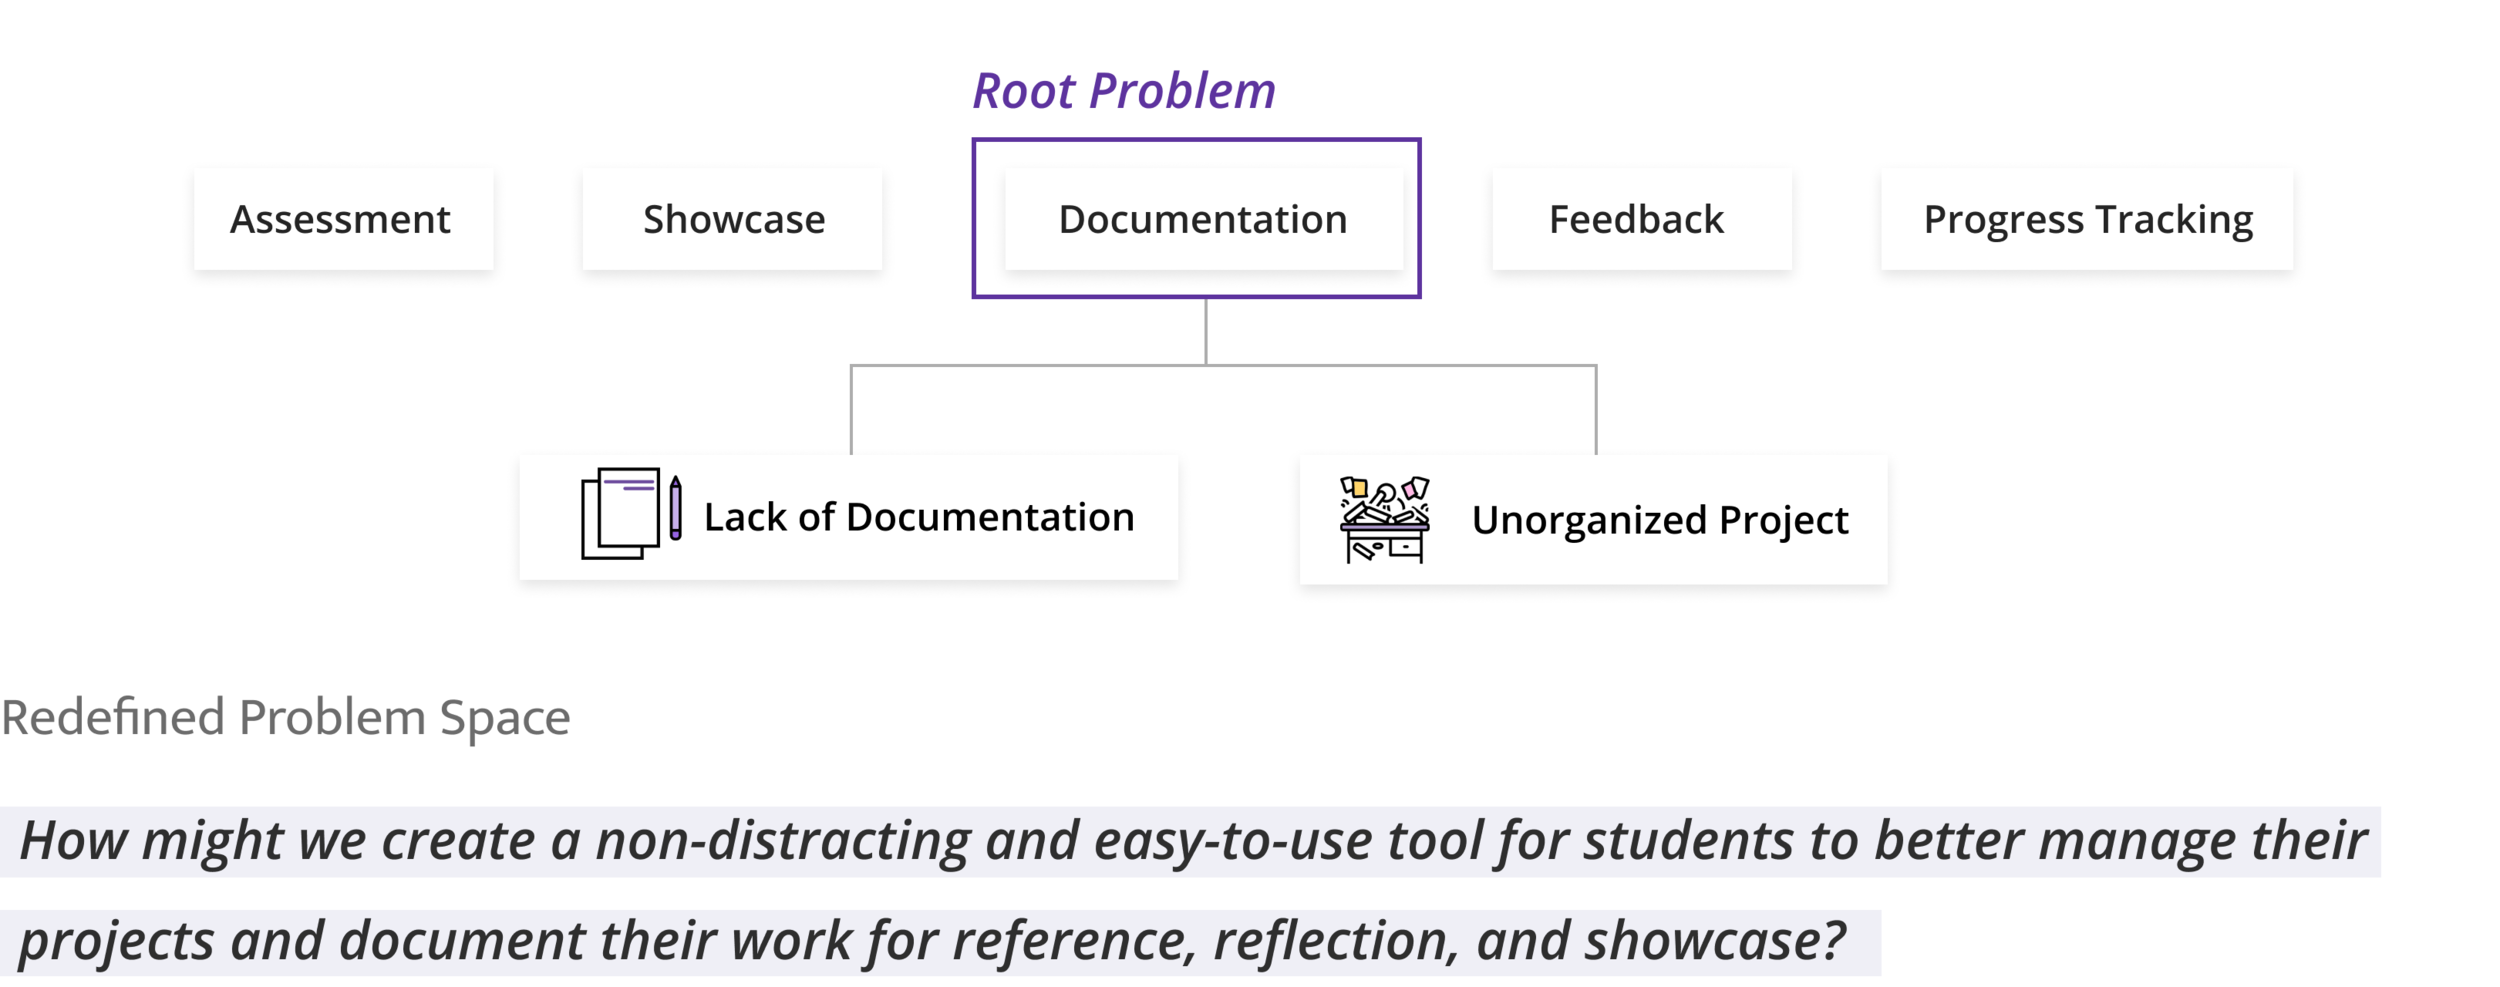
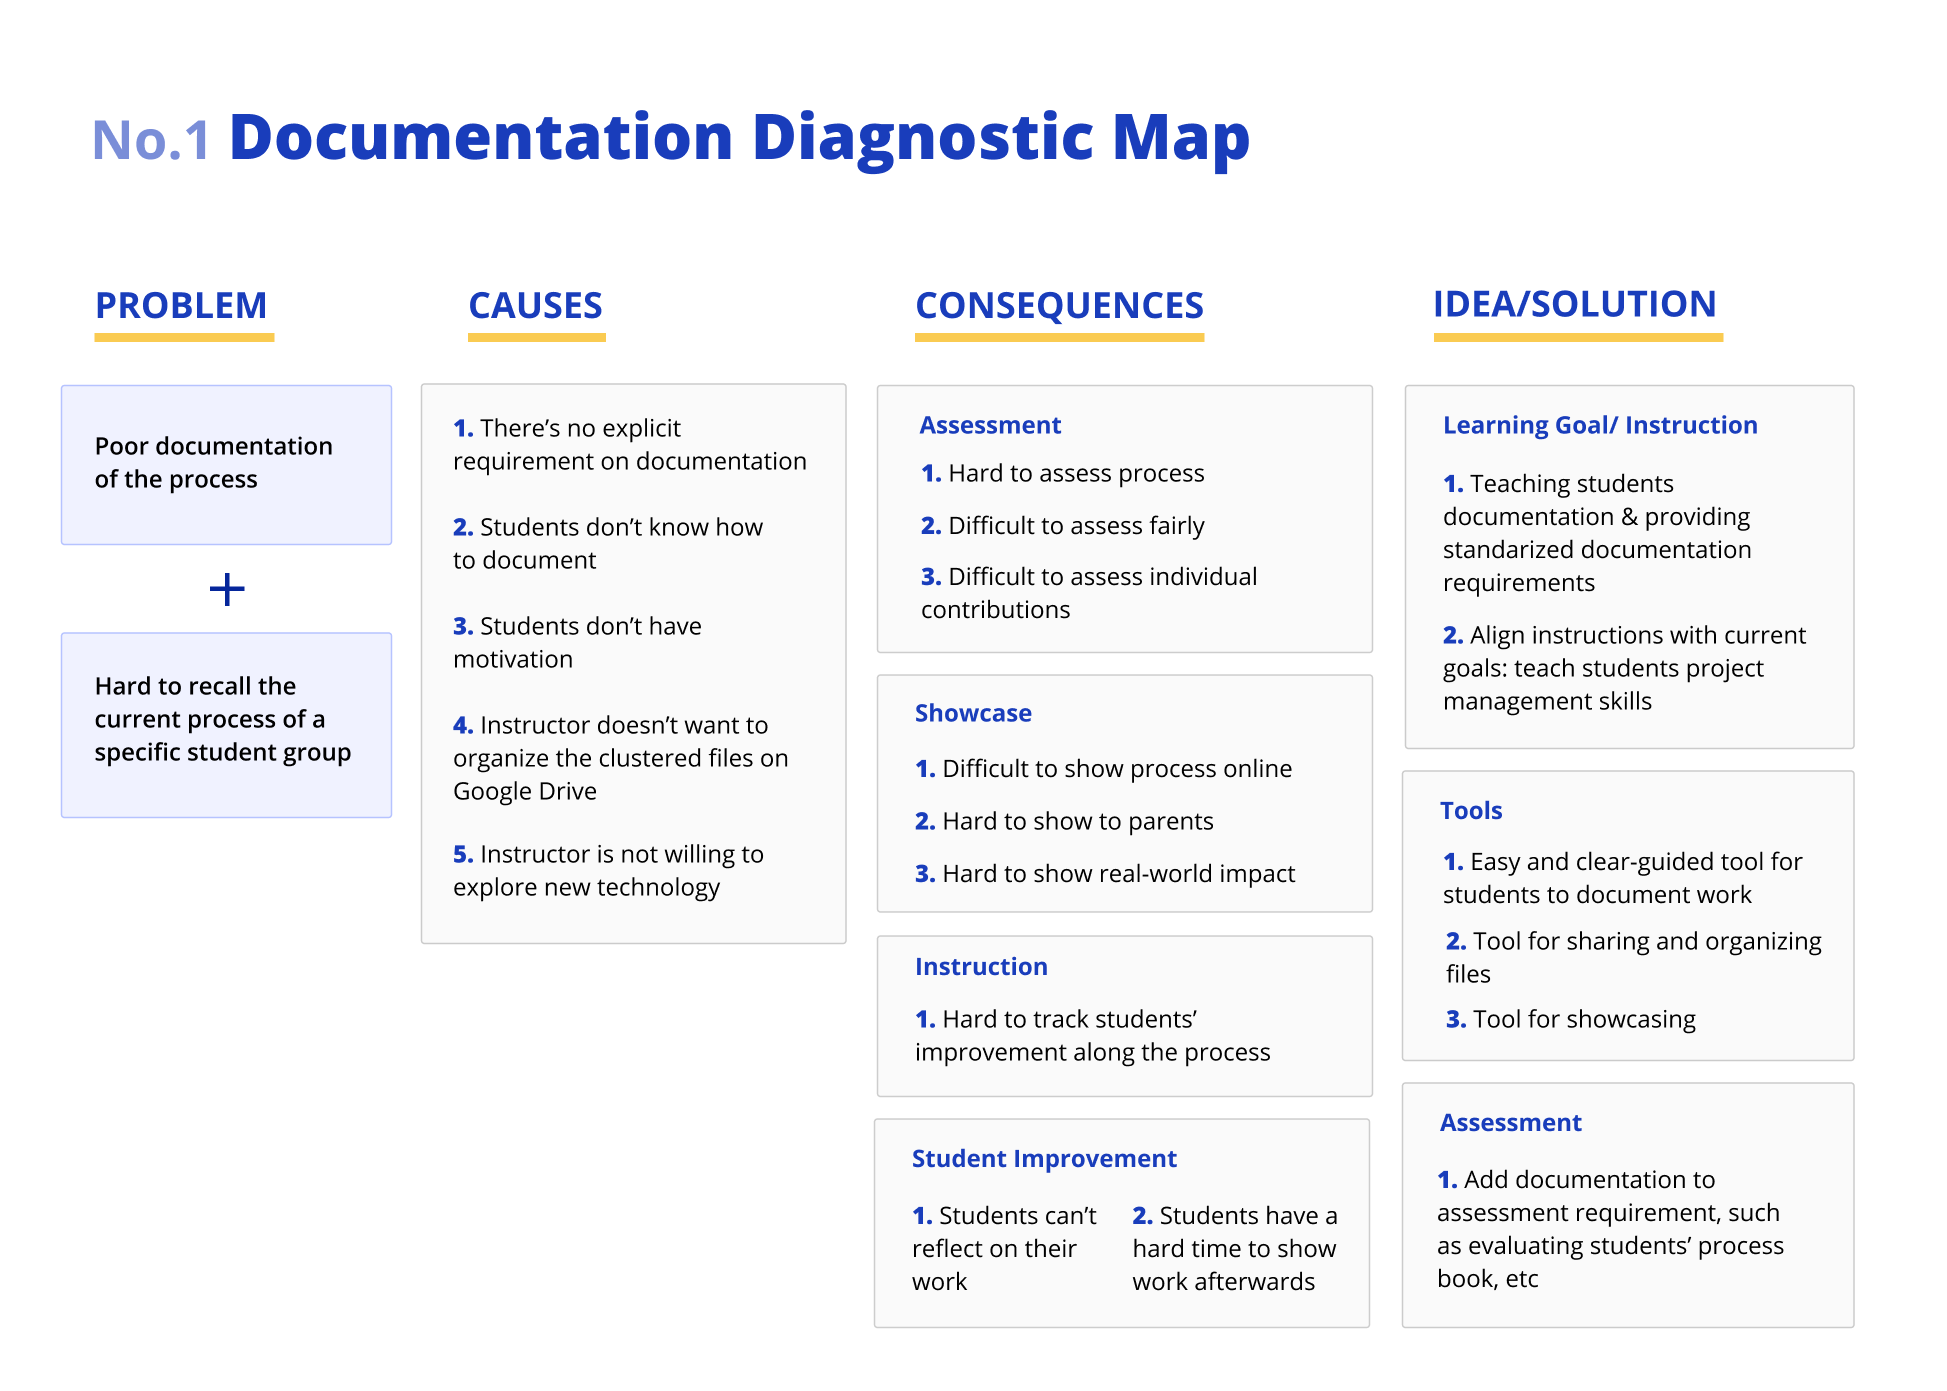
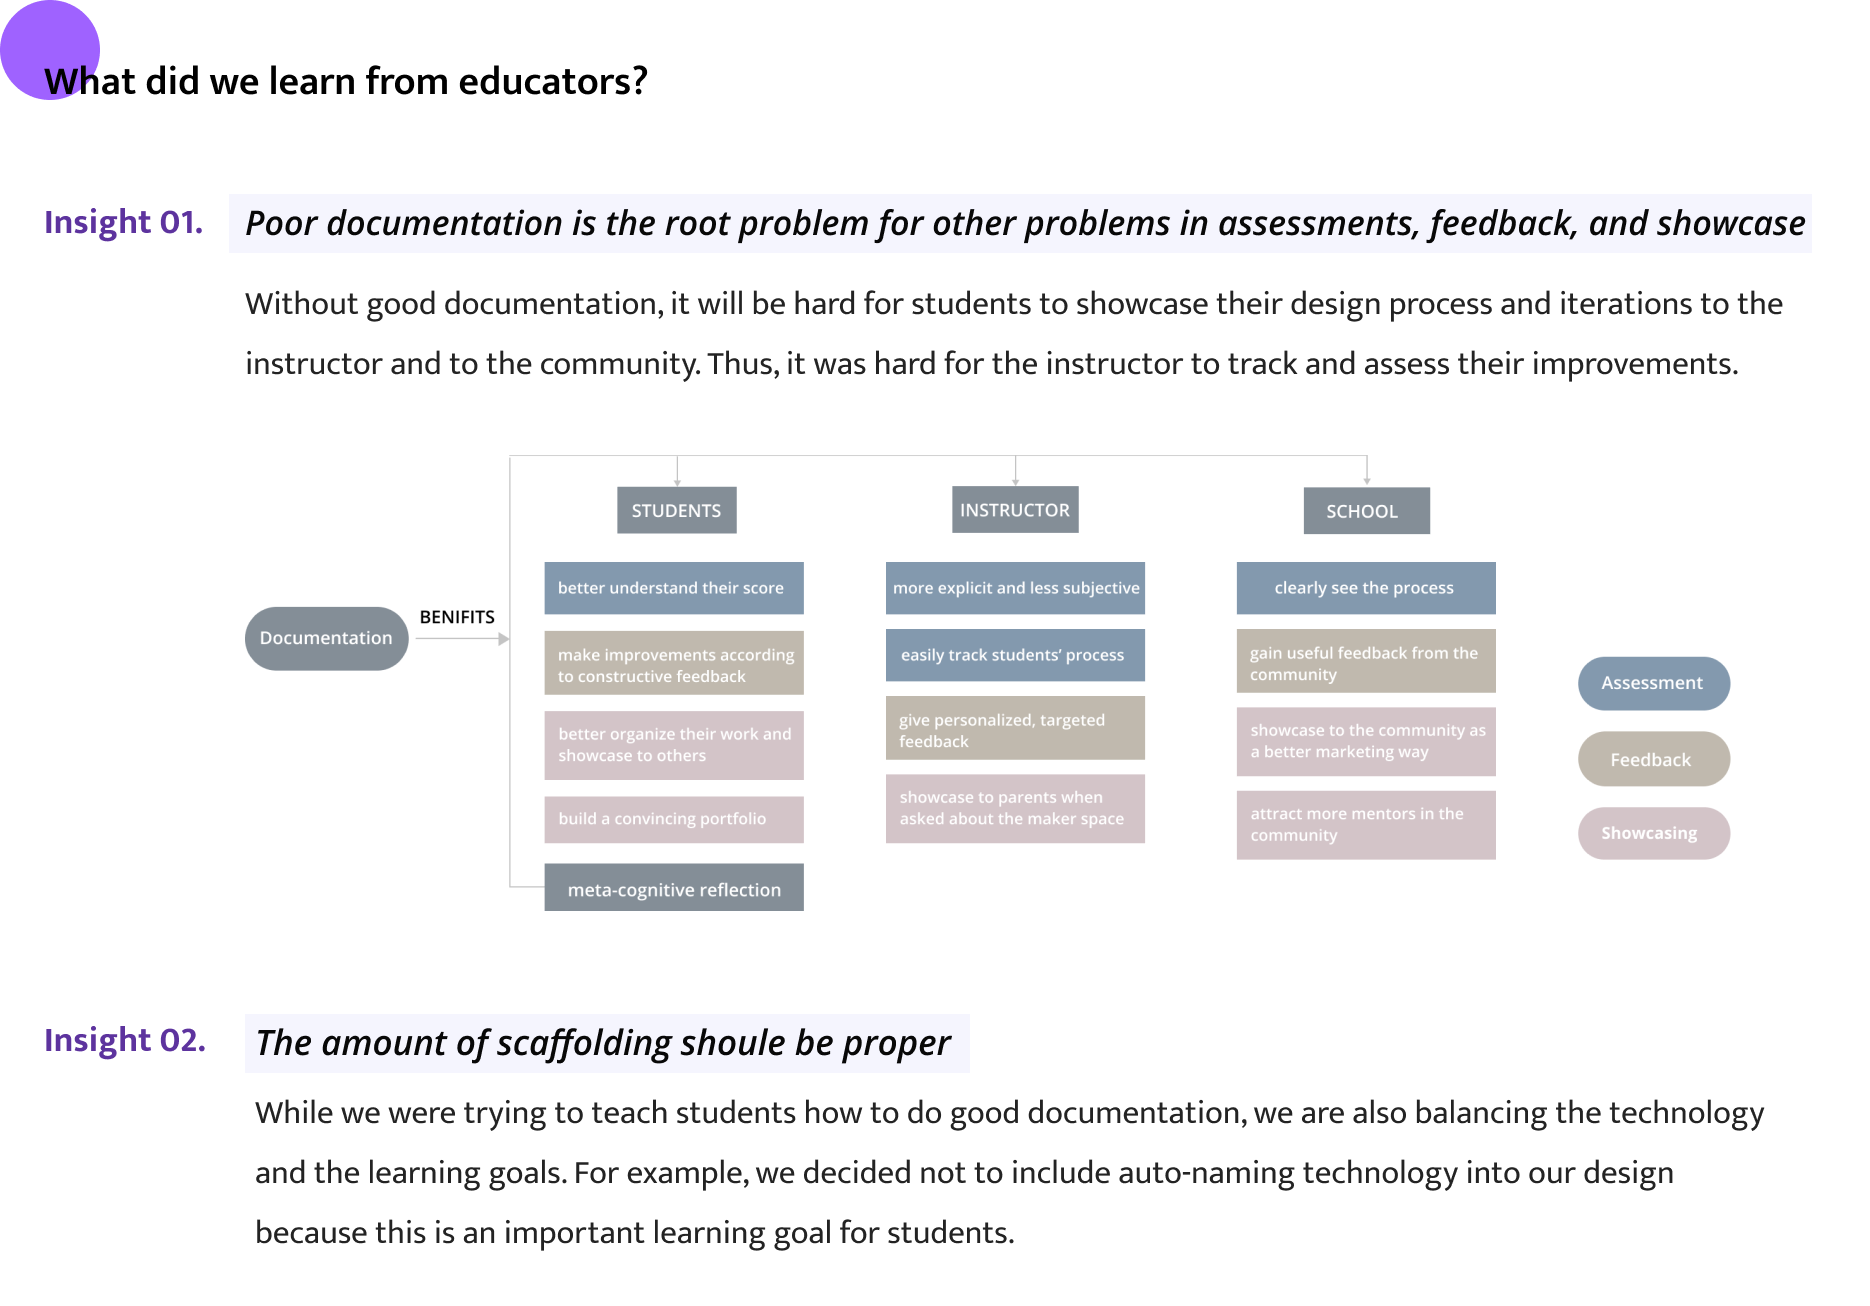
To better understand the relationships among the challenges, we used diagnostic map to analyze the causes, consequences, and possible solutions of the problems, including documentation, assessment, feedback, and showcase. Here’s one example of the diagnostic map — documentation.
● Synthesis

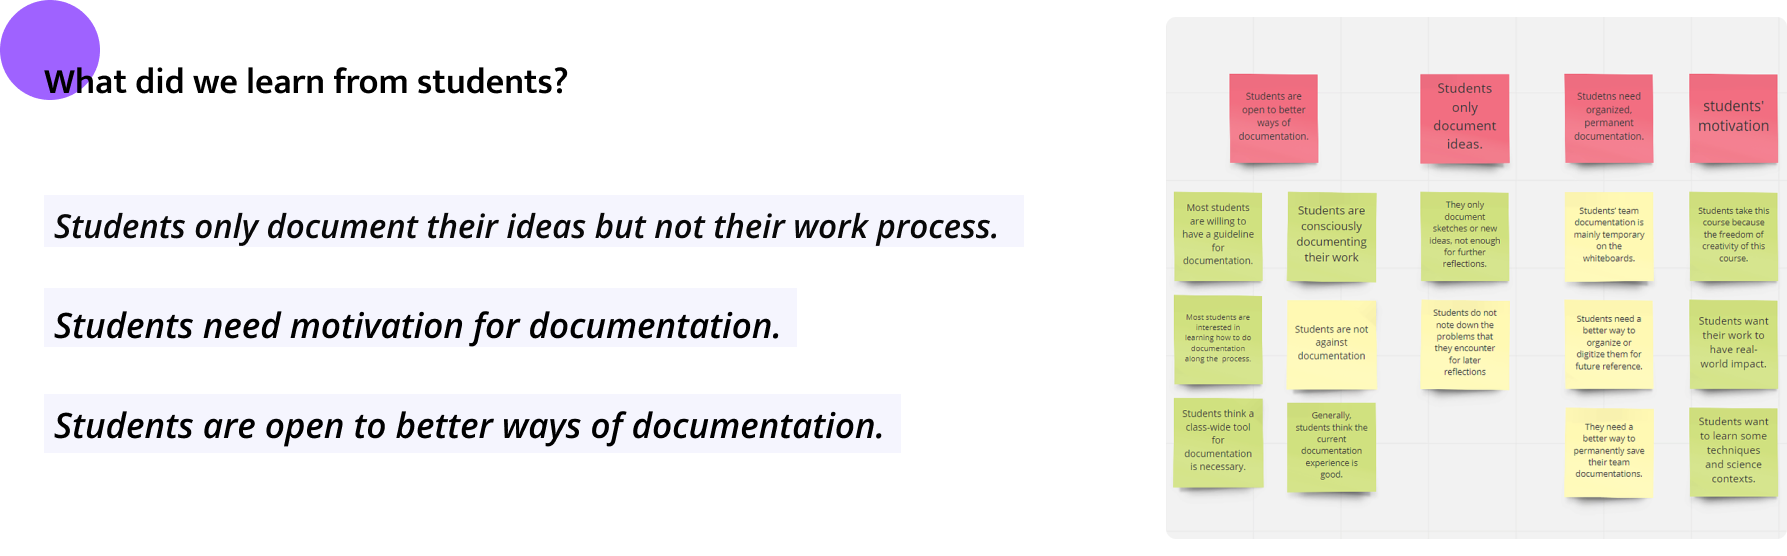
Step 03: Understand students' needs
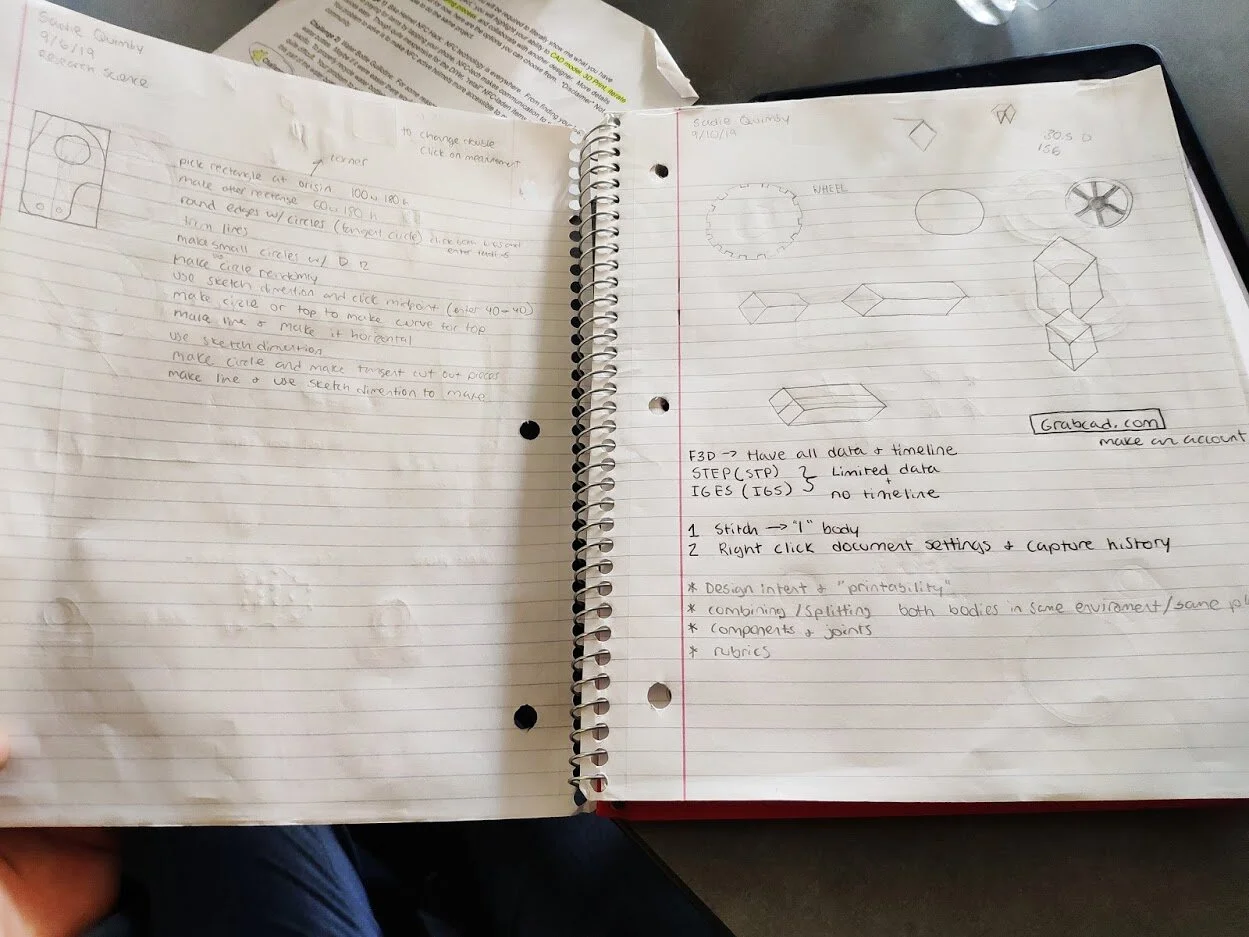
● On-site observations and online surveys
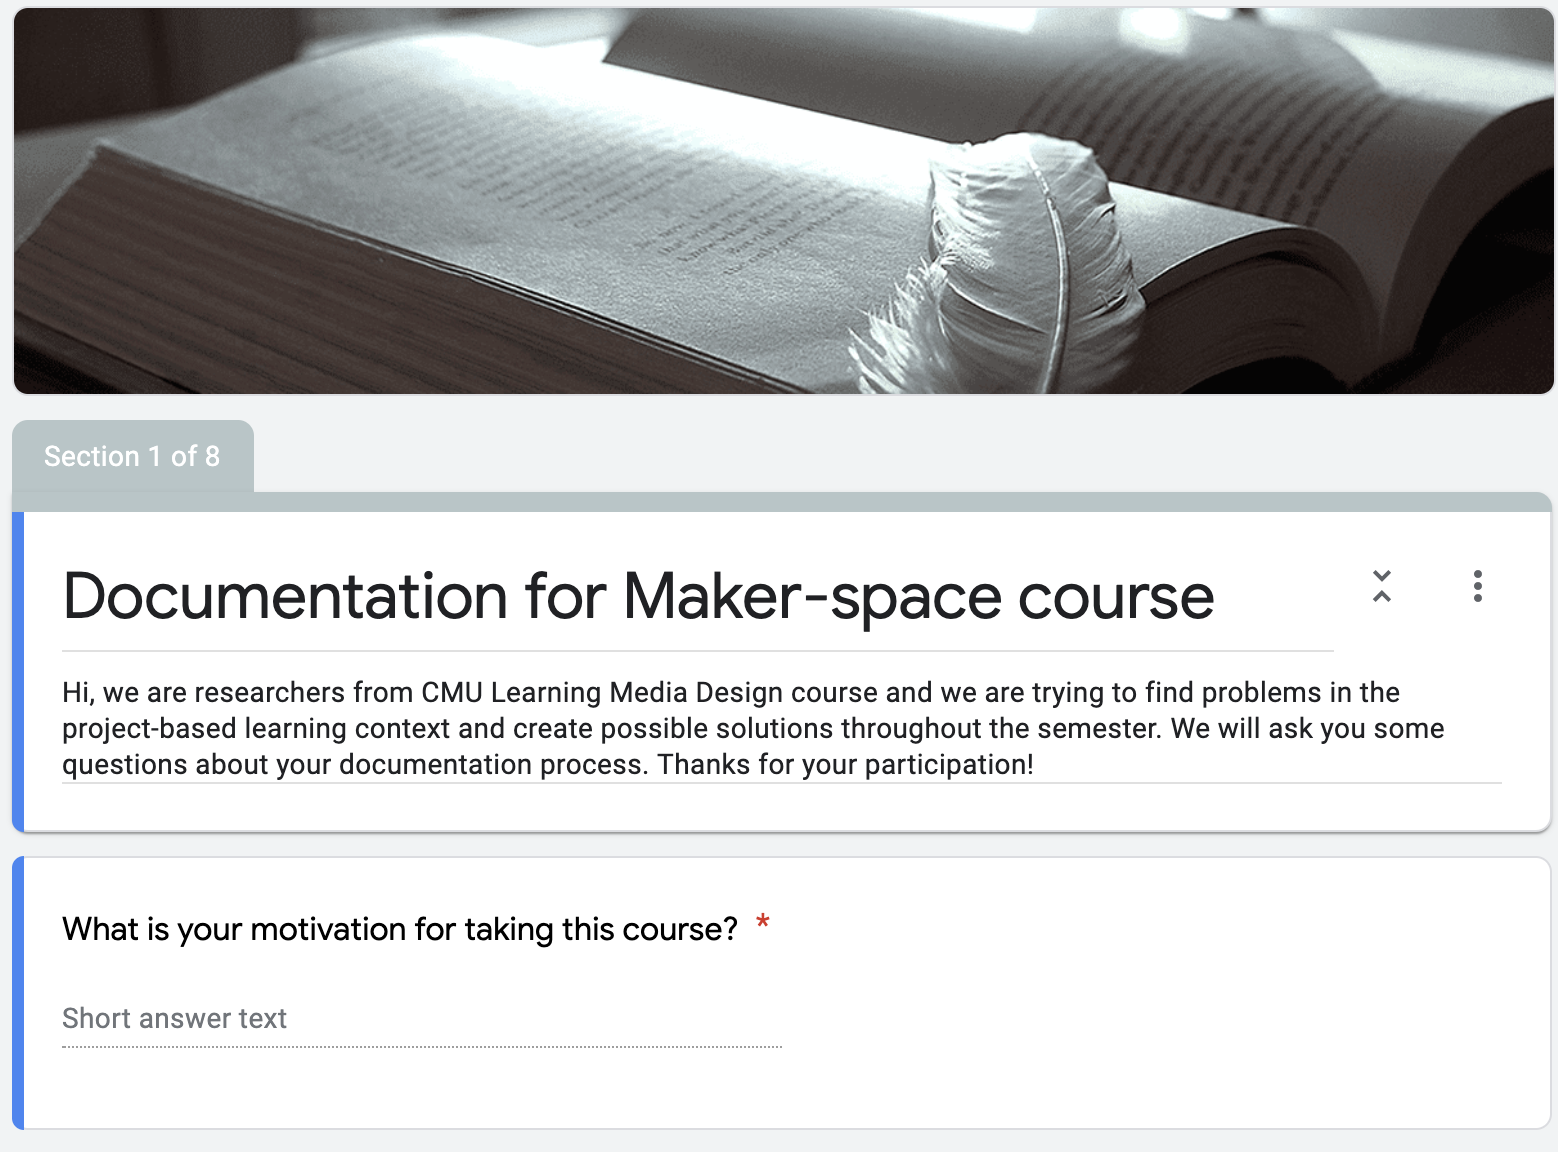
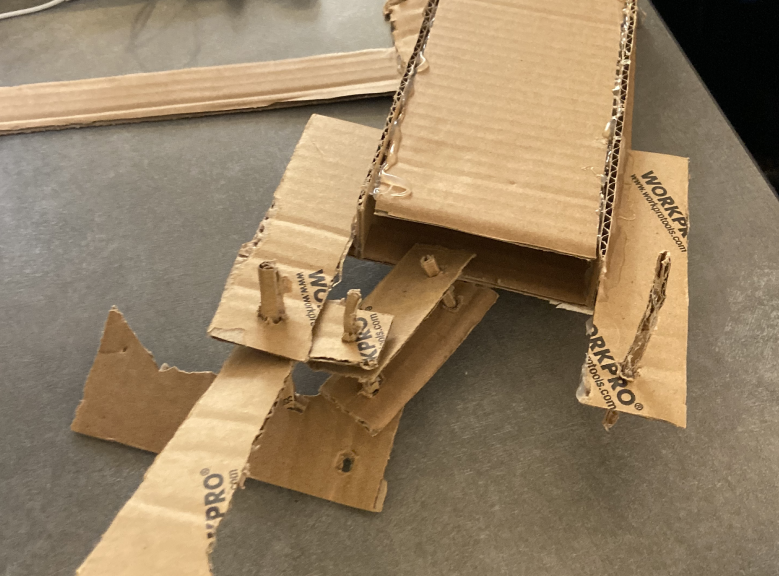
In order to understand current workflow and how students were feeling towards different methods of documentation, we conducted a second round of user study with our end users, students in maker space course, through on-site observations and understand their opinions on documentation through online surveys.
● Synthesis


Step 01: Brainstorming & Storyboarding
We brainstormed 50+ HMW questions and clustered them to two main groups. These storyboards represented different directions of possible design, including low-tech vs. high-tech, learner-centered vs. technology-centered, etc.
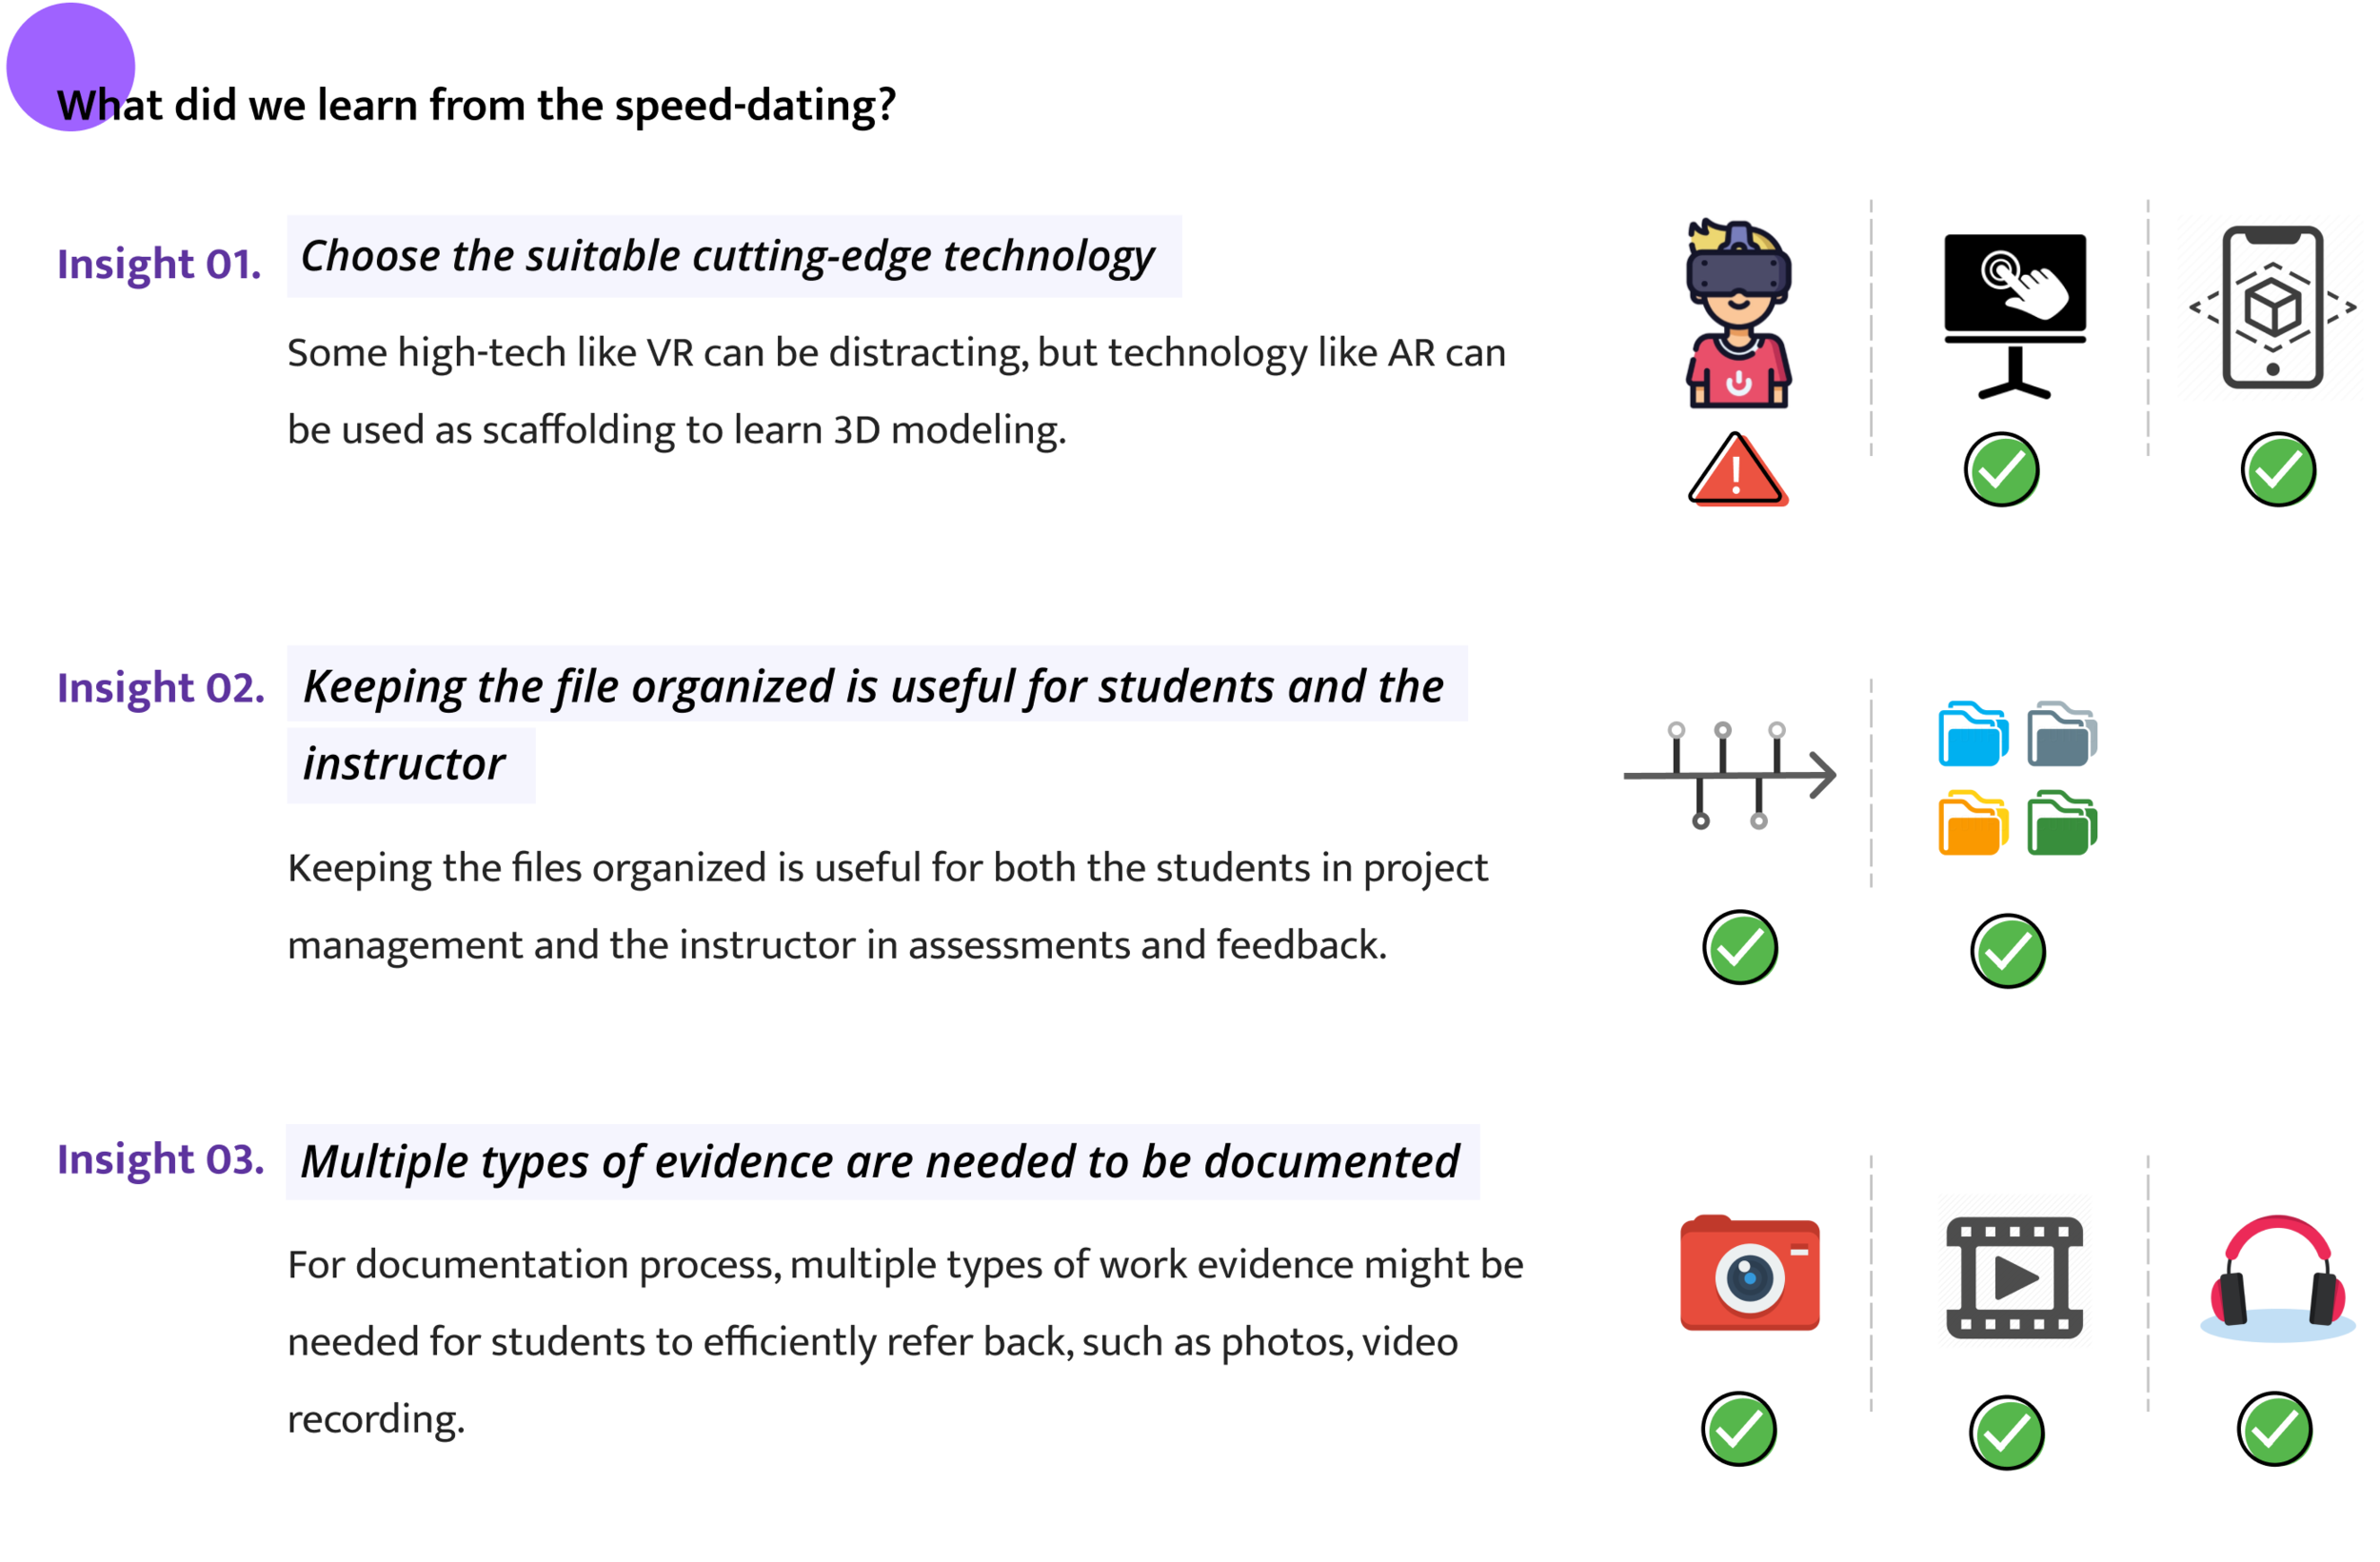
Step 02: Validating Needs through speed-dating
We used the pool of 20+ storyboards for Mr. M to see and conducted a speed dating with him. The intention of the speed-dating session is to help us explore the stakeholders' acceptance of the potential design ideas and see if the design ideas would cater to their needs.
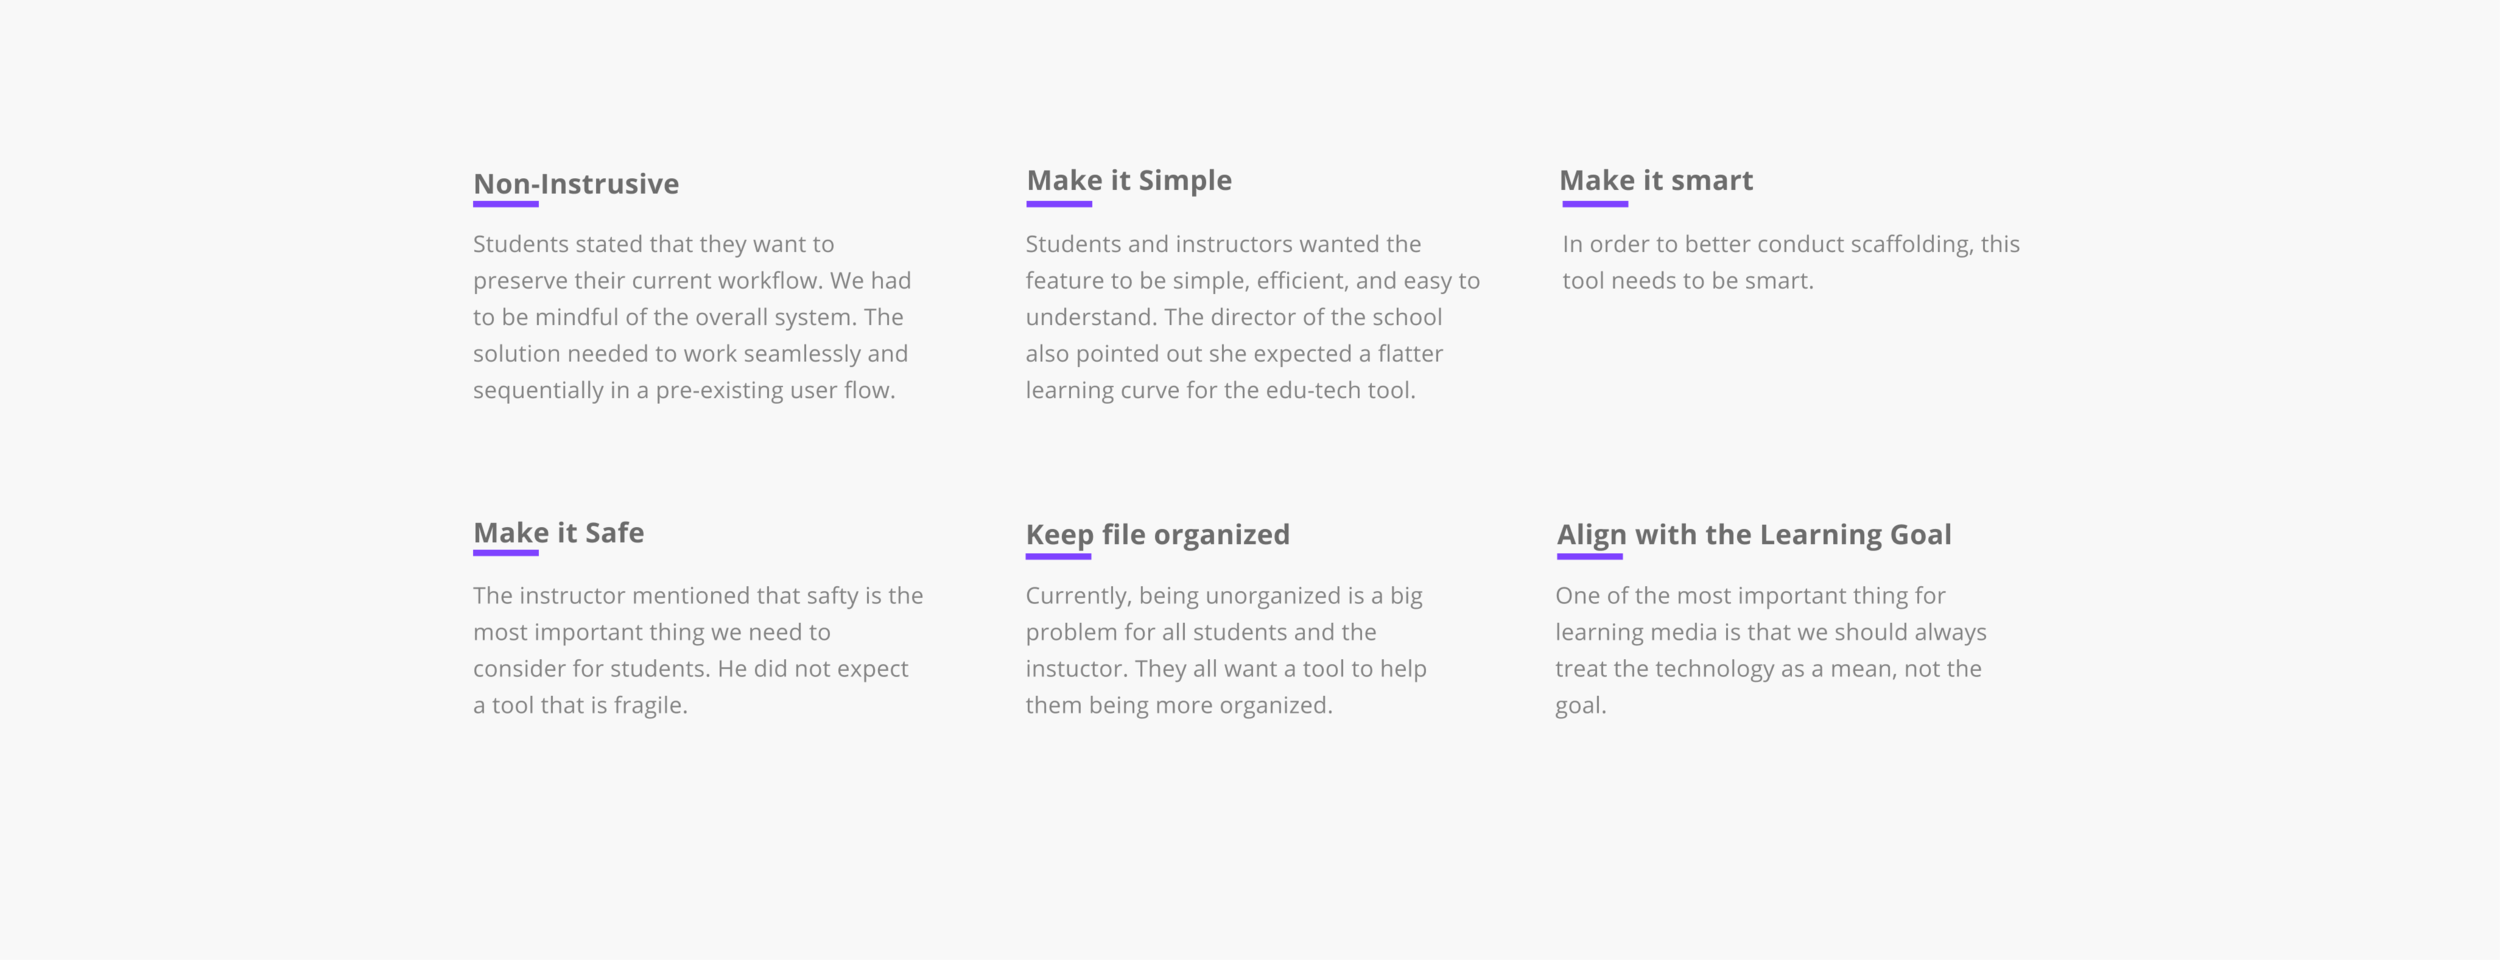
Step 03: Write down design requirements
Thinking through what students would need during their working process and through the discussion with their instructor, we determined design requirements for the solution. We did so to ensure we were holding ourselves accountable to referring back to the data learned in research, and to use these requirements as our guiding principles as we moved onto brainstorming.
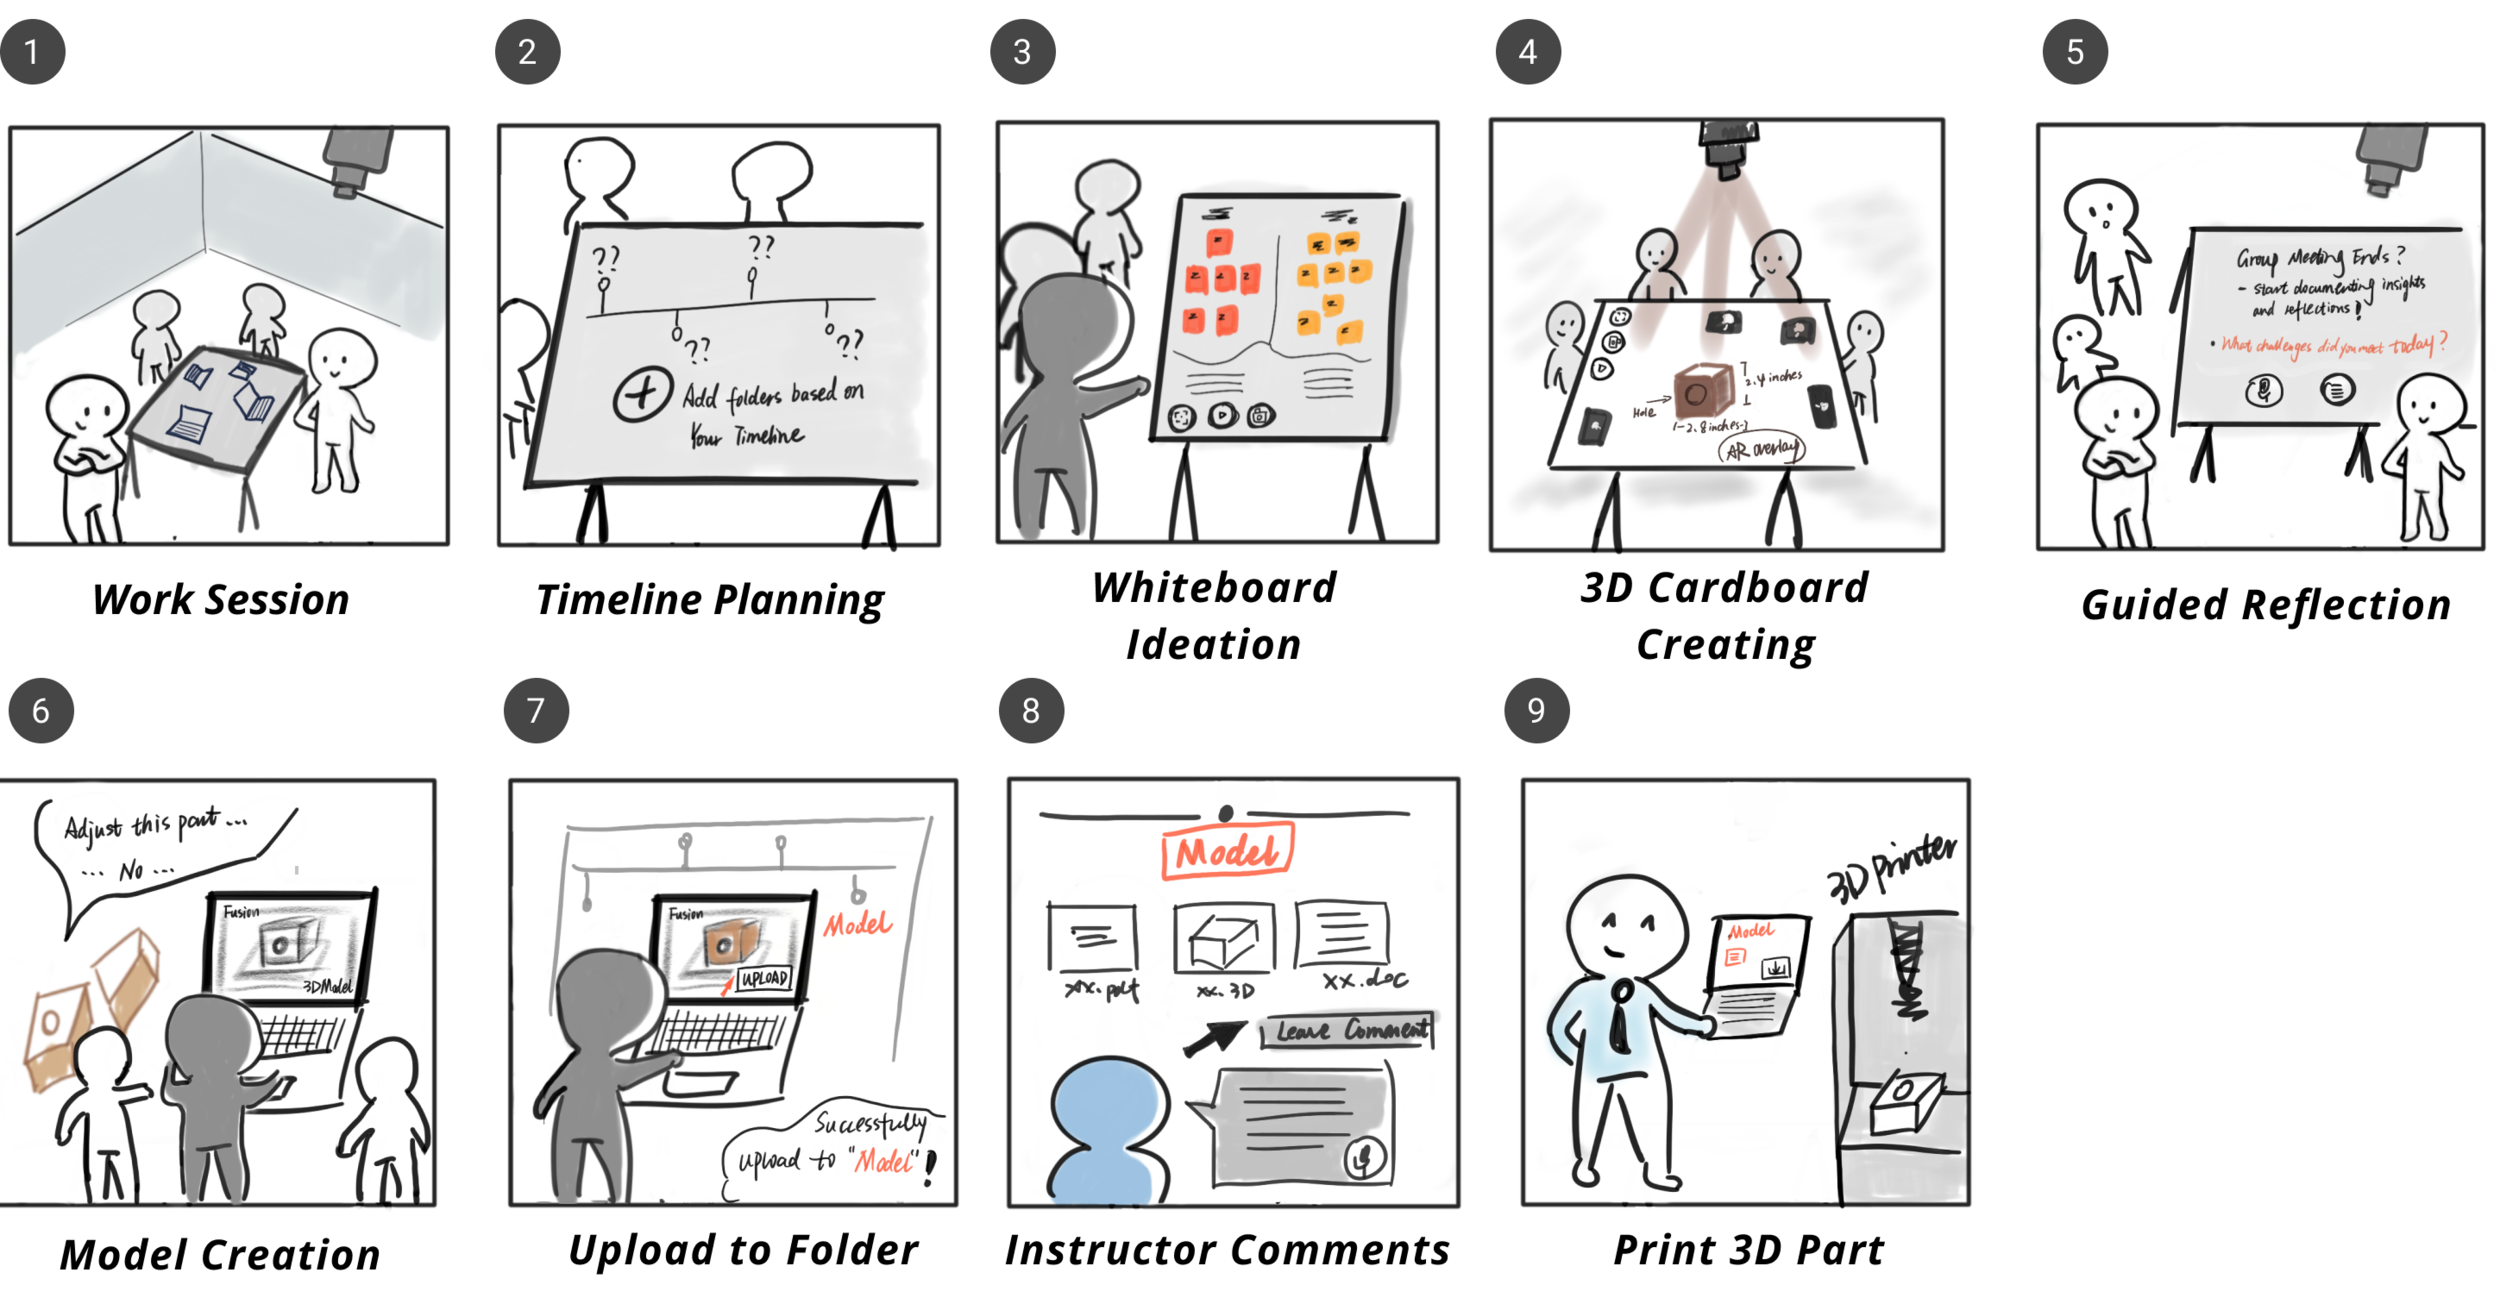
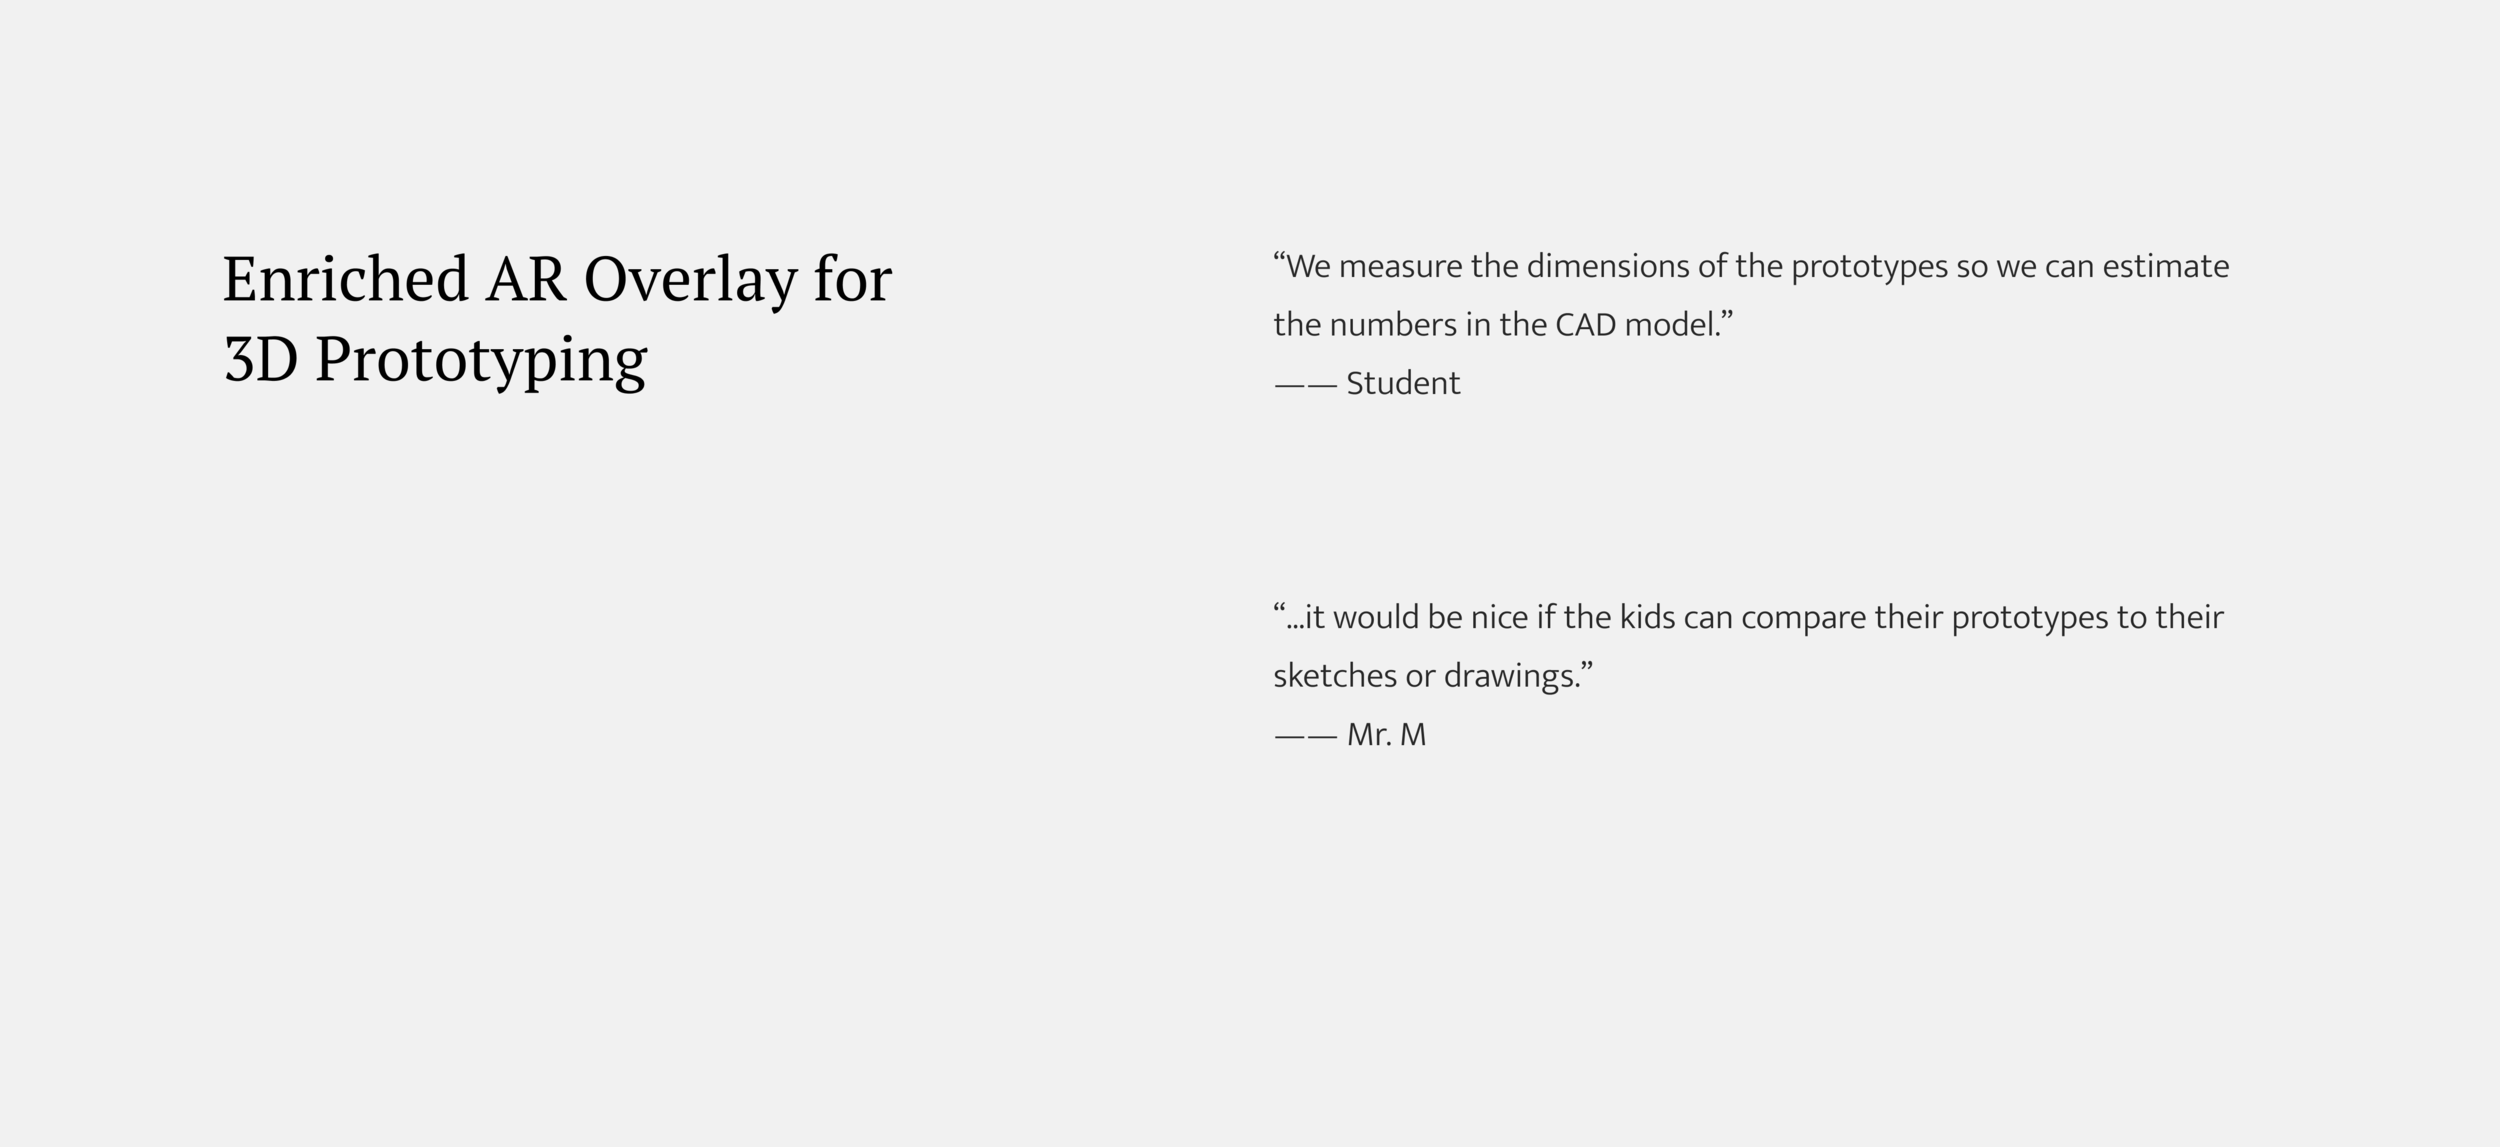
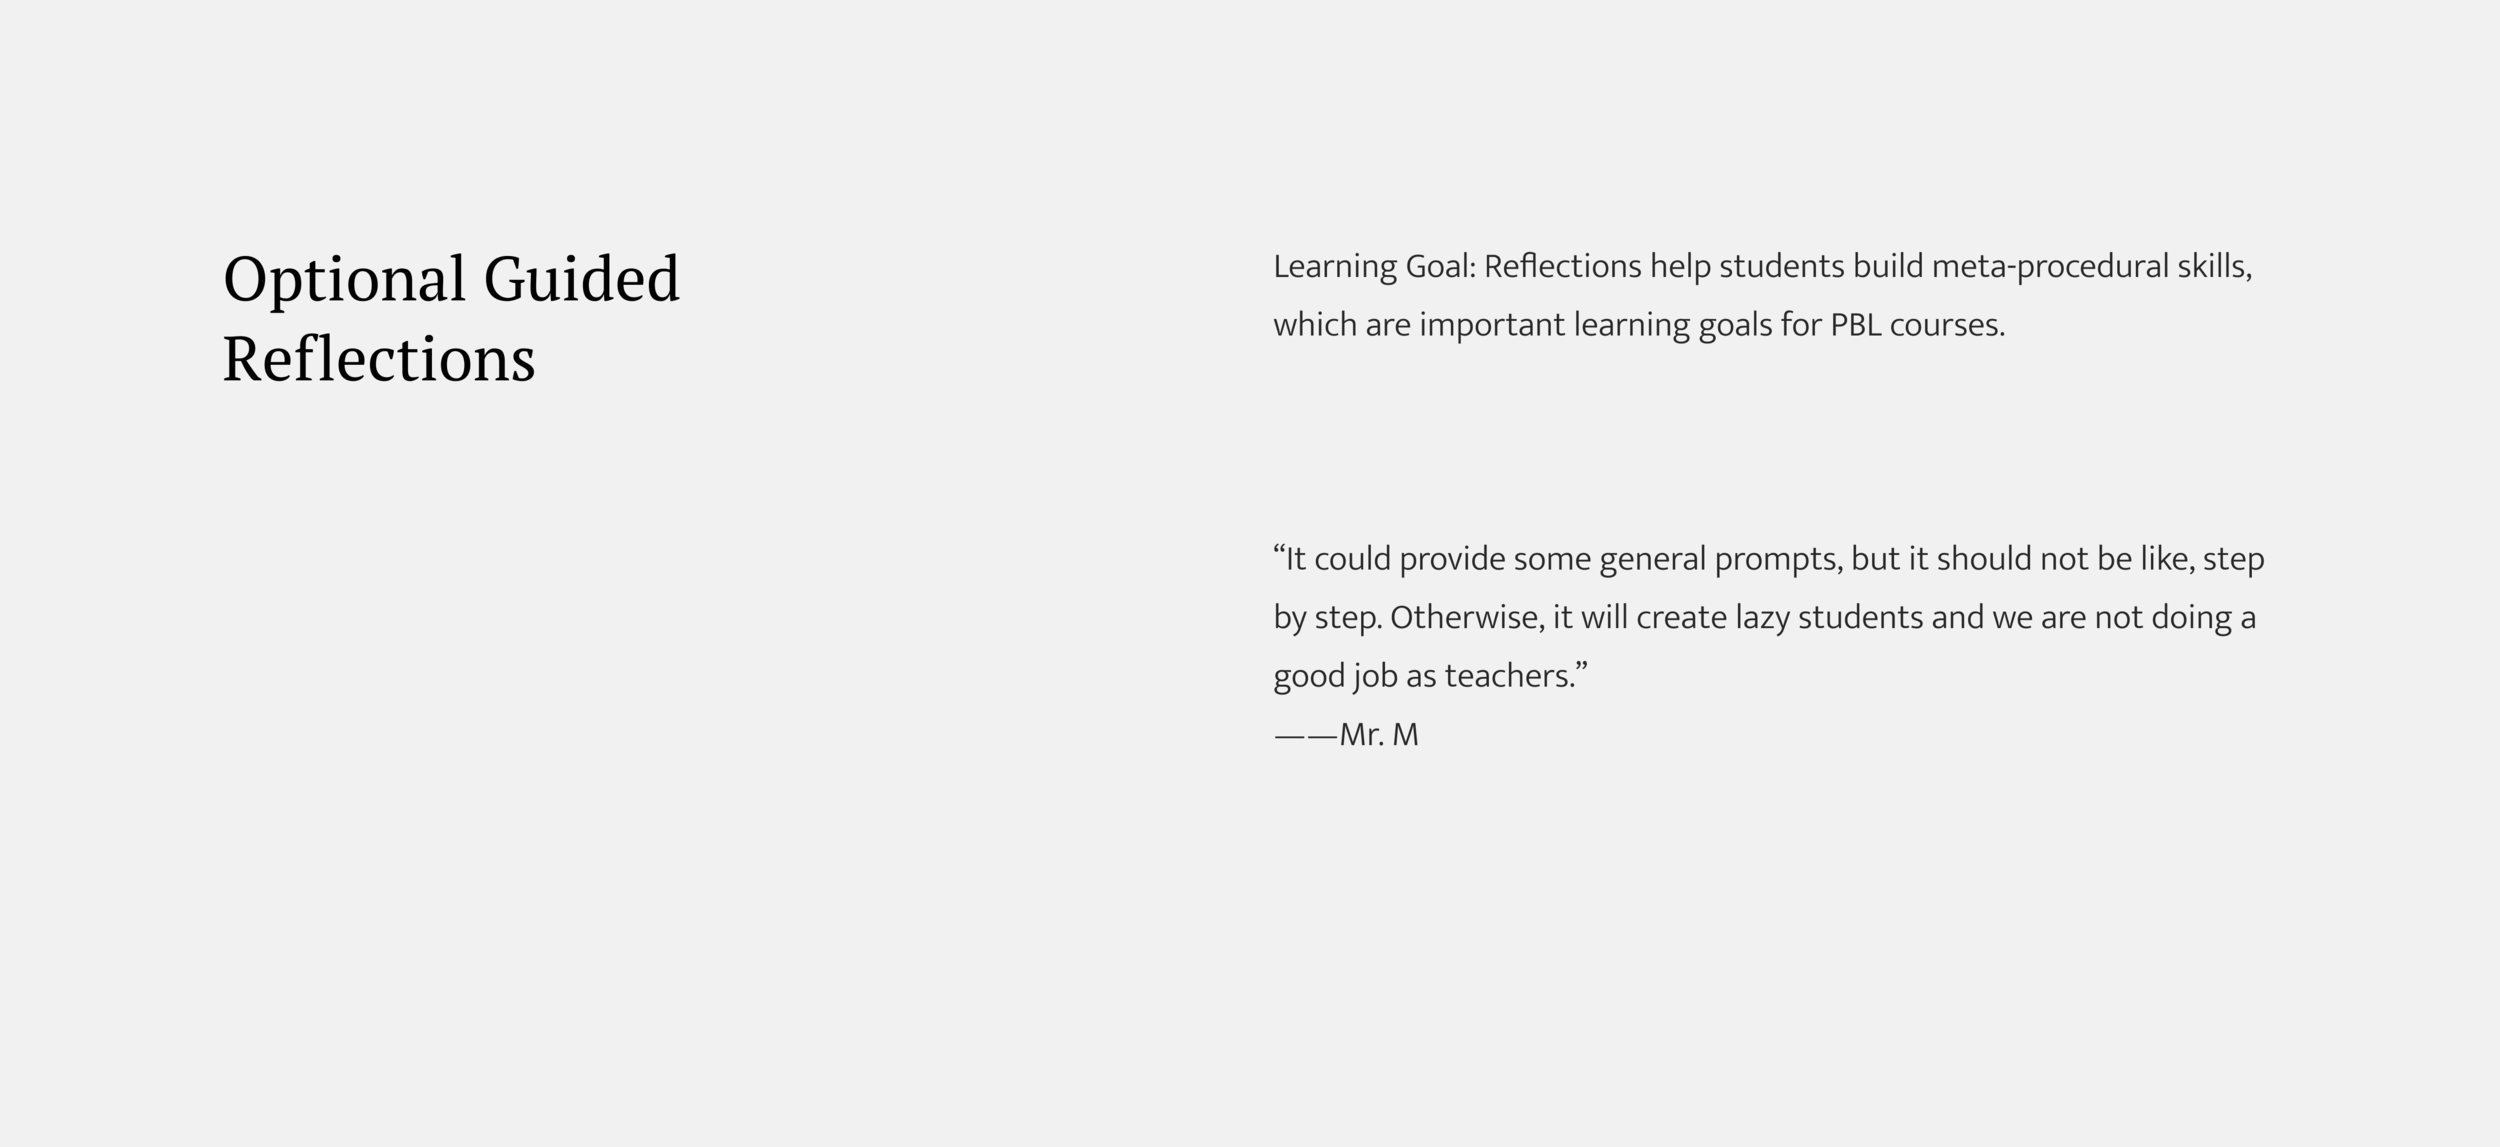
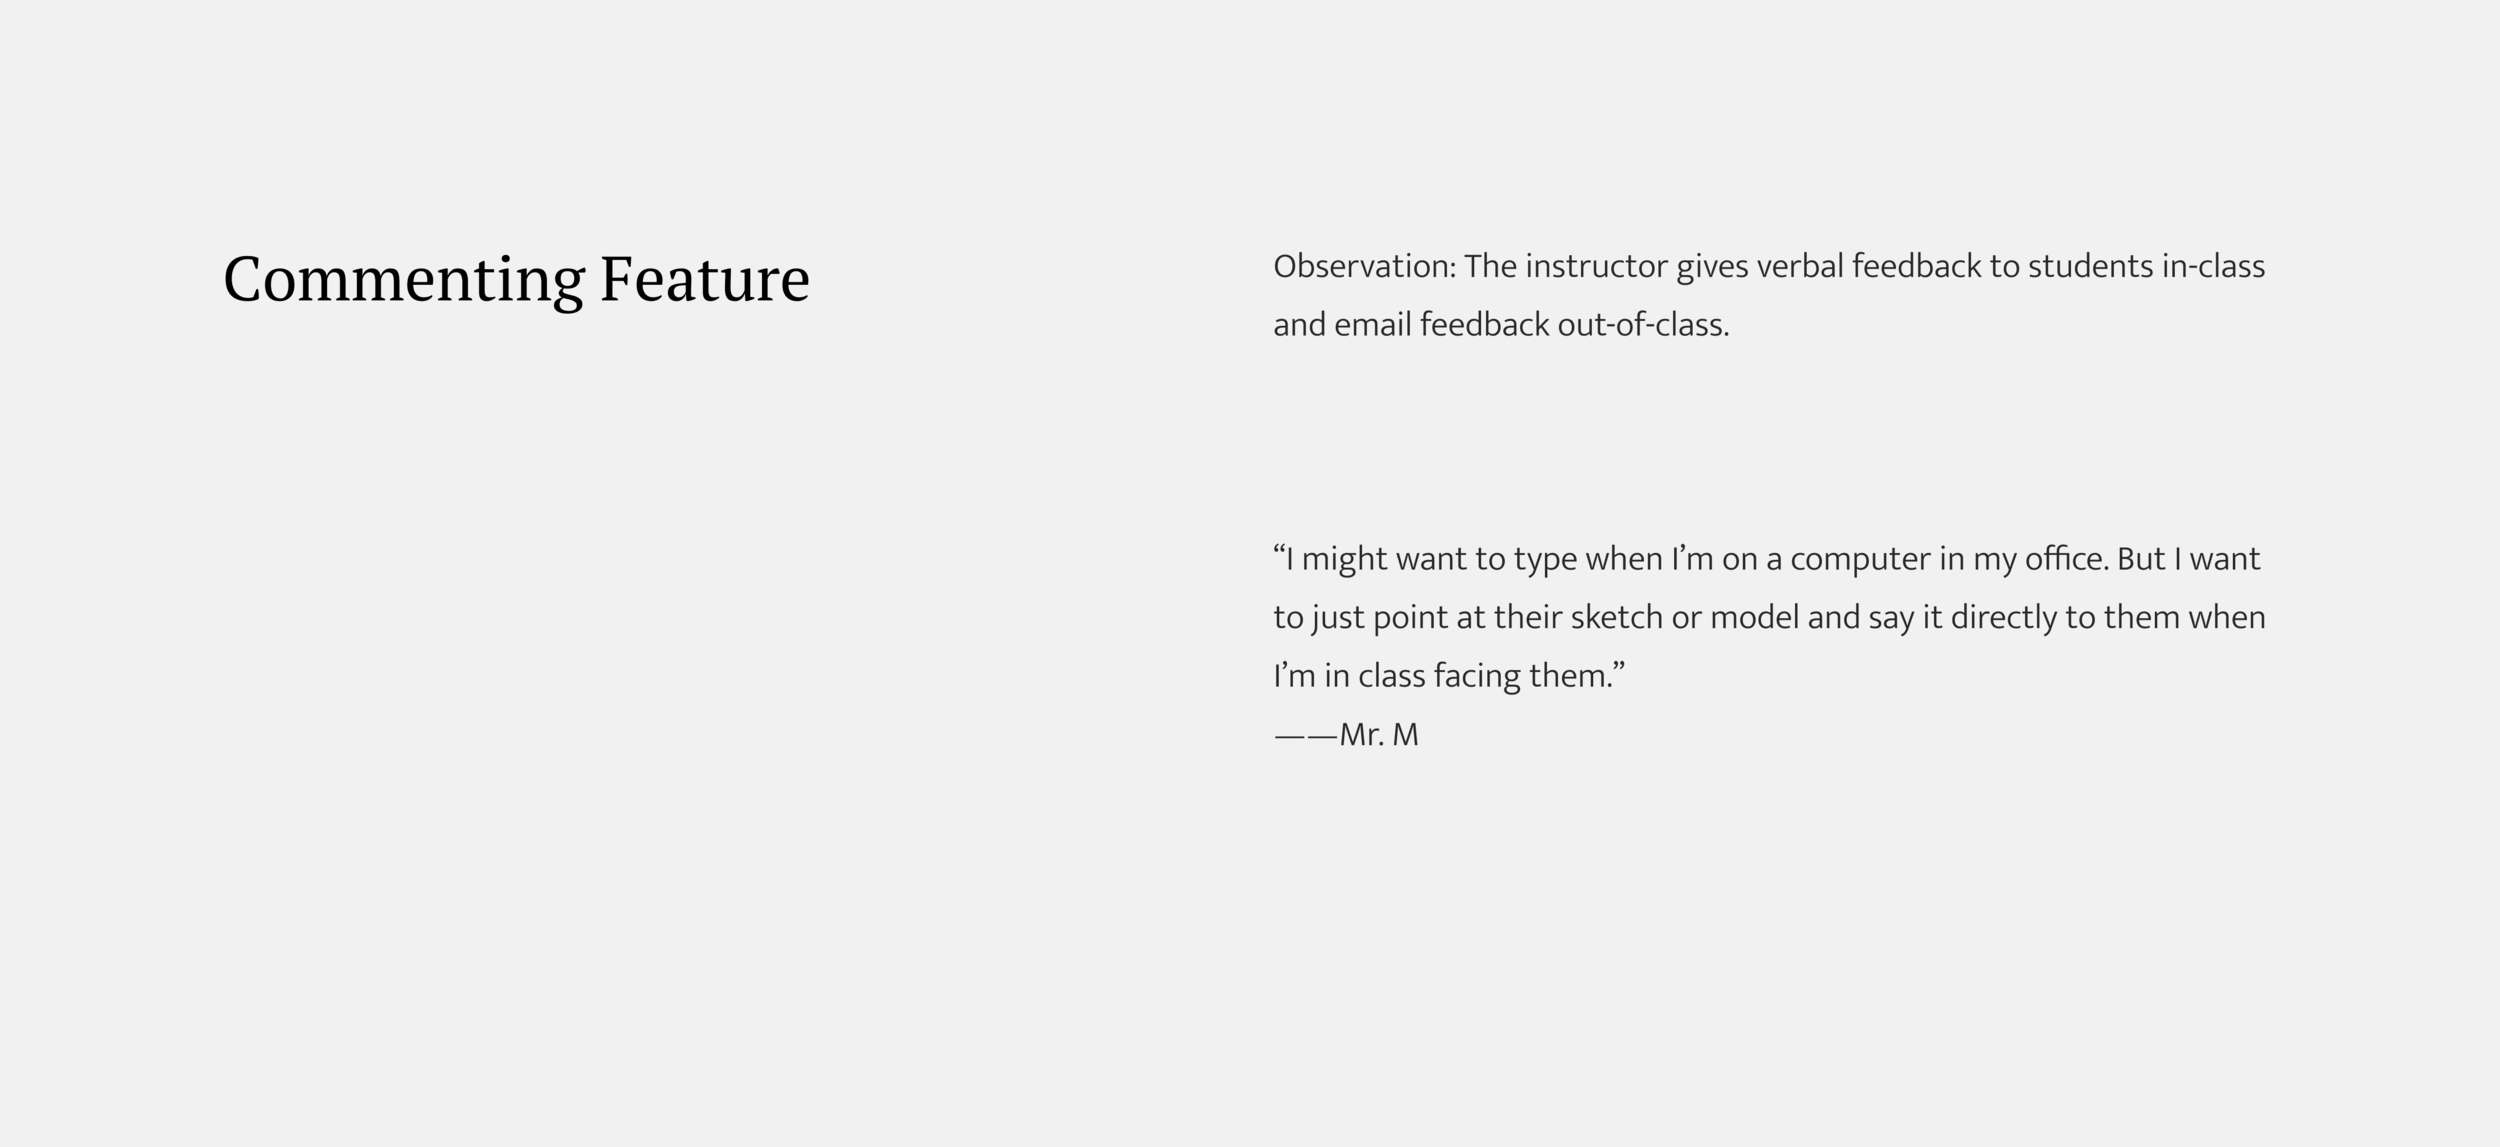
Step 04: Make design decision: main features
Based on our previous research, we made our design decisions regarding the main features of our design. Here, I will use a concept visual walkthrough step 1 to 9 of how students and the instructor interact with Launch.
*I made sure that each design decision was supported by the evidence:

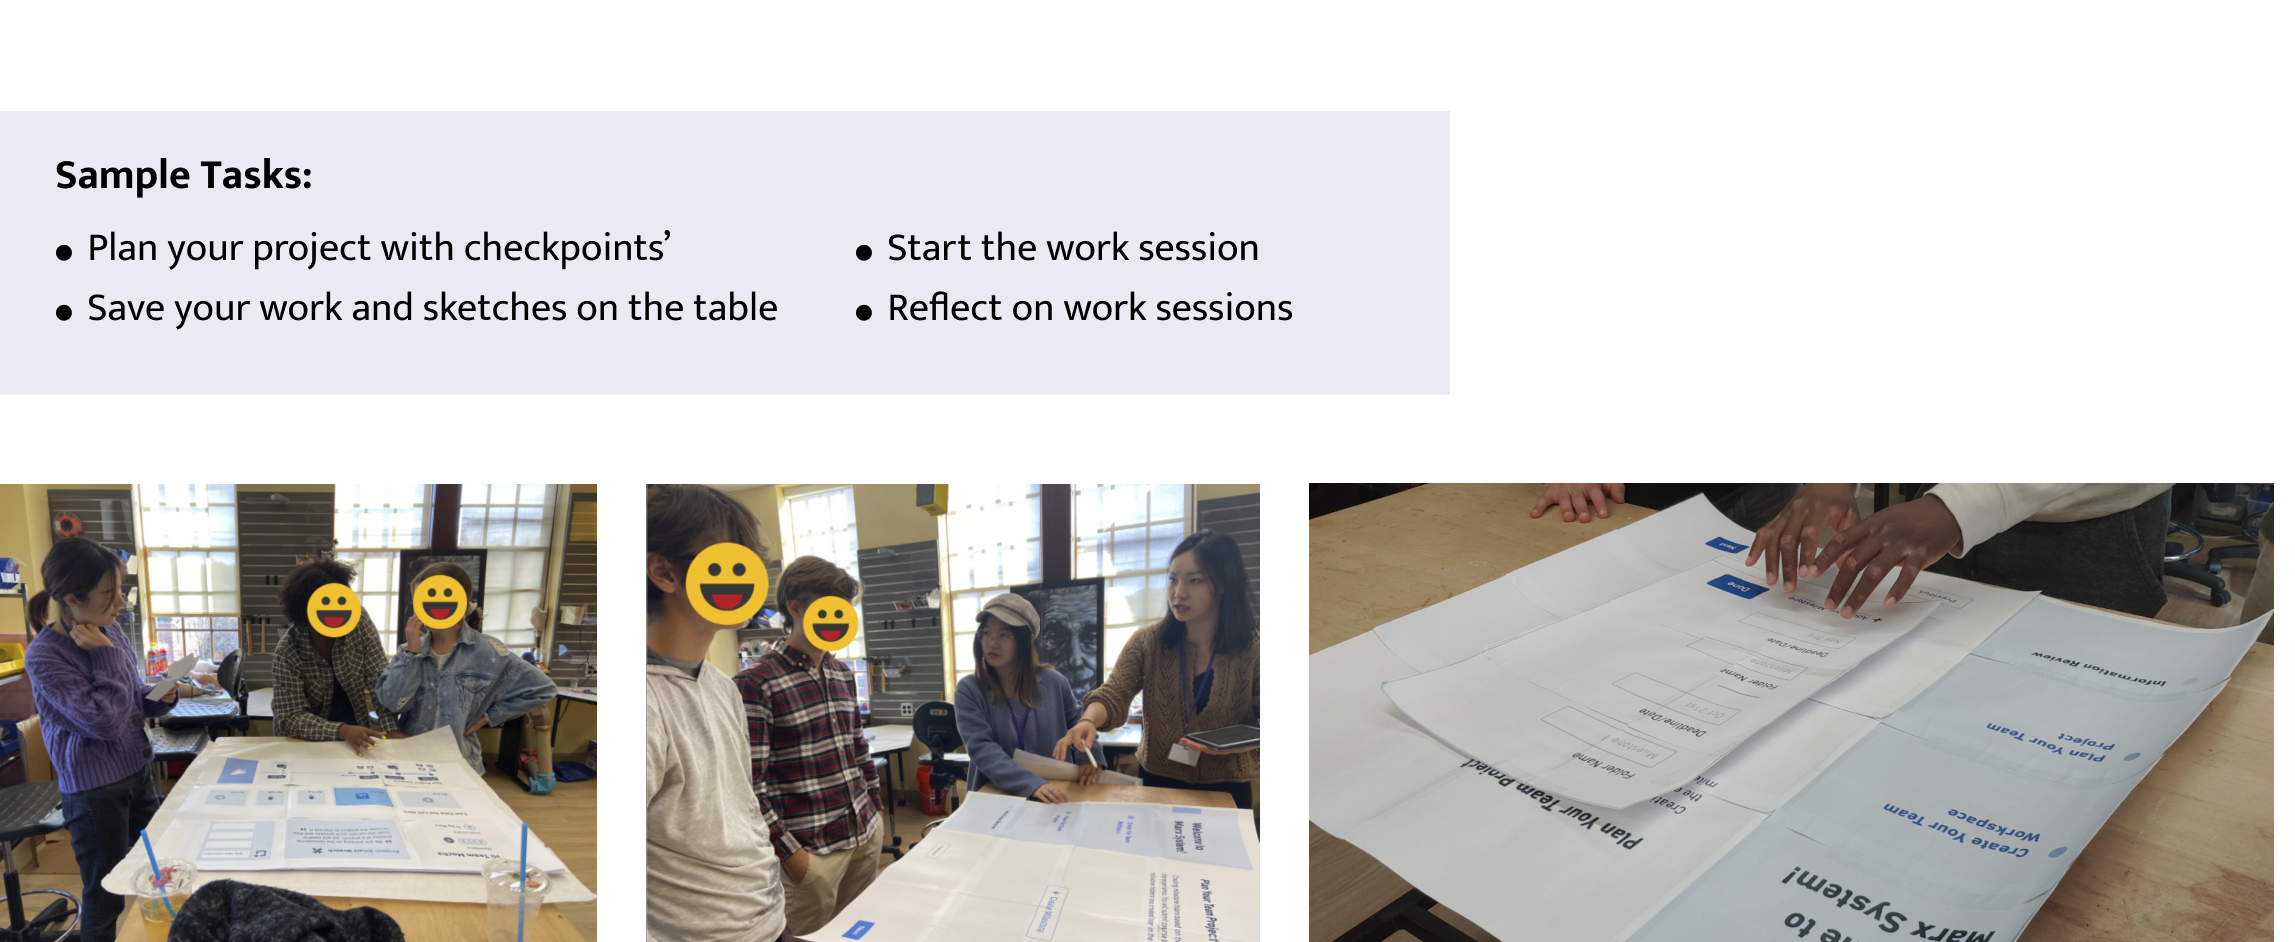
Low -fidelity prototype & Wizard-of-Oz testing
For low-fi prototyping, we were mainly focused on the role of our design in students’ learning experience. We did paper prototyping to test the flow of our design solution. We tested with the students’ in a Wizard-Of-Oz style and having them think aloud while trying to complete a set of tasks.
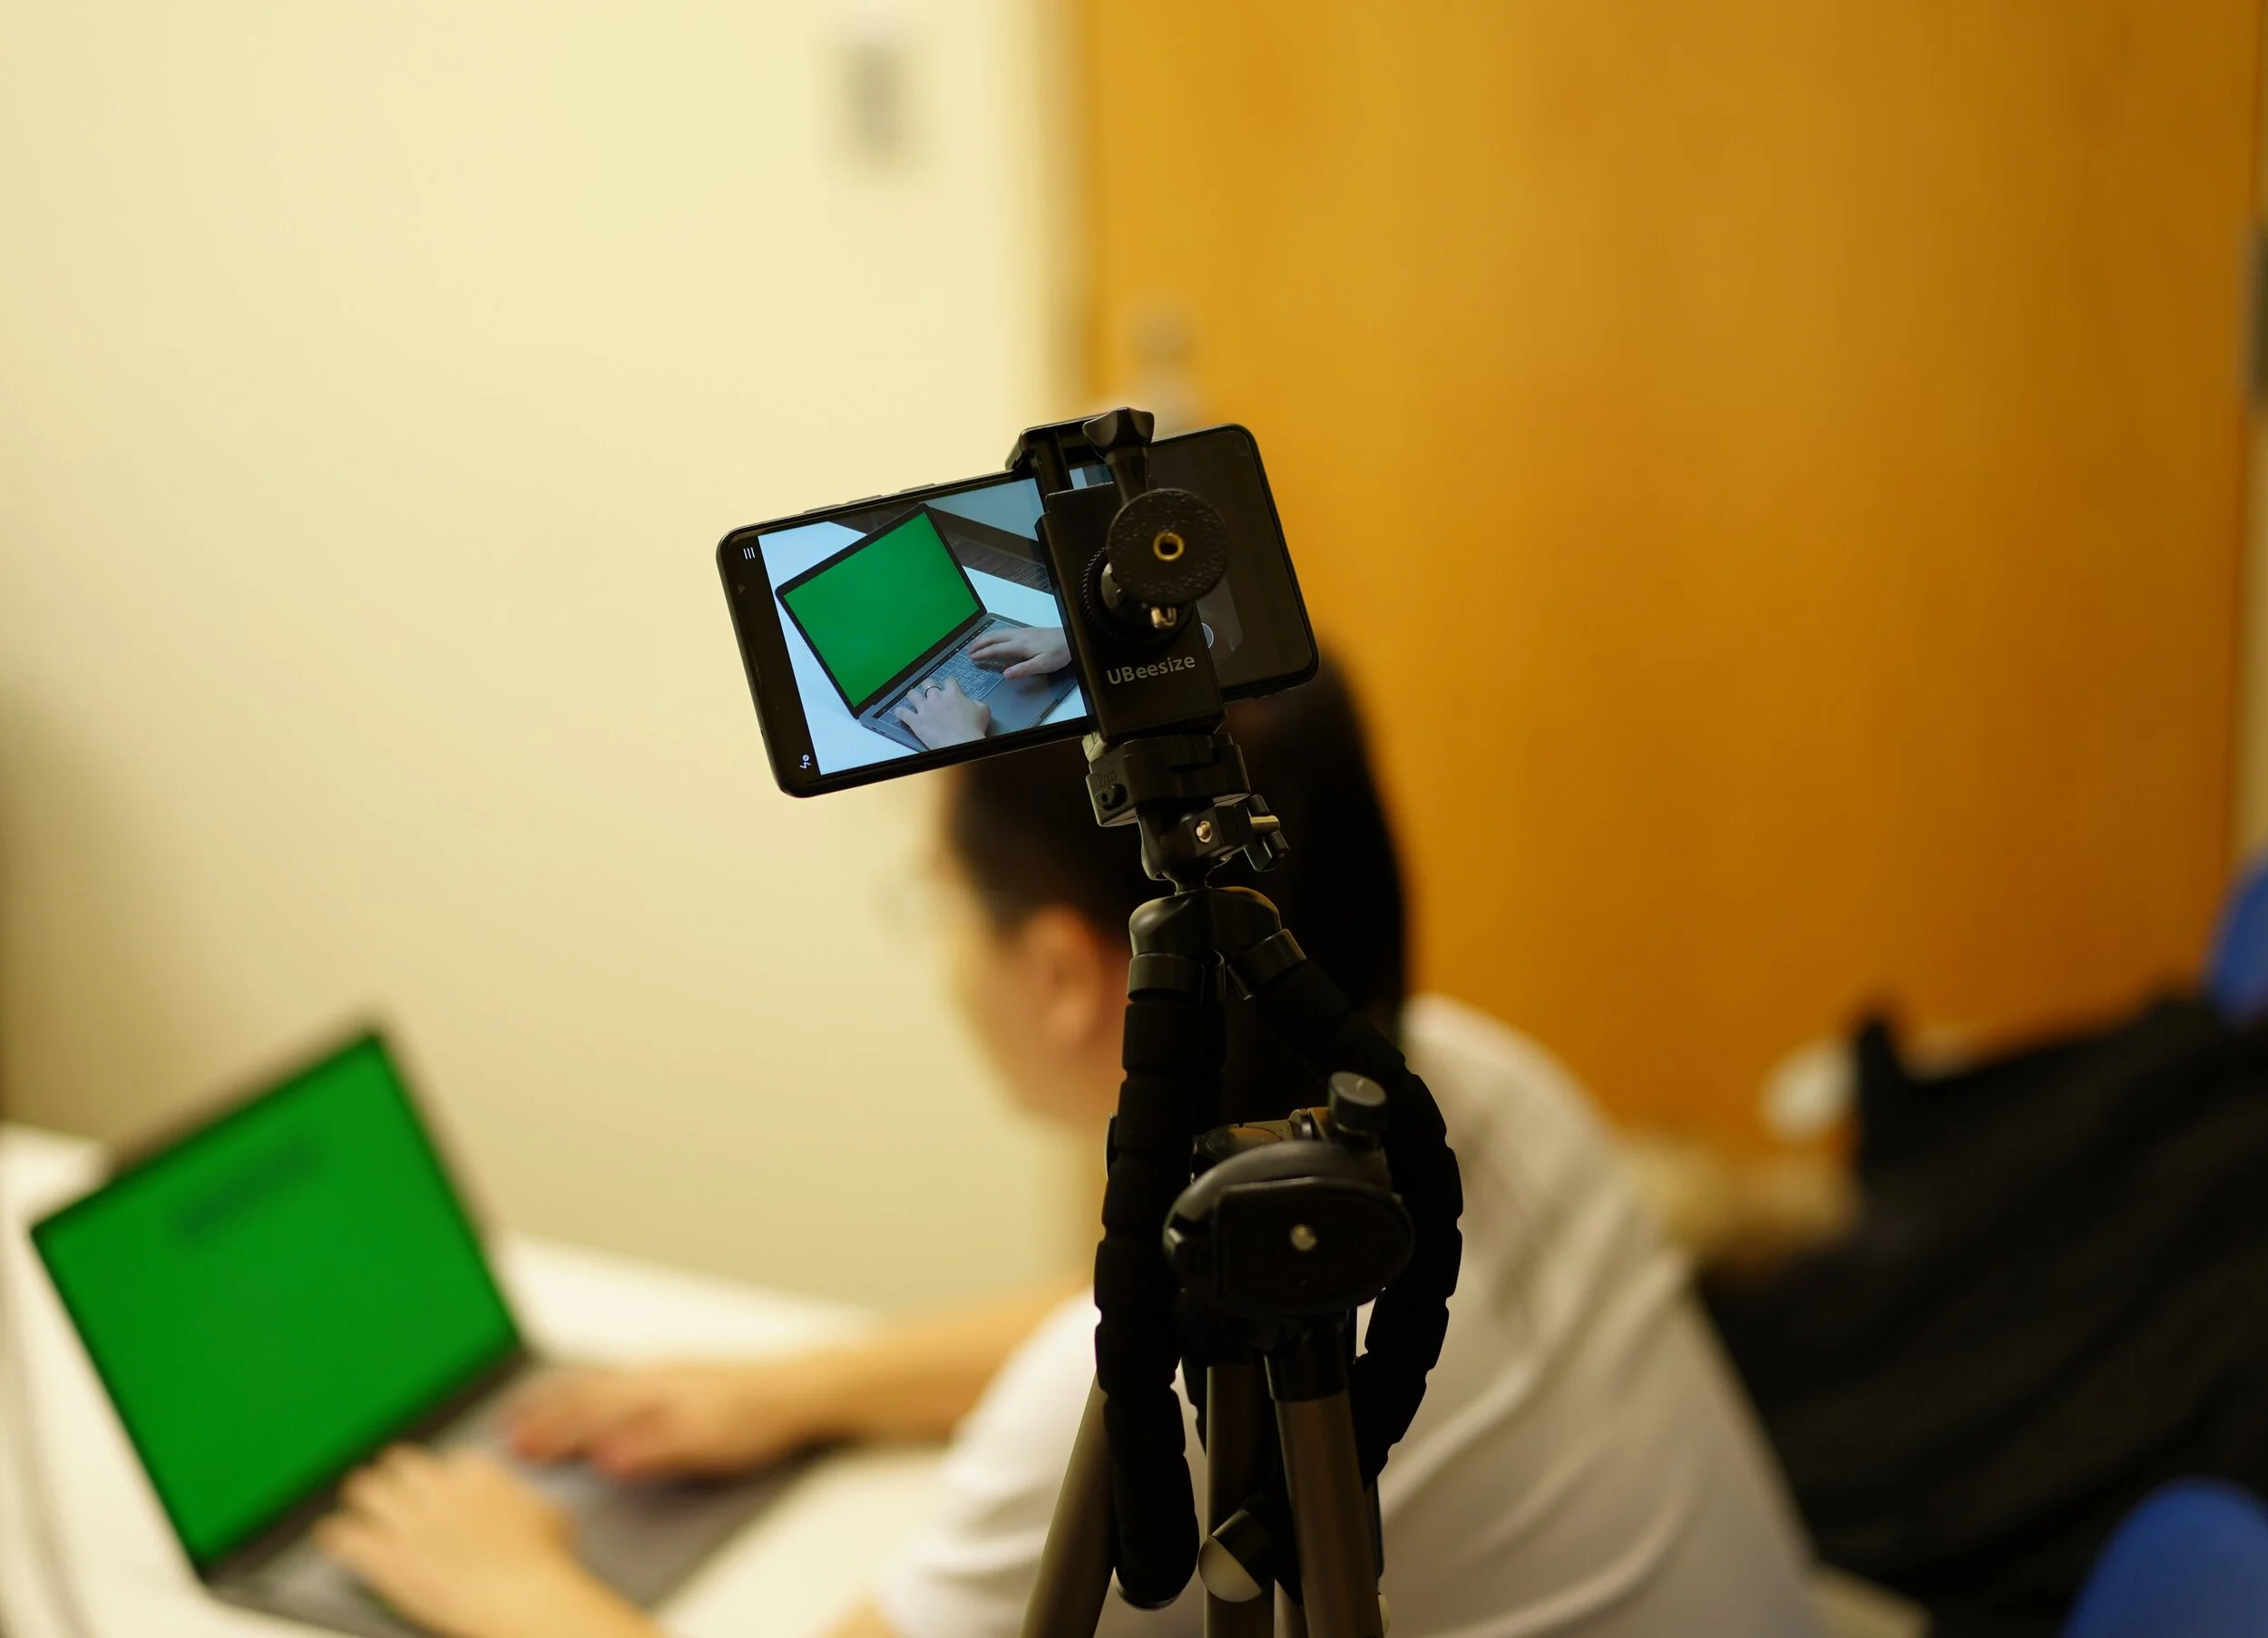
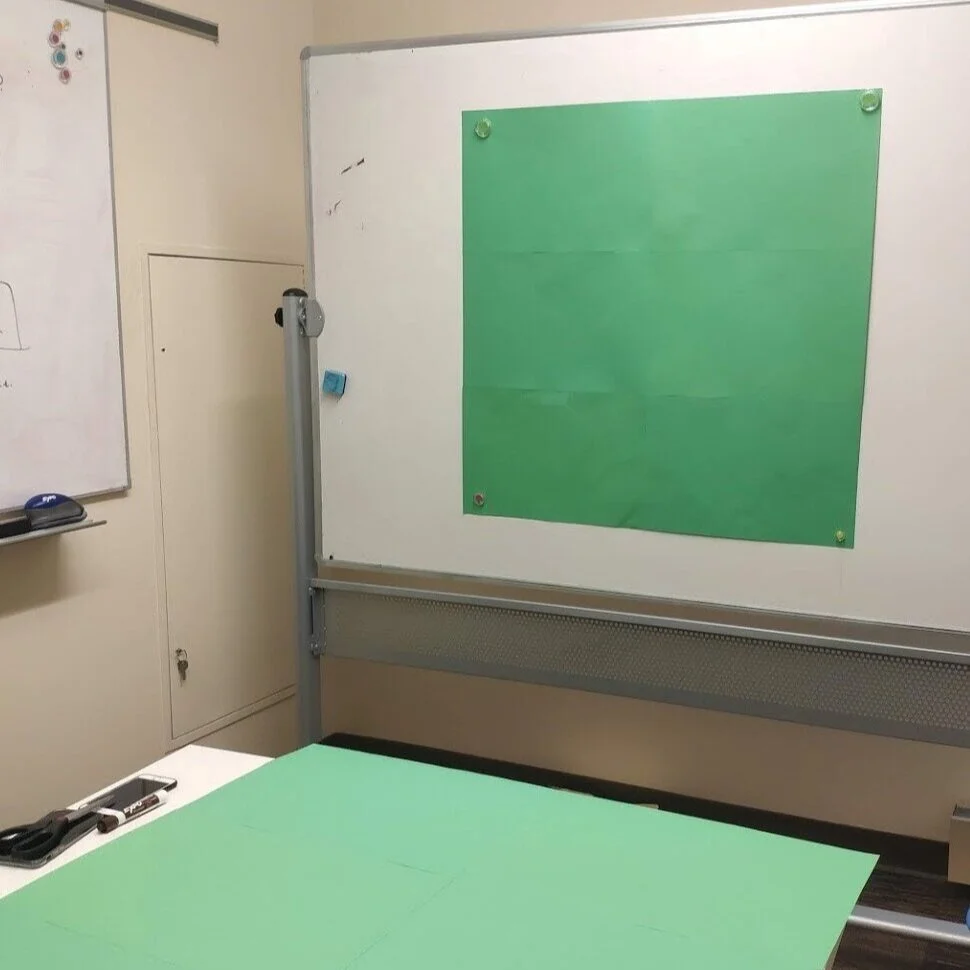
Video Prototyping & Testing the look-and-feel of our design
For the second round of prototyping, we focused on the look-and-feel of our design. The hi-fi interfaces were added into the video in post-editing to give it a realistic feel.


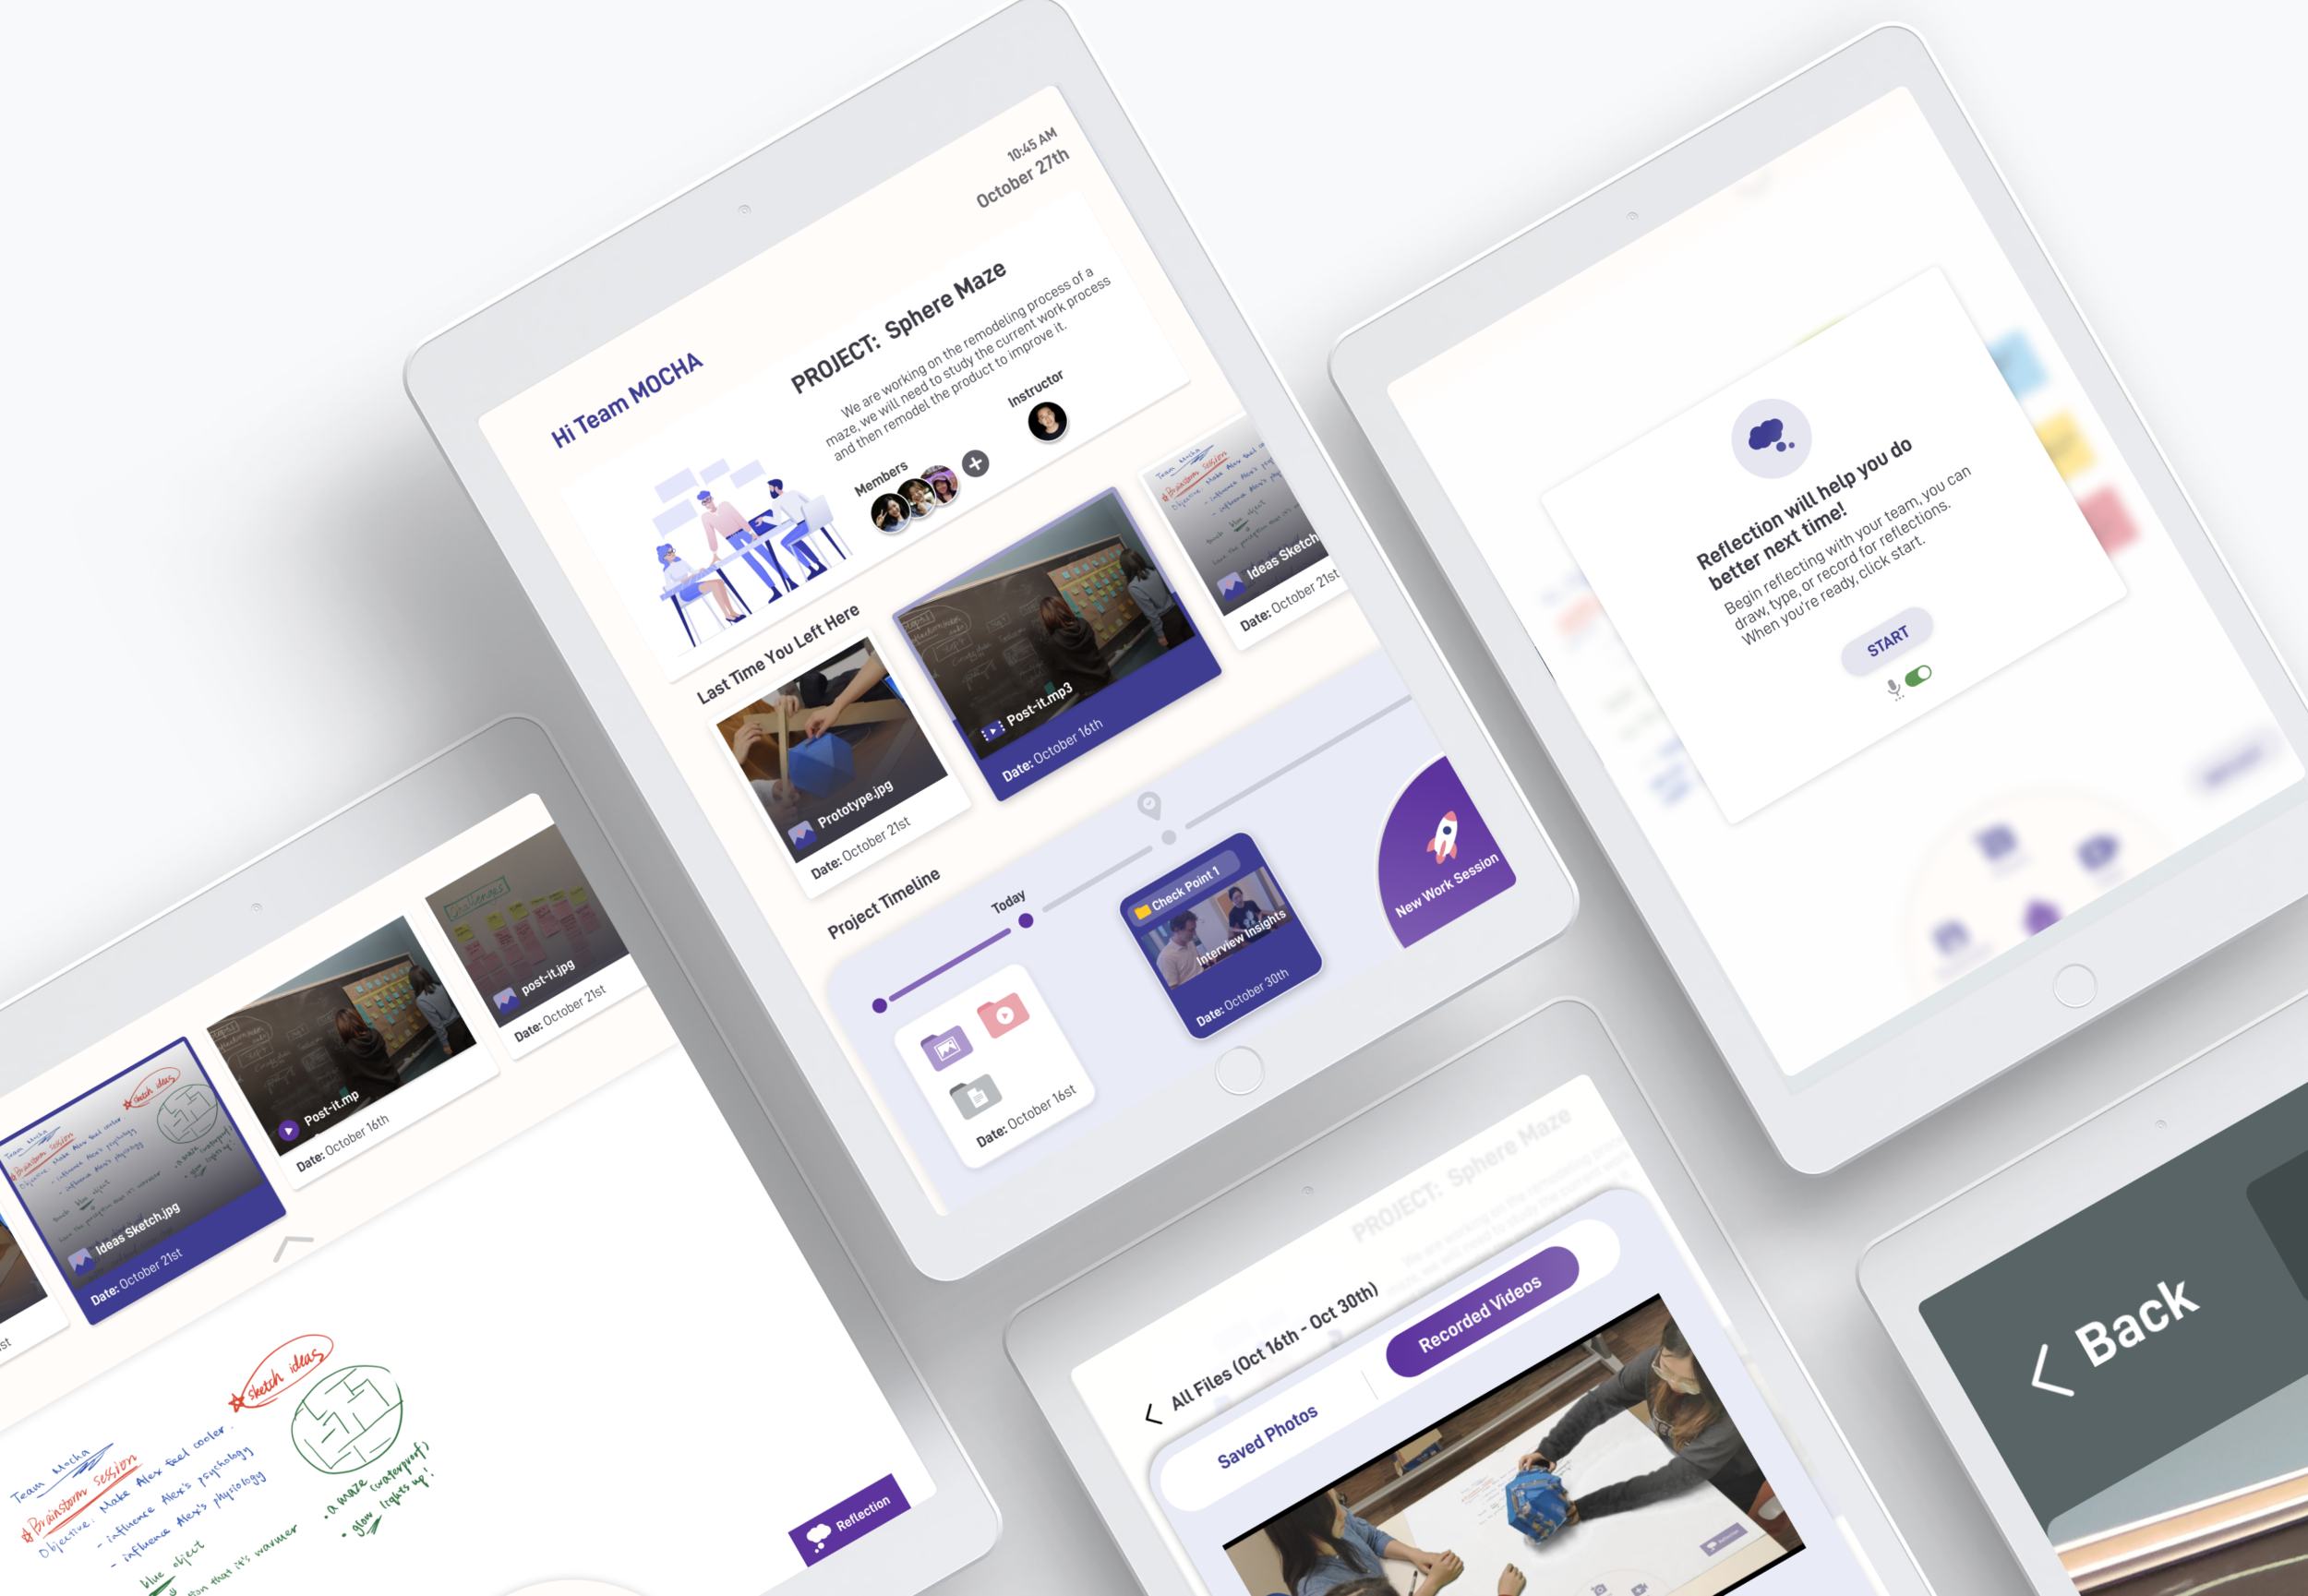
We prototyped the platform that can be used on whiteboards, tables, and online. We are expecting our product to assist students in better learning procedural skills (documentation skill + project management skill) and developing dispositions (ownership + social awareness).

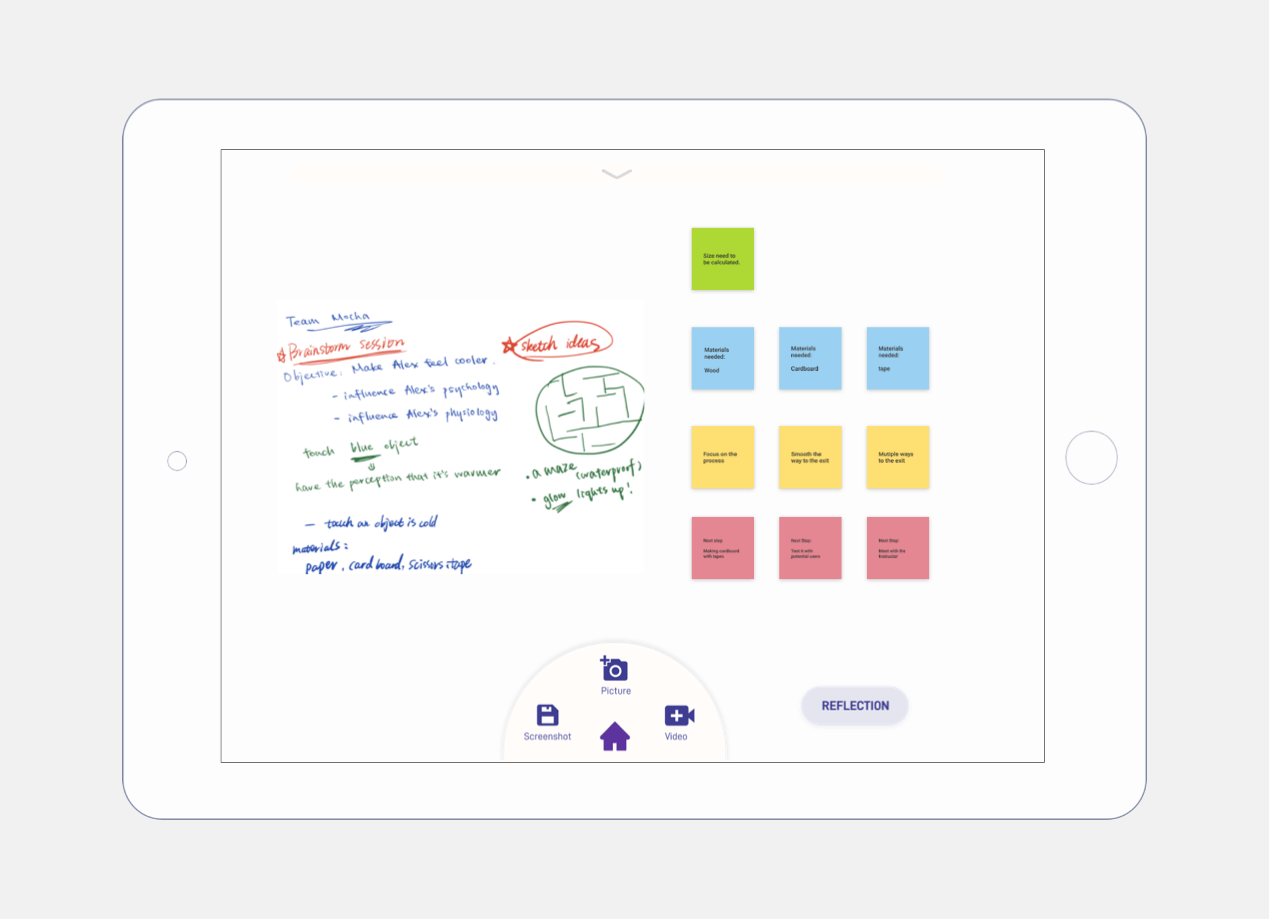
Documentation
A simple and non-interruptive user experience for students to document (screenshot, photos, videos) while working.

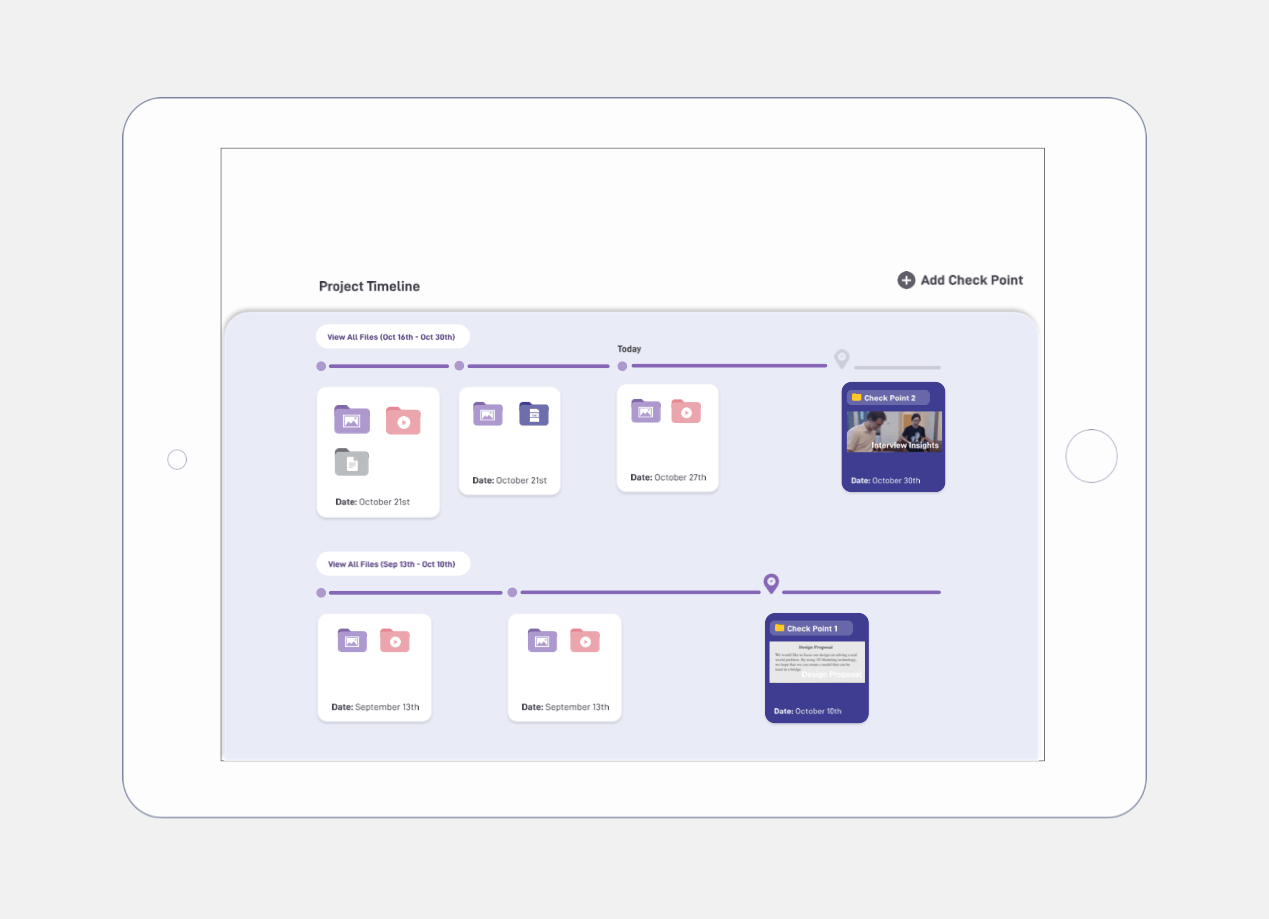
Project Management
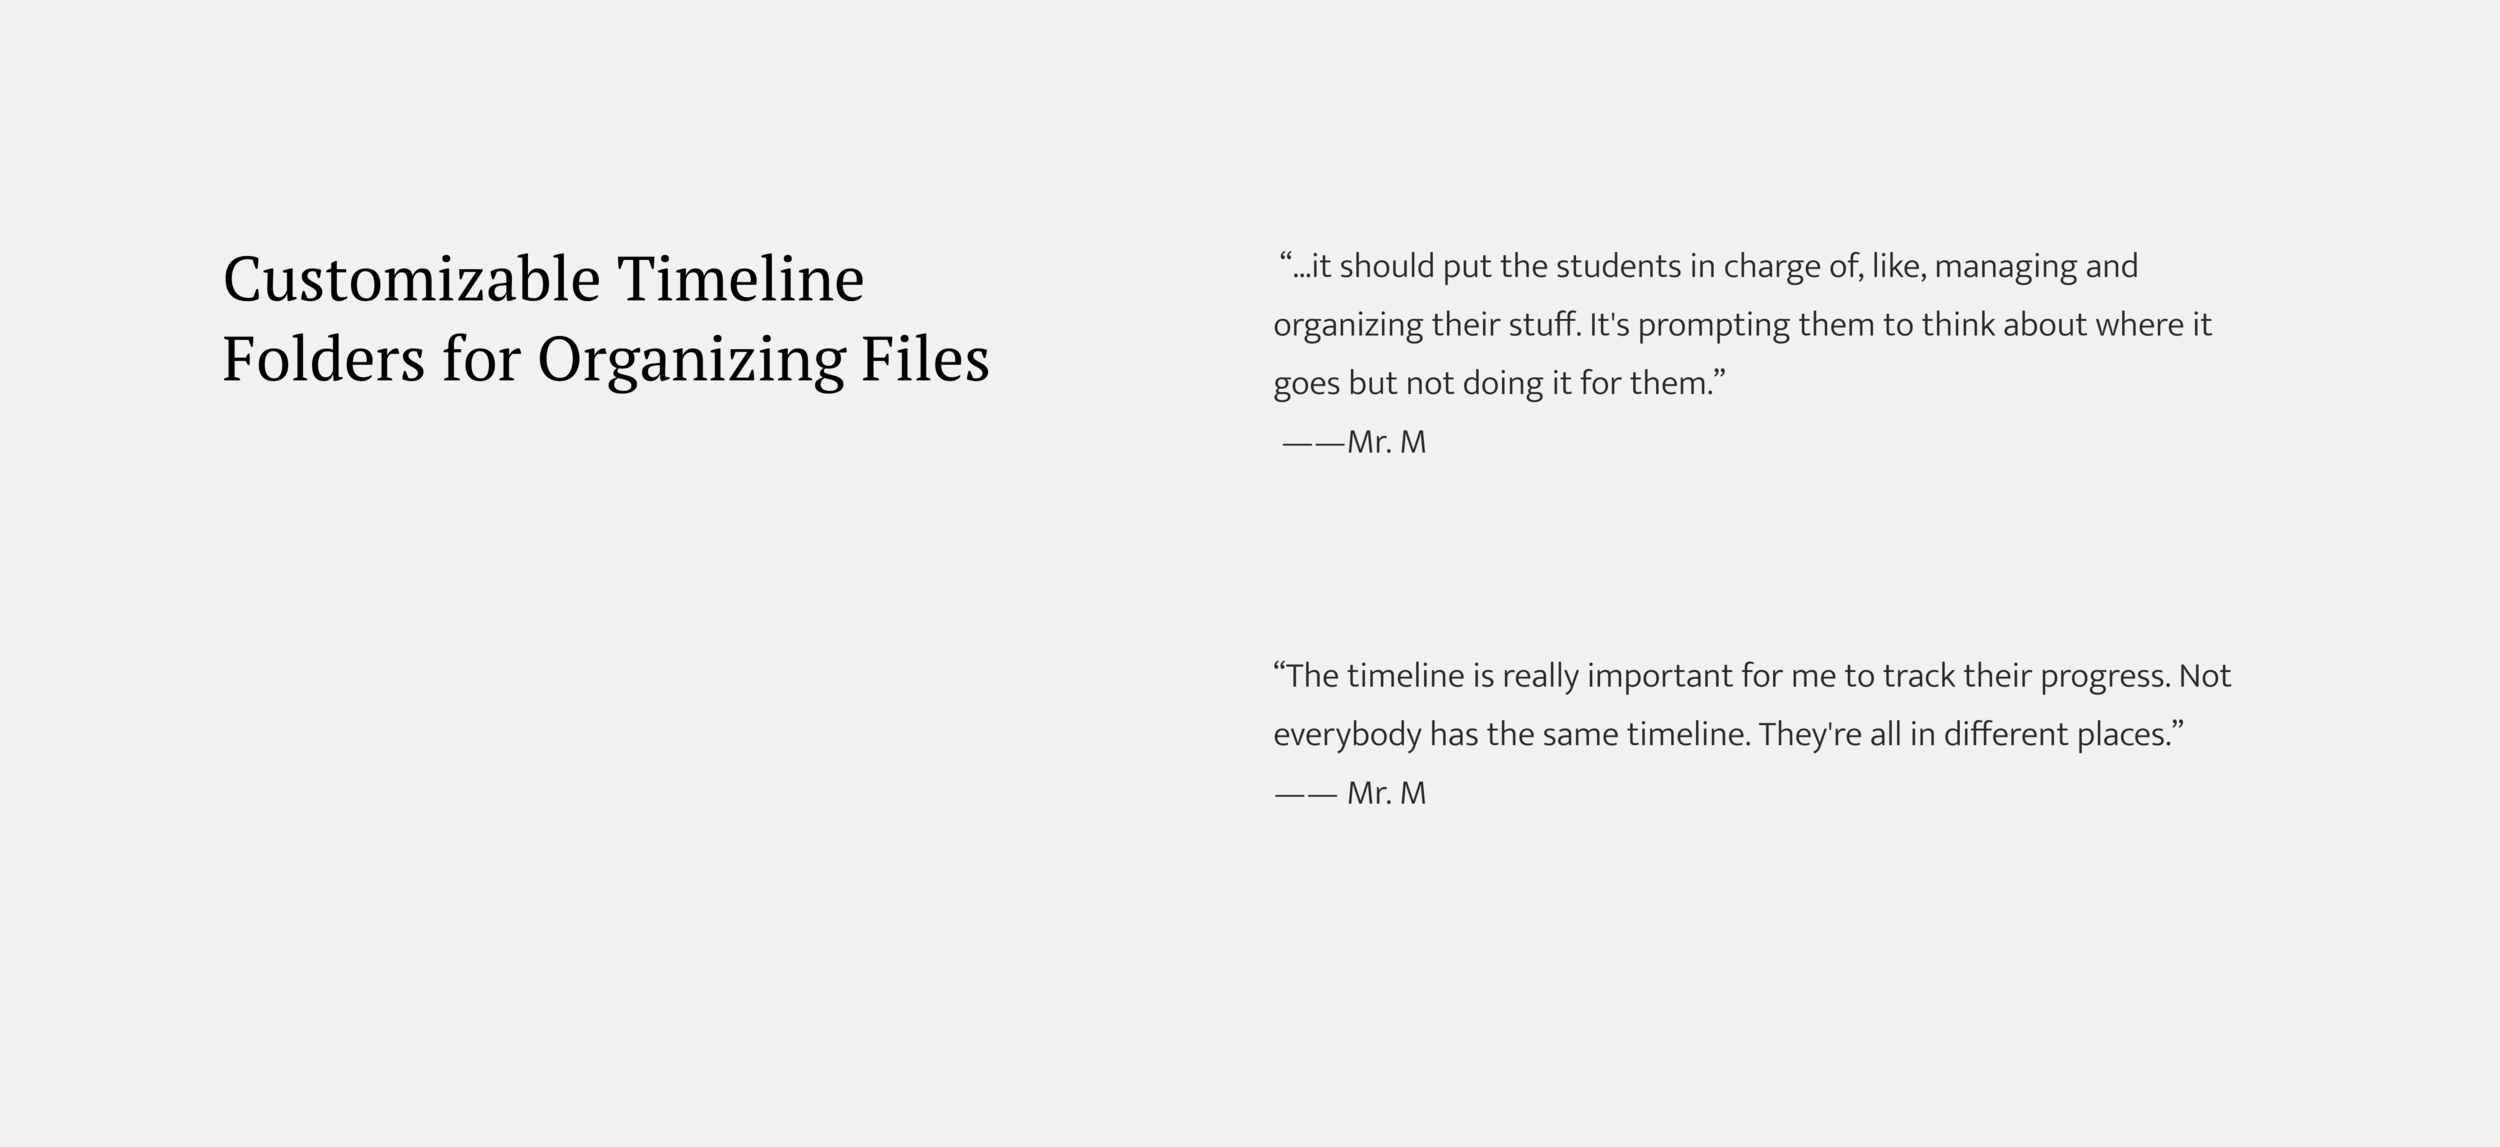
Easily create Check Points to share with the instructors and group members. Students can also add folders along the process. In this way, they need to consider what is the best way to schedule their project process.

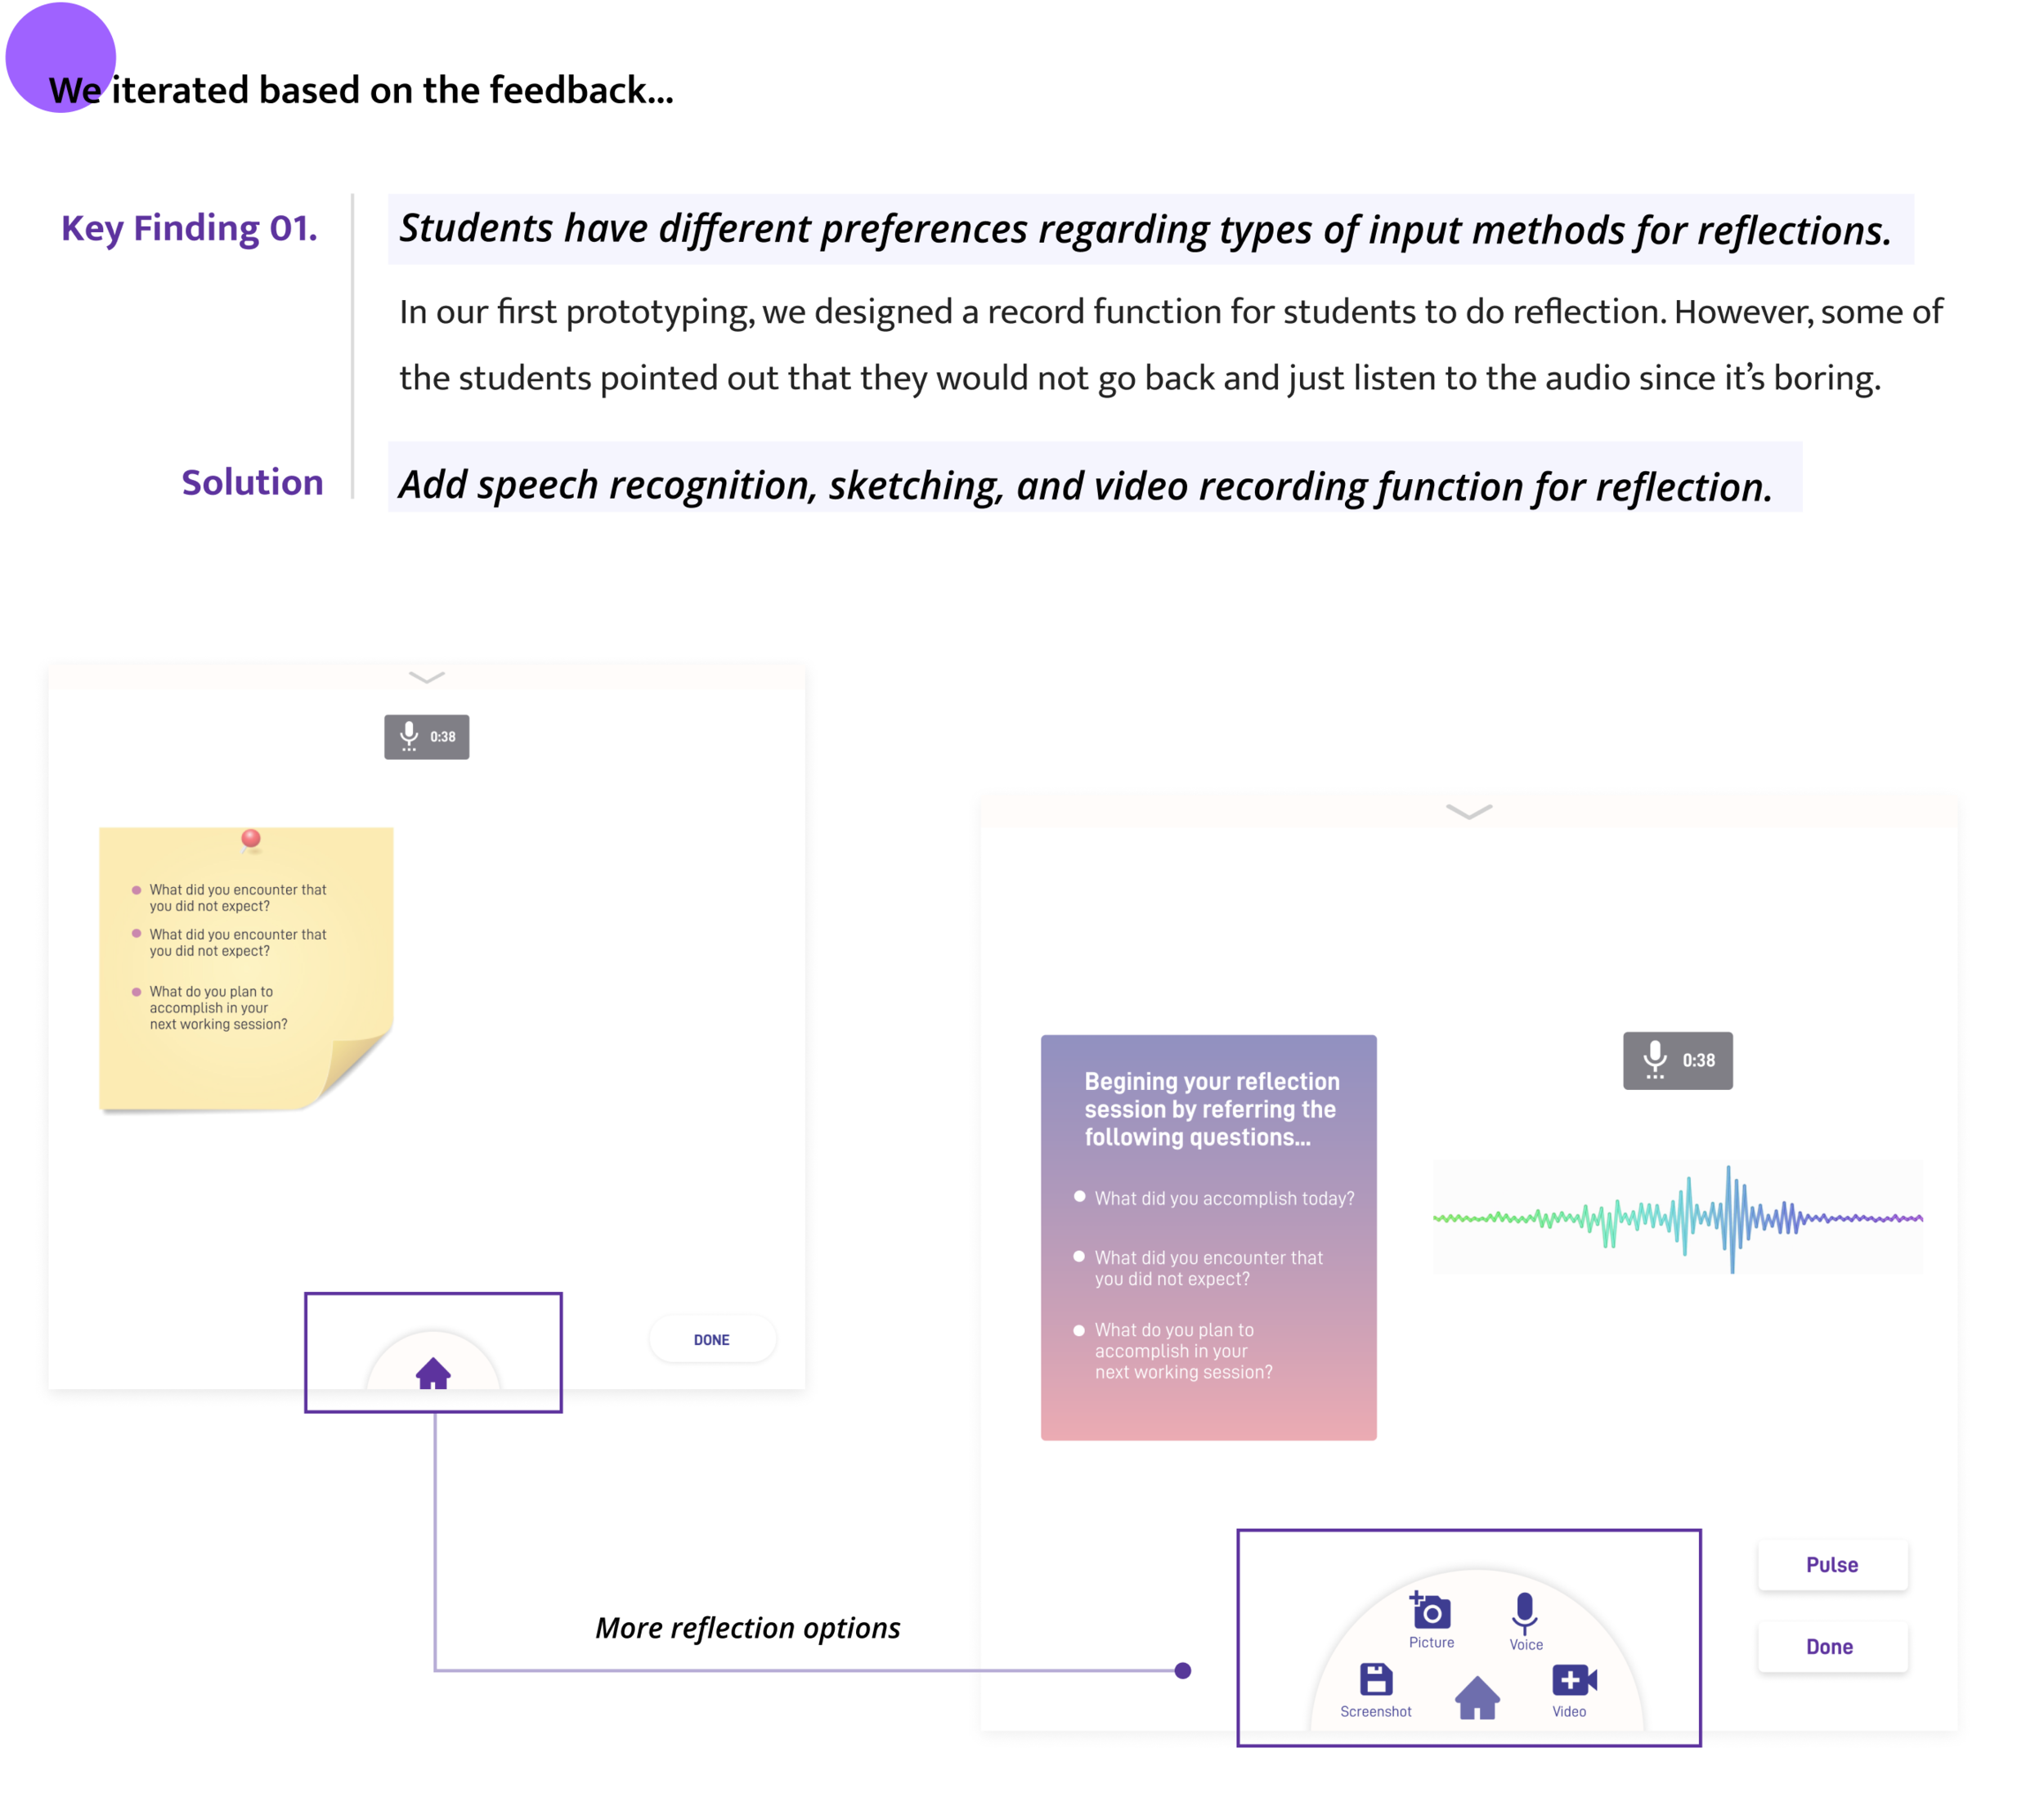
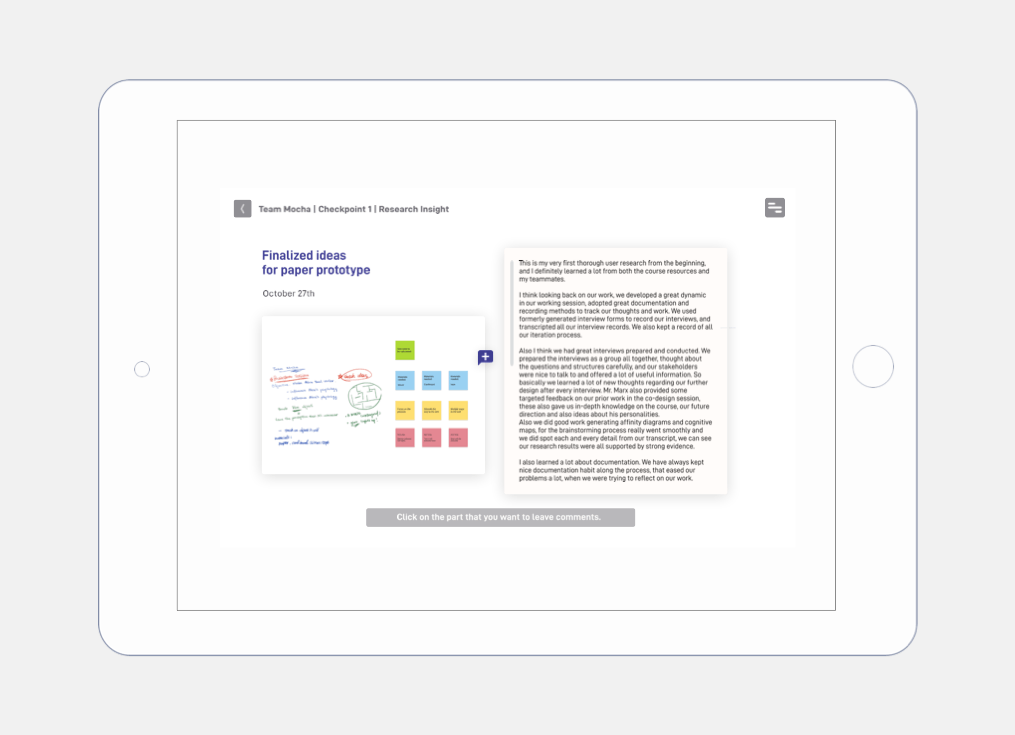
Reflection
Scaffold the students for self-reflection, which is an important learning objective of the Maker Space course.

Comment
The instructor can assess student's work in a more organized way and make comments directly on the artifacts.

What went well:
From this project, I learned particular considerations of user experience design when engagement and learning are explicit goals. I think we did a solid research and practiced selecting appropriate user research methods to generate learning system insights.
What could be better:
Since this is a semester-long course project, we did not have enough time to do more user-testing and iteration. Also, we need to think more about the business value.


Besides the conceptual design solution, we also considered how our design could actually be implemented in the Maker Space for our client to use and whether it has high business value. Click here for the technology for implementation.